
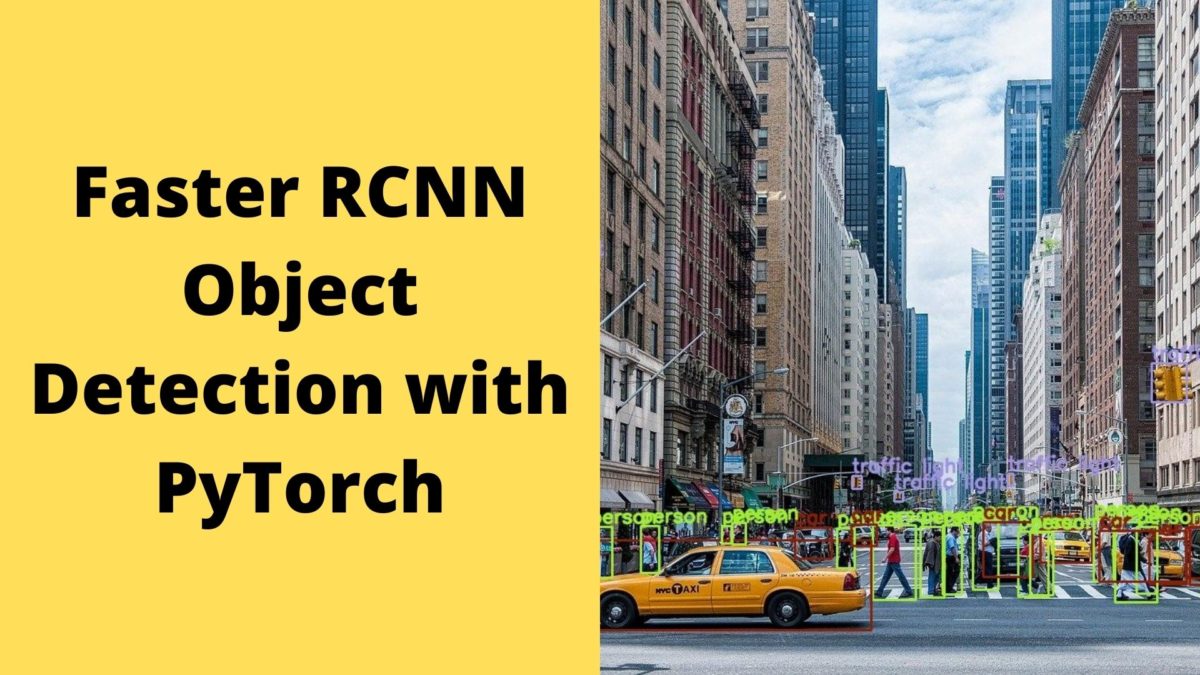
In this article, we will use a deep learning object detector to detect objects in images and videos. We will use the Faster RCNN with the PyTorch deep learning framework deep learning detector in particular. Faster RCNN is one of the best object detectors out there in terms of accuracy.
Before moving further I recommend that you read two other articles.
The above two articles will help you a lot if you are new to deep learning object detection. I have discussed some of the best and state-of-the-art methods in Introduction to Deep Learning for Object Detection. This covers R-CNN, Fast R-CNN, Faster R-CNN, SSD (Single Shot Detection), YOLO (v1, v2, and v3), and some other new methods as well. In Evaluation Metrics for Object Detection, you will get to know how to evaluate our deep learning object detector. This covers topics like Average Precision, Intersection over Union, and Mean Average Precision which are very important topics for object detection.
So, what will you learn from this article?
- How to use a pre-trained deep learning object detector for our own purposes?
- Using the PyTorch Faster RCNN object detector with ResNet50 backbone.
- Using PyTorch pre-trained Faster RCNN to get detections on our own videos and images.
- Controlling the input image size for finer detections.
- Controlling the input frame size in videos for better frame rates.
- Effect of different input sizes on the object detector.
All in all, you are going to learn a lot in this tutorial and it is going to be a lot of fun.
A few questions before we move further.
- Are we going to train our own object detector in this tutorial?
- No, we will be using a Faster RCNN model already available in PyTorch which is pre-trained on the COCO dataset. Although we will be covering training our own detector in future articles.
- Do you need an NVIDIA GPU to follow along?
- If you have an NVIDIA GPU in your system, then it is good. If not, you will be able to follow along with all the same. At most, you will experience low frames when detecting objects in videos but still, you will be able to learn how to use a pre-trained object detector.
The Faster RCNN Deep Learning Object Detector
First of all, I again recommend going through this article where you will find all the details about the whole RCNN family of detectors.
Here, we will discuss some important details regarding the Faster R-CNN object detector that we will be using. In the paper, you will find that most of the results are based on the VGG-16 CNN base network. But in this article, we will use a ResNet50 base network Faster R-CNN model. We will get the model from PyTorch’s torchvision.models module. Also, ResNet50 base gives a higher FPS while detecting objects in videos when compared to the VGG-16 base.
The PyTorch model has been trained on the MS COCO dataset. This means that we will able to detect almost 80 different classes of objects out of the box. These classes range from person to bicycle to a toothbrush. You will find the whole list of objects here.
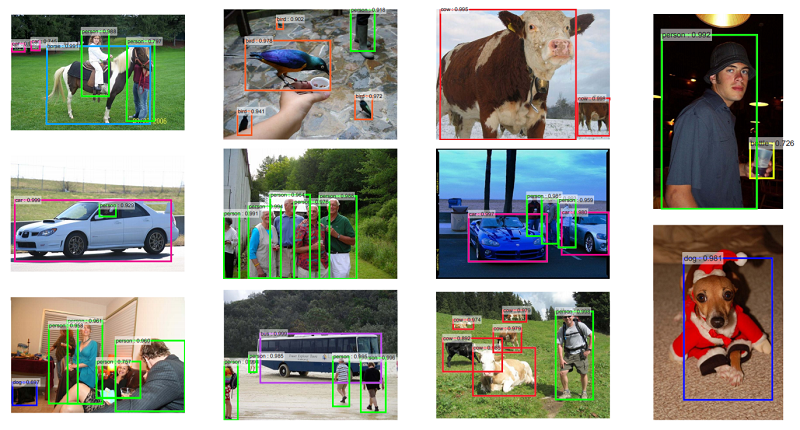
Figure 2 shows just a glimpse of the different objects that we can detect using the Faster R-CNN detector.
In the Torchvision models, you will also find pre-trained deep learning segmentation models. Maybe you can try your hands on that on your own a bit. We will cover deep learning image segmentation in future tutorials as well.
The Input and Output Format of PyTorch Faster RCNN Object Detector
It is a good idea to know about the input and output format of the PyTorch Faster RCNN object detector. This will give us an idea of what we are dealing with and what kind of code we should write.
The Input Format
For detecting the objects in an image, obviously we will have to give an image as an input to the Faster RCNN detector. The image will be in the format of [channels x height x width]. But for detection purposes, that is while giving the image as an input to the Faster RCNN detector, the input has to be 4 dimensional. We need one extra batch dimension. So, the input format will become, [batch_size x channels x height x width]. The batch size here is the number of images per forward pass. And in our case, it is going to be 1.
There is one other small thing. The Faster RCNN network resizes all the images to 800×800 pixels by default. This is the min_size argument while initializing the network. We can either increase or decrease this size according to our requirements. I will show this later in this article. And of course, tweaking the min_size argument will affect the detection accuracy either in a positive way or negative way.
The Output Format
After performing detection on the input image, the Faster RCNN detector outputs a list of dictionary. And this dictionary has three keys. They are scores, boxes, and labels. The scores contain all the confidence values of each detection. The boxes contain all the bounding box coordinates in [x_min, y_min, x_max, y_max] format. And the labels contain all the label indices from the COCO instance categories.
It is important to note that the list is a single dimensional. So, to access all the values in the dictionary keys, we will have to employ the following format.
outputs[0]['boxes']to access all the bounding boxes.outputs[0]['labels']for accessing all the labels.outputs[0]['scores']to access all the detection scores.
An Example Output of PyTorch Faster RCNN
All of this will make sense when you see an actual detection list after printing it. So, here is an example of a detection list after we perform detection on an image that contains three horses. This image is also in our input folder (horses.jpg)
{'boxes': tensor([[281.8719, 79.2813, 420.7067, 225.9756],
[330.9540, 80.9836, 593.0887, 228.4178],
[109.6095, 95.4173, 332.9263, 226.0391],
[111.1189, 108.3175, 299.6677, 226.6196],
[359.3416, 98.2548, 600.4445, 232.9423],
[142.3595, 82.4780, 474.7162, 232.5670],
[217.1381, 91.9968, 338.9271, 226.1555],
[111.3002, 108.9321, 300.2285, 223.7775],
[346.2999, 14.0223, 632.1669, 213.3479],
[351.5598, 123.3582, 592.3282, 229.2103]], device='cuda:0',
grad_fn=), 'labels': tensor([19, 19, 19, 18, 18, 19, 19, 21, 1, 22], device='cuda:0'), 'scores': tensor([0.9977, 0.9913, 0.9898, 0.2787, 0.1807, 0.1448, 0.1275, 0.0993, 0.0854,
0.0730], device='cuda:0', grad_fn=)}
Notice how there are so many detections for only three horses. Therefore, it is almost always better to consider only those detections that have a score above a certain threshold and discard all else. For most images in Faster RCNN, a threshold of 0.8 works well. There are a few cases where we have to consider lower thresholds. Especially when there are many small objects in an image.
Setting Up the Project Directory
Before moving further, let’s set up the project directory for this tutorial. Take a look at the following directory structure and try to replicate on your system. That way, you will be able to follow along easily.
│   coco_names.py
│   detect.py
│   detect_utils.py
│   detect_vid.py
│
├───input
│       horses.jpg
│       people.jpg
│       street.jpg
│       street1.jpg
│       video1.mp4
│       video2.mp4
│
├───outputs
│       horses_800.jpg
...
- First, we have four python scripts, namely,
coco_names.py,detect.py,detect_utils.py, anddetect_vid.py. We will get to know what these scripts do when we begin to write the code for them. - The
inputfolder contains all the input images and videos that we will use for detection. - The
outputsfolder will contain the outputs from the python scripts after we run the detection code on the input images and videos.
If you want, you can use your own input images and videos for detection. Or if you want to replicate all the results from this tutorial, then you can download the zipped input file by clicking the button below. This contains all the images and videos that we will use in this tutorial.
The file is only 5 MB in size. So, you should not face any problem in downloading it. After you download the input.zip file, then unzip in the project directory and you are all set to move further.
Now, as we are done with setting up the project directory, let’s move ahead and write some code.
Writing the Code for Object Detection using Faster RCNN Detector
From this section onward, we will write the code in each of the python scripts. We will begin writing the code for each script on a new sub-section to avoid any confusion. Let’s start with the coco_names.py file.
Getting the Object Class Names for coco_names.py
The coco_names.py python script will contain all the coco category instance names that the Faster RCNN detector can detect. We can write the names in the detection script itself, but that will introduce a lot of unnecessary clutter. We will keep the instance names file separate and can import it to whichever other script we want.
You will find all the instance category names here and here as well.
We will just copy and paste that list into our coco_names.py script.
So, create the coco_names.py file in your project directory and copy and paste the following code block.
COCO_INSTANCE_CATEGORY_NAMES = [
    '__background__', 'person', 'bicycle', 'car', 'motorcycle', 'airplane', 'bus',
    'train', 'truck', 'boat', 'traffic light', 'fire hydrant', 'N/A', 'stop sign',
    'parking meter', 'bench', 'bird', 'cat', 'dog', 'horse', 'sheep', 'cow',
    'elephant', 'bear', 'zebra', 'giraffe', 'N/A', 'backpack', 'umbrella', 'N/A', 'N/A',
    'handbag', 'tie', 'suitcase', 'frisbee', 'skis', 'snowboard', 'sports ball',
    'kite', 'baseball bat', 'baseball glove', 'skateboard', 'surfboard', 'tennis racket',
    'bottle', 'N/A', 'wine glass', 'cup', 'fork', 'knife', 'spoon', 'bowl',
    'banana', 'apple', 'sandwich', 'orange', 'broccoli', 'carrot', 'hot dog', 'pizza',
    'donut', 'cake', 'chair', 'couch', 'potted plant', 'bed', 'N/A', 'dining table',
    'N/A', 'N/A', 'toilet', 'N/A', 'tv', 'laptop', 'mouse', 'remote', 'keyboard', 'cell phone',
    'microwave', 'oven', 'toaster', 'sink', 'refrigerator', 'N/A', 'book',
    'clock', 'vase', 'scissors', 'teddy bear', 'hair drier', 'toothbrush'
]
This is all for the coco_names.py file.
Writing the Detection and Visualization Functions
Remember that we will detect objects in both images and videos. For images, it is quite straightforward. For the videos, we will have to do detection on each individual frame. But then again, we can consider each individual frame as an image.
This means that we can use the same code for detecting objects in both, images and videos. Therefore, we will write two reusable functions that we will use for detection and visualization. And when I say visualization, then I mean drawing the bounding boxes around the objects.
We will write the reusable functions in detect_utils.py file and import those into other scripts. So, the following code will go into detect_utils.py file. We will start with importing all the required modules and libraries.
import torchvision.transforms as transforms
import cv2
import numpy
import numpy as np

from coco_names import COCO_INSTANCE_CATEGORY_NAMES as coco_names
- We are importing
torchvision.transformsto convert the input image or video frame to a tensor. - From
coco_namesscript, we are importing theCOCO_INSTANCE_CATEGORY_NAMESlist ascoco_names. This gives us access to all the instance category names.
There can be many objects belonging to the same class in an image. Also, there can many different classes of objects in an image. We do not want that each of the different classes has the same color bounding box around them. This will make it difficult to distinguish one class from the other. So, we want that each of the classes has a different colored bounding box around them. And each object belonging to the same class should have the same color bounding box. So, we will create a tuple that will generate a random list that will contain a random RGB tuple for different classes in the image. These are going to be tuples as we will be using OpenCV for drawing the bounding boxes.
# this will help us create a different color for each class
COLORS = np.random.uniform(0, 255, size=(len(coco_names), 3))
So, even if there are all the categories present in an image, we can now draw a different colored bounding box around each category.
Next, we will define the transform to convert an input image to a tensor.
# define the torchvision image transforms
transform = transforms.Compose([
    transforms.ToTensor(),
])
Writing the predict() Function
In this section, we will write the predict() function for the detect_utils.py script. This function will output the predictions when we give the model an image as the input.
The following is the predict() function.
def predict(image, model, device, detection_threshold):
    # transform the image to tensor
    image = transform(image).to(device)
    image = image.unsqueeze(0) # add a batch dimension
    outputs = model(image) # get the predictions on the image

    # print the results individually
    # print(f"BOXES: {outputs[0]['boxes']}")
    # print(f"LABELS: {outputs[0]['labels']}")
    # print(f"SCORES: {outputs[0]['scores']}")

    # get all the predicited class names
    pred_classes = [coco_names[i] for i in outputs[0]['labels'].cpu().numpy()]

    # get score for all the predicted objects
    pred_scores = outputs[0]['scores'].detach().cpu().numpy()

    # get all the predicted bounding boxes
    pred_bboxes = outputs[0]['boxes'].detach().cpu().numpy()
    # get boxes above the threshold score
    boxes = pred_bboxes[pred_scores >= detection_threshold].astype(np.int32)

    return boxes, pred_classes, outputs[0]['labels']
- The
predict()function takes in 4 parameters. The image we want to do prediction on, the Faster RCNN model, the computation device, and the detection threshold. - On line 3, we transform the image into a tensor. Then we add an extra batch dimension on line 4.
- Line 5 predicts the outputs by performing a forward pass through the model.
- I have commented out lines 8, 9, and 10. You can uncomment those to print the individual outputs and get a better perspective.
- Line 13 stores all the prediction labels in the
pred_labelslist. Note that we are changing the device to CPU before converting it into NumPy format. - Line 16 stores all the confidence scores in
pred_scoreslist. We are performing adetach() as we do not need any backpropagation functionality. - The
pred_boxeslist (line 19) stores all the predicted bounding boxes. But we need only those that are above thedetection_thresholdvalue. Line 21 keeps only those above threshold bounding boxes in theboxeslist and discards the others. - Finally, on line 23, we return the bounding boxes, the predicted classes, and the predicted labels as well.
Function to Draw Bounding Boxes Around an Object
Here, we will write the draw_boxes() function. This function will draw a bounding box around each of the object that we detect in an image.
The following code block shows the draw_boxes() function.
def draw_boxes(boxes, classes, labels, image):
    # read the image with OpenCV
    image = cv2.cvtColor(np.asarray(image), cv2.COLOR_BGR2RGB)
    for i, box in enumerate(boxes):
        color = COLORS[labels[i]]
        cv2.rectangle(
            image,
            (int(box[0]), int(box[1])),
            (int(box[2]), int(box[3])),
            color, 2
        )
        cv2.putText(image, classes[i], (int(box[0]), int(box[1]-5)),
                    cv2.FONT_HERSHEY_SIMPLEX, 0.8, color, 2,
                    lineType=cv2.LINE_AA)

    return image
draw_boxes()takes in four input parameters. They are the bounding boxes (coordinates), the class names, the label indices, and the image.- We will be drawing bounding boxes around the objects using OpenCV’s
rectangle()function. Therefore, first, we convert the image into BGR format for OpenCV. - Starting from line 4 we run a
forloop for the number of bounding box coordinates that we have. - On line 5, we choose a random color for each of the class labels. This color will be the same for the same classes as we are choosing it according to the class label index.
- Then starting from lines 6 to 11, we draw the bounding boxes around the object. We use a line thickness of 2.
- From lines 12 to 14, we write the class name just above the bounding box coordinates.
- Finally, we return the image with all the drawn bounding boxes on line 16.
The predict() and draw_boxes() function will do the bulk of the work for us. Now, we just need to read an image, provide it these two functions, and display the output on the screen.
Detecting Objects in Images using PyTorch Faster RCNN
In this section, we write the code to detect objects in images using the Faster RCNN detector.
We have already written the predict() and draw_boxes() function, so our work is going to be much easier.
All the code in this section will go into the detect.py python file. So, open up the file and follow along.
Let’s import all the required modules and libraries first.
import torchvision
import numpy
import torch
import argparse
import cv2
import detect_utils

from PIL import Image
We will need the torchvision module to initialize the Faster RCNN ResNet 50 neural network model. Along with others, we are importing the detect_utils file as well. With that, we can access its predict() and draw_boxes() functions.
Construct the Argument Parser
We will construct the argument parser here.
# construct the argument parser
parser = argparse.ArgumentParser()
parser.add_argument('-i', '--input', help='path to input image/video')
parser.add_argument('-m', '--min-size', dest='min_size', default=800,
                    help='minimum input size for the FasterRCNN network')
args = vars(parser.parse_args())
While executing the python script from the command line, we will provide two additional arguments. One is the input path to the image and the other is the min_size for the Faster RCNN network. We have kept the default size for the network to 800×800 pixels which is also the default size for the network out of the box.
Initializing the PyTorch Faster RCNN ResNet50 Network
The following line of code initializes the Faster RCNN ResNet50 network.
# download or load the model from disk
model = torchvision.models.detection.fasterrcnn_resnet50_fpn(pretrained=True,
                                                    min_size=args['min_size'])
Notice that we are providing two arguments.
- The first one is
pretrained=True. This will initialize the network and load the pretrained COCO weights as well. The first time you execute this line, it will download the Faster RCNN network into the torch cache directory in your system. From the subsequent runs, it will just load the model from that path. - The second argument is
min_sizewhich we have kept to 800 by default. Even if we do not provide themin_sizeargument, then also it will initialize with 800. So, it is better to always provide the argument.
We will also initialize the computation device here. It is going to be either the CPU or the NVIDIA GPU depending on your system.
device = torch.device('cuda' if torch.cuda.is_available() else 'cpu')
Detecting Objects
In this section, we will read the image and detect the objects using the Faster RCNN network.
The following code block does that and some more tasks for us as well.
image = Image.open(args['input'])
model.eval().to(device)

boxes, classes, labels = detect_utils.predict(image, model, device, 0.8)
image = detect_utils.draw_boxes(boxes, classes, labels, image)
cv2.imshow('Image', image)
save_name = f"{args['input'].split('/')[-1].split('.')[0]}_{args['min_size']}"
cv2.imwrite(f"outputs/{save_name}.jpg", image)
cv2.waitKey(0)
- On line 1, we read the image from the
inputargument path. Line 2 puts the model into evaluation mode. Putting the model into evaluation mode is really important before proceeding further. - On line 4, we call the
predict()function from thedetect_utilspython file. We provide the image, the model, the computation, and the detection threshold of 0.8 as the arguments. We store the results inboxes,classes, andlabels. - Line 5, calls the
draw_boxes()function fromdetect_utils. We provide the results from thepredict()function along with the image as the arguments. This returns the image with the bounding boxes drawn on the objects. We save it in a variable calledimage. - On line 6, we show the image on the screen. Line 7, creates a
save_namestring that is according to the image file name and themin_sizeargument of the Faster RCNN network. This will help us save the results to disk where the name will correspond to the image size on which detection was performed. - Finally, we write the image to disk.
Executing the detect.py File from Command Line/Terminal
Now, we are all set to execute the detect.py script. Open up your terminal and cd into your project directory.
Let’s start with detecting objects in the horses.jpg image.
python detect.py --input input/horses.jpg
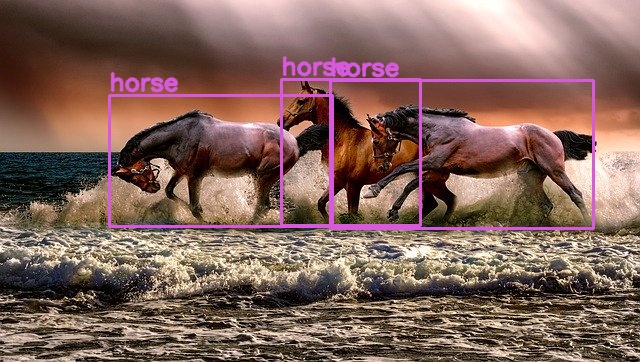
The PyTorch Faster RCNN network was able to detect the three horses easily. Note that the image is resized to 800×800 pixels by the detector network.
Now, let’s try the Faster RCNN detector on the people.jpg file.
python detect.py --input input/people.jpg
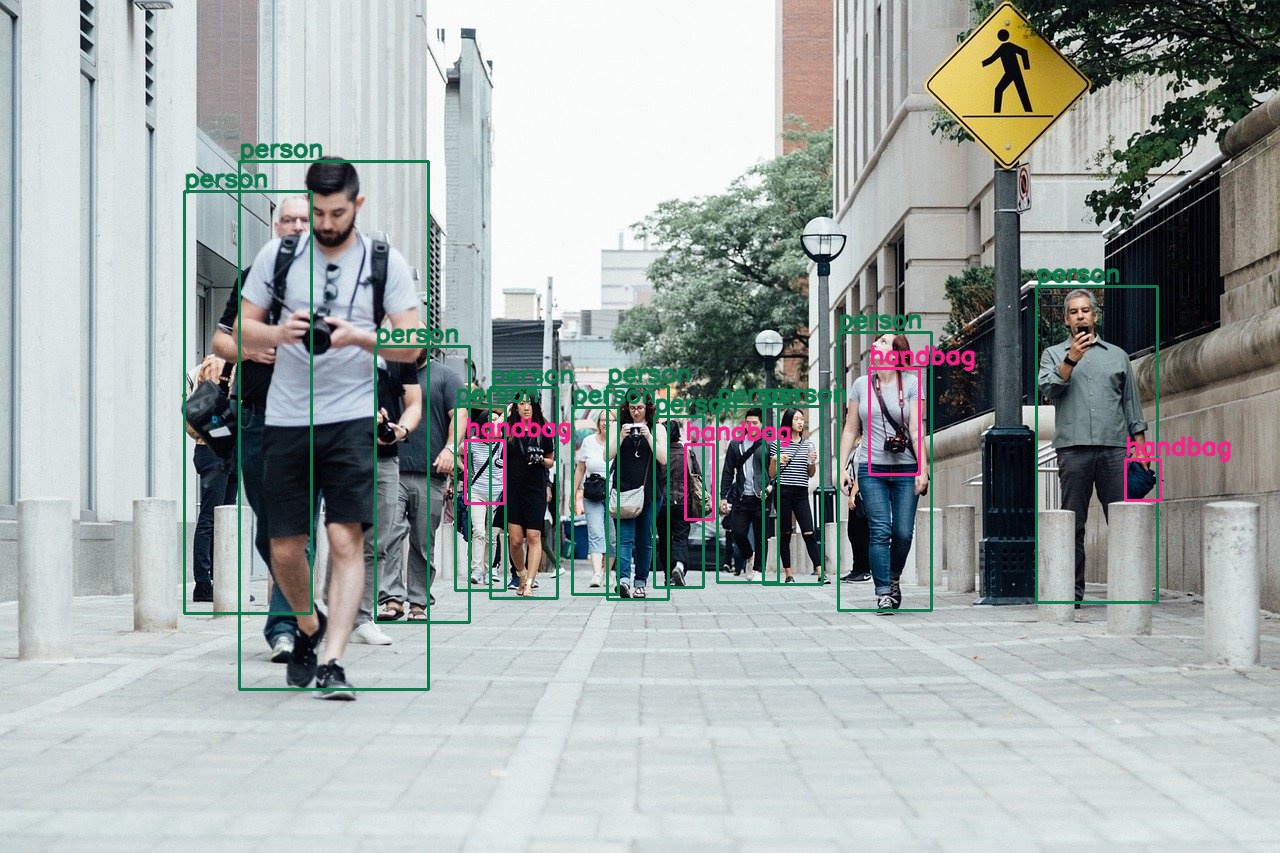
Wow! the Faster RCNN network detected a lot of people. Along with that, it detected 4 handbags as well. This is amazing. But we can see some more handbags in the image as well. Let’s try increasing the min_size argument and see whether the network can detect any more handbags.
python detect.py --input input/people.jpg --min-size 1024
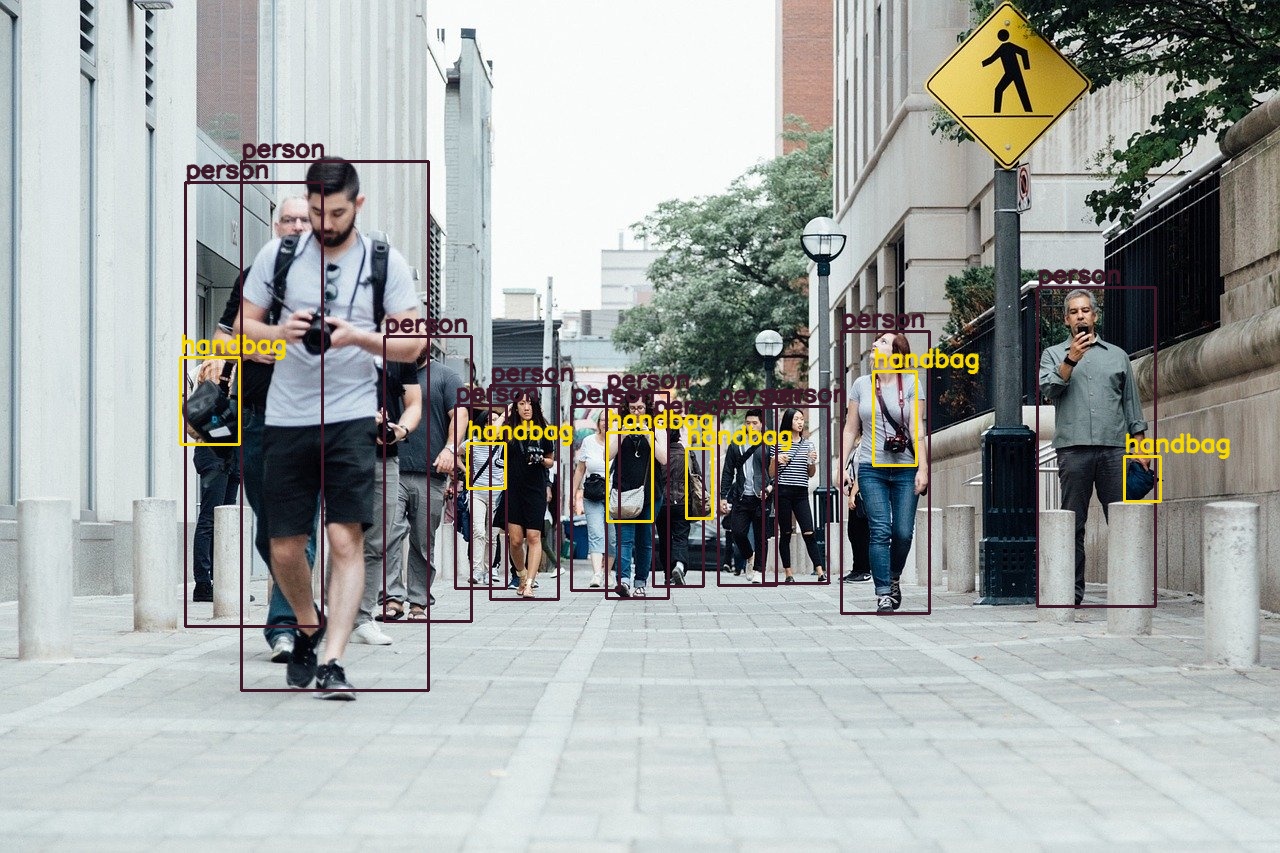
Increasing the min_size to 1024 allows the network to detect even smaller objects. This time the Faster RCNN network is able to detect 6 handbags. And in some cases, it is detecting the handbags just from the strap of the handbags that are visible. This is really amazing.
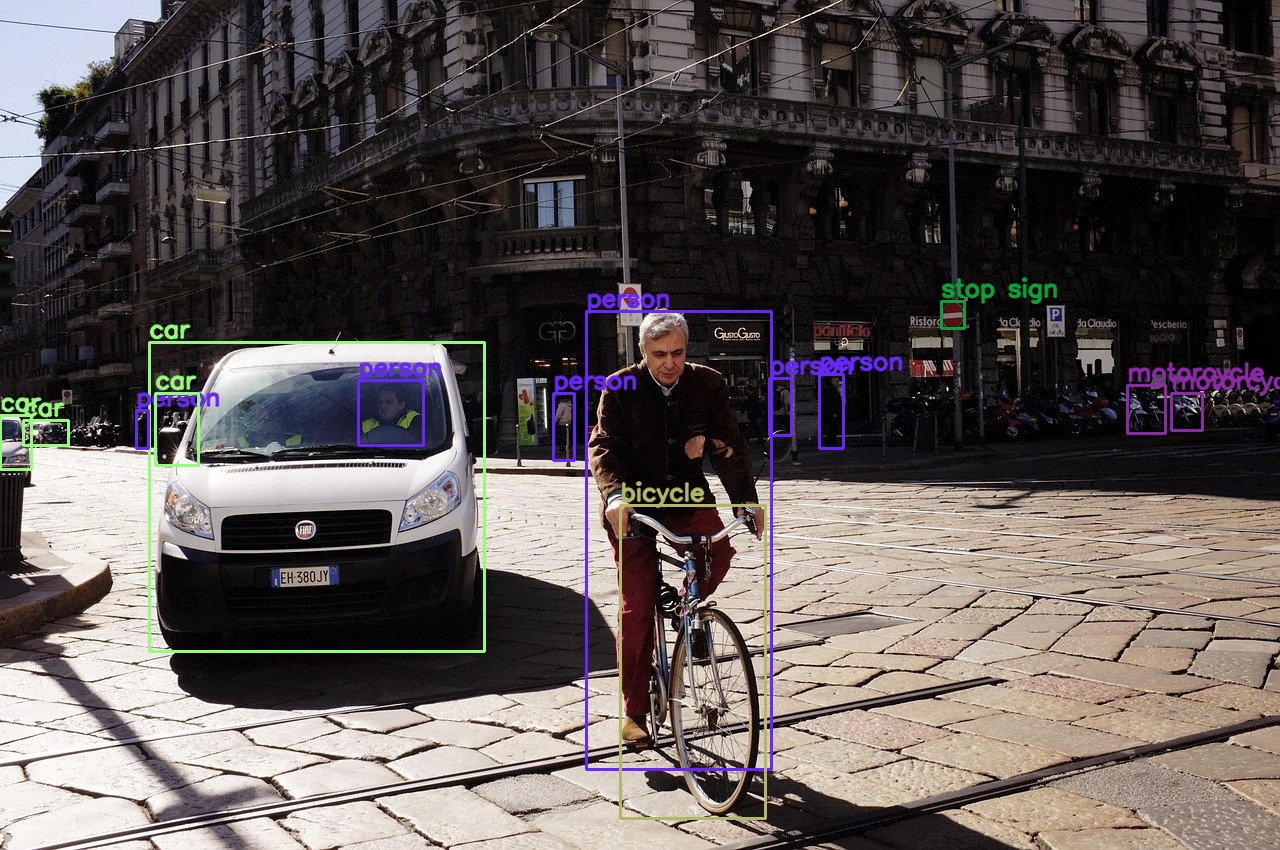
Just one final image test. This time on the street.jpg file.
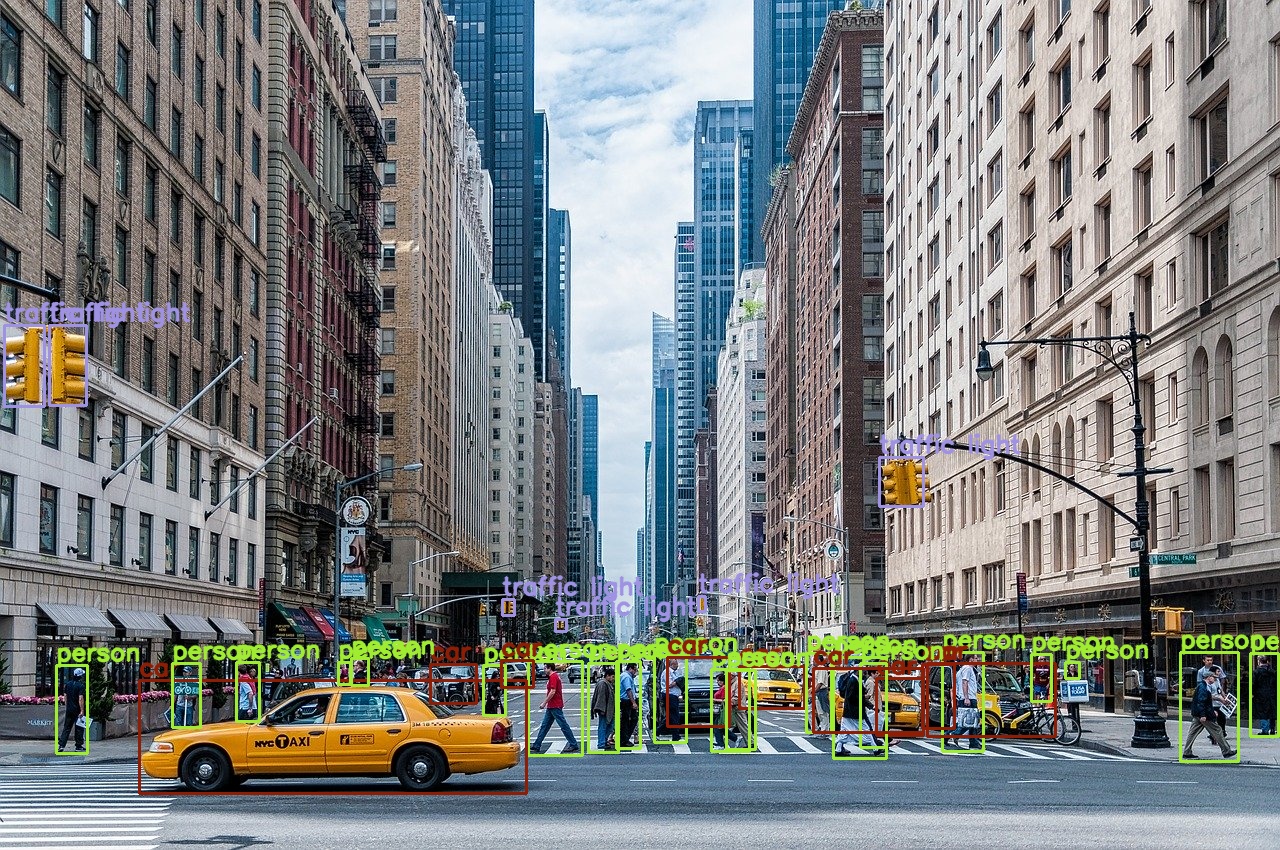
python detect.py --input input/street.jpg

This time, with min_size of 800, the Faster RCNN network is detecting 4 cars, 5 persons, 2 motorcycles, 1 bicycle, and 1 stop sign. And most probably, one of the cars along the back is a false positive. Obviously, it is not clearly visible. Now, let’s try with min_size of 1024.
python detect.py --input input/street.jpg --min-size 1024
This time the network does not detect the false-positive car as in the previous case. Also, this time it is detecting one more person in the background. Looks like increasing the min_size argument actually helps. But if you see closely, then you can see that there are many more motorcycles in the back that the network does not detect. Try decreasing the detection threshold from 0.8 to 0.6, and see if it helps.
Detecting Objects in Videos using the PyTorch Faster RCNN Network
Now, we will write the code to detect objects in videos using the PyTorch Faster RCNN network. All the code in this section will go into the detect_vid.py file.
Let’s start with the preliminary things. This includes the imports, the construction of the argument parser, initializing the model, and the computation device.
import torchvision
import cv2
import torch
import argparse
import time
import detect_utils

from PIL import Image

# construct the argument parser
parser = argparse.ArgumentParser()
parser.add_argument('-i', '--input', help='path to input video')
parser.add_argument('-m', '--min-size', dest='min_size', default=800,
                    help='minimum input size for the FasterRCNN network')
args = vars(parser.parse_args())

# download or load the model from disk
model = torchvision.models.detection.fasterrcnn_resnet50_fpn(pretrained=True,
                                                    min_size=args['min_size'])

device = torch.device('cuda' if torch.cuda.is_available() else 'cpu')
Setting Up the VideoCapture and VideoWriter Objects
We need to capture the video from the input path. We will do this using OpenCV. Also, we need to write the final frames with the detected objects on the disk. For that, we will need the OpenCV VideoWriter object. Let’s set those up.
cap = cv2.VideoCapture(args['input'])

if (cap.isOpened() == False):
    print('Error while trying to read video. Please check path again')

# get the frame width and height
frame_width = int(cap.get(3))
frame_height = int(cap.get(4))

save_name = f"{args['input'].split('/')[-1].split('.')[0]}_{args['min_size']}"
# define codec and create VideoWriter object
out = cv2.VideoWriter(f"outputs/{save_name}.mp4",
                      cv2.VideoWriter_fourcc(*'mp4v'), 30,
                      (frame_width, frame_height))
We are following a similar naming scheme to save the videos as we did in the case of images. We will save the images as.mp4 files.
Next, we will define two variables, frame_count and total_fps. Along with that, we will get the model into evaluation mode.
frame_count = 0 # to count total frames
total_fps = 0 # to get the final frames per second

# load the model onto the computation device
model = model.eval().to(device)
frame_countwill help us keep track of the total number of frames in the video.- Using
total_fpsvariable we will count the total frames per second that we get while detecting objects in frames. This will help us to calculate the average FPS that we get while performing detection on the video.
Reading Frames and Detecting Objects
We will read the video until there are no more frames and keep on detecting the objects in each frame. If you have worked with OpenCV and videos before or even if you have read some of my video inferencing tutorials, then you will find it really easy to understand.
# read until end of video
while(cap.isOpened()):
    # capture each frame of the video
    ret, frame = cap.read()
    if ret == True:
        # get the start time
        start_time = time.time()
        with torch.no_grad():
            # get predictions for the current frame
            boxes, classes, labels = detect_utils.predict(frame, model, device, 0.8)

        # draw boxes and show current frame on screen
        image = detect_utils.draw_boxes(boxes, classes, labels, frame)

        # get the end time
        end_time = time.time()
        # get the fps
        fps = 1 / (end_time - start_time)
        # add fps to total fps
        total_fps += fps
        # increment frame count
        frame_count += 1

        # press `q` to exit
        wait_time = max(1, int(fps/4))
        cv2.imshow('image', image)
        out.write(image)
        if cv2.waitKey(wait_time) & 0xFF == ord('q'):
            break

    else:
        break
- For each
Trueframe we are predicting the outputs at line 10. Then we are drawing the bounding boxes around the objects at line 13. - Note that we are keeping track of the
start_timeandend_timefor detection of each frame at lines 7 and 16. - At line 18, 20, and 22, we calculate the current FPS, increment the
total_fpsandframe_countcounter. - Then we show the image and write the video frame to disk.
- Finally, we break out of the loop when there are not more frames.
Now, we just need to release the VideoCapture() object and destroy all video frames. Along with that, we will calculate the average FPS and print it.
# release VideoCapture()
cap.release()
# close all frames and video windows
cv2.destroyAllWindows()

# calculate and print the average FPS
avg_fps = total_fps / frame_count
print(f"Average FPS: {avg_fps:.3f}")
Executing the detect_vid.py File
If you have a GPU in your system, then it’s all well and good. You can follow along. If you are running this on your CPU, then most probably, you will get 1 FPS or below that. Still, don’t be afraid to run the code. Run it, if you face FPS issues, then just press q to exit after a few frames. In the least, you will still get to learn how predictions on videos work.
Run the following command in your terminal. This will run the detection on by resizing the frames to min_size of 800.
python detect_vid.py --input input/video2.mp4
And this is the output video that is saved to the disk.
The results are really good. The Faster RCNN network is detecting humans and cars in the distance as well. It is also detecting the handbags in the frames.
But what is the FPS that we are getting for such high accuracy. The following is the average FPS printed on terminal that I got with my GTX 1060.
Average FPS: 4.402
So, on a GTX 1060 with frames resized to min_size of 800, we get an average of 4.4 FPS. This is not at all real-time, but again GTX 1060 is not a very powerful GPU as well.
Now, let’s try and reduce the frame size to 300 and perform detection again.
python detect_vid.py --input input/video2.mp4 --min-size 300
The following is the detection output.
Resizing the frames to min_size 300 makes the detection worse. Most of the persons in the distance are not getting detected. And the network is not detecting the handbags as well.
Still, what is the FPS that we are getting? This is the output on my terminal.
Average FPS: 10.237
We have a large gain of almost 6 FPS but the detections are worse. 10 FPS is still not quite real-time yet.
You will find some other images and videos in the input file that you downloaded. Do test the Faster RCNN network on those images and videos. Try to experiment with different min_size argument and detection thresholds as well. You can even tell us about your findings in the comment section.
Limitations of Faster RCNN Detection Network
We saw that the Faster RCNN network is really good at detecting objects, even small ones. And increasing the min_size argument for images makes the detections even better.
But Faster RCNN using the PyTorch framework cannot run in real-time on videos (at least on a nominal and budget GPU). For such real-time detections, we have other deep learning object detectors. Some of them are single shot detectors like YOLO (You Only Look Once) and SSD (Single Shot Detection). And some recent real-time detectors include the likes of EfficientDet. We will take a look at all of these in future articles and tutorials.
Summary and Conclusion
In this tutorial, you learned how to use the Faster RCNN object detection network with the PyTorch framework. We detected objects in images and videos. You also got to know how various hyperparameters and arguments like the min_size and detection threshold affect the accuracy. This article also showed that the Faster RCNN network is not very ideal for videos and we have other single shot detectors for those cases.
In case you have any questions, suggestions, or doubts, then please leave them in the comment section. I will surely address them.
You can contact me using the Contact section. You can also find me on LinkedIn, and X.

I’m new to Deep learning. It would be better if we make a series of FRCNN model from scratch. That will be good for understanding.
I’m new to Deep learning. It would be better if you make a series of FRCNN model from scratch. That will be good for understanding.
Hello Wasif. I will try my best to make a Faster RCNN series. The problem with such series posts is the continuation of the code. Still, I will try to come up with some strategies. In the meantime, feel free to look around the site and read the articles that you find interesting.
Good luck with your learning.
Hi how do I train the model further on my own dataset with coordinates?
Hello Mavis. I recently published an article exactly for that one. Please refer to this => https://debuggercafe.com/custom-object-detection-using-pytorch-faster-rcnn/