
In recent years, text generation has witnessed unprecedented advancements, primarily driven by deep learning models. One such intriguing avenue is “character level text generation“. This methodology crafts text one character at a time, unlike the more common word-level models, which generate text word-by-word. As the AI domain evolves, understanding the intricacies of such models becomes imperative for both enthusiasts and professionals. In this blog post, we embark on a journey to demystify the process of character level text generation using Long Short-Term Memory networks, commonly referred to as LSTMs.
Here are the steps that we will cover for character level text generation using LSTM
- Preparing a Simple Character-based Dataset: Dive into the nuances of setting up a character-based dataset. This will be tailored for single batch training, laying the foundation for our LSTM model.
- Handling Multi-batch Size Training: Explore the challenges and techniques associated with training on multiple batches. This will guide us to learn various intricacies of batching and data collation.
- Reading and Training from a Text File: Transcend traditional data preparation by learning how to read and train your character level LSTM directly from a text file, maximizing flexibility and utility.
This is the first post in the introductory series to text generation.
A Quick Primer on LSTMs (Long Short-Term Memory Networks)
At the heart of our exploration into character level text generation is the LSTM. Before diving deep into the world of text generation, let’s briefly understand what an LSTM is and why it’s special.
What is an LSTM?
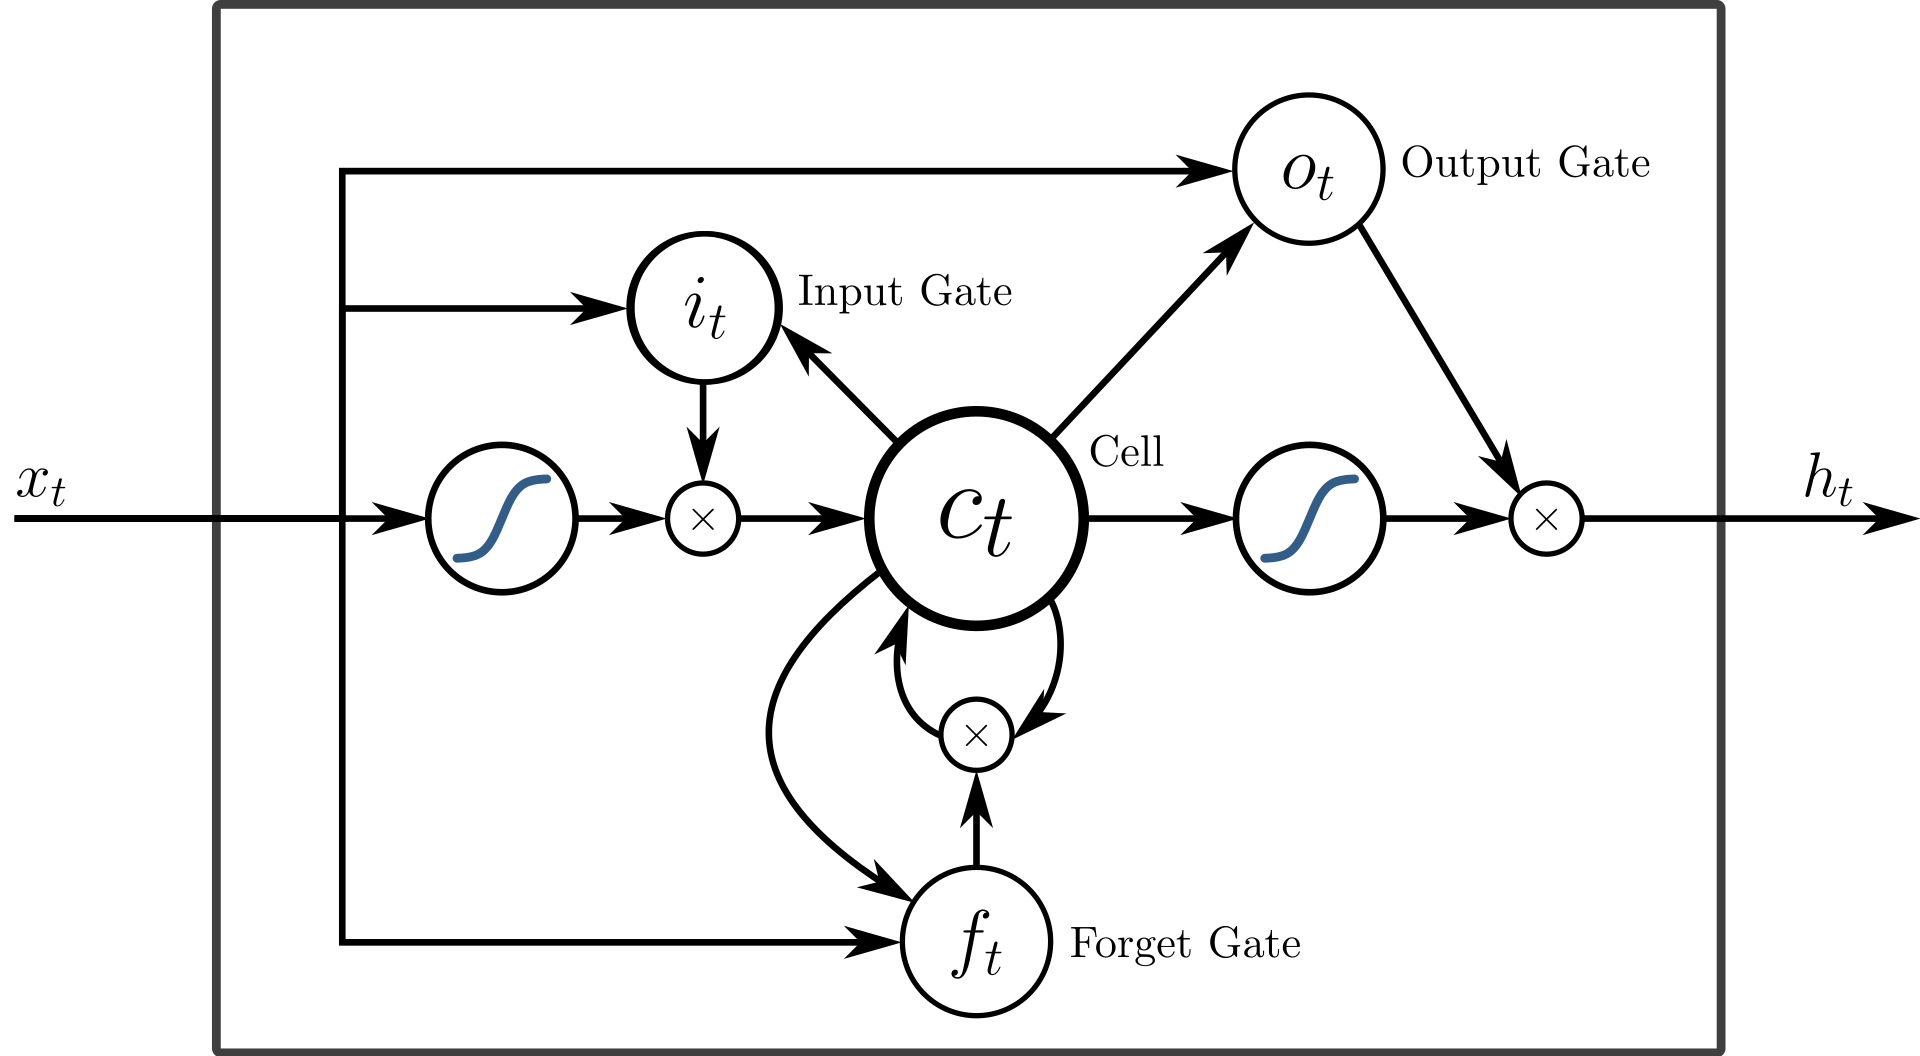
LSTM stands for Long Short-Term Memory. It’s a kind of neural network designed especially to remember patterns over long periods. Unlike traditional neural networks that might forget previous inputs, LSTMs are designed to remember them, making them perfect for tasks like ours where understanding a sequence (like a string of characters) is vital.
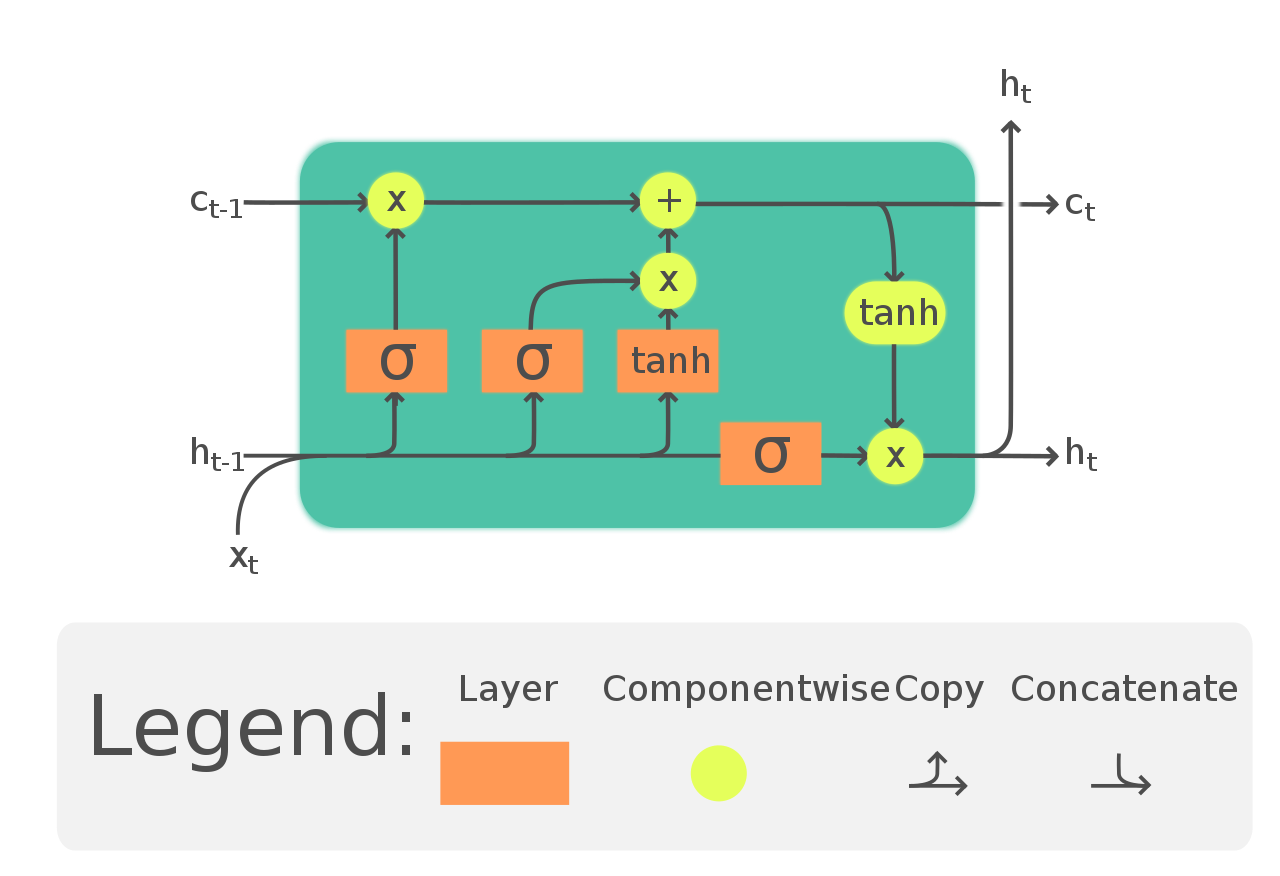
The Magic of Memory Cells
The core idea behind LSTMs is the concept of a “memory cell”. These cells can remember values over arbitrary time intervals, which is incredibly useful when we want our model to recall previous characters and generate coherent text.
Why LSTMs for Text Generation? Especially when Transformers Exist?
In the ever-evolving landscape of deep learning, new architectures are frequently emerging, each bringing unique strengths. Transformers, for instance, have recently taken the spotlight due to their unparalleled prowess in handling various sequence tasks. So, why stick with LSTMs for text generation?
For starters, LSTMs have a longstanding history of success in this domain. Their intrinsic ability to remember long-term dependencies means they can understand and generate sequences effectively. If we’re writing a sentence and have the characters “The cat is on the…”, an LSTM can recall context from earlier in the sentence to suggest that we might be talking about a location next (like “roof” or “mat”).
Furthermore, while transformers are powerful, they sometimes come with a higher computational cost. LSTMs, being more lightweight in certain applications, can offer a balance of efficiency and performance, especially for simpler tasks or when resources are limited.
That said, both architectures have their places in the vast domain of text generation. In this series, as we begin with LSTMs, we’ll also journey into the world of transformers, allowing you to appreciate the strengths and nuances of each.
Character Level Text Generation using LSTM
Now, we will start with the coding part of the blog post. We will go into as much detail of the code as possible as this will serve as the base for the next two blog posts.
The accompanying notebook and data can be downloaded via the download section
We will start with the data preparation and training techniques for a single batch size so that we can understand the process completely.
Download Code
In case you are looking to get started with text classification, then the following two blog posts will be perfect for you.
- Getting Started with Text Classification using Pytorch, NLP, and Deep Learning
- Disaster Tweet Classification using PyTorch
Let’s start with the import statements.
import torch
import torch.nn as nn
import torch.optim as optim

from torch.utils.data import Dataset, DataLoader
from collections import Counter
The above code block imports all the necessary packages, libraries, and modules that we need along the way.
Data Preparation for Character Level Text Generation [Single Batch Training]
As we’ve established, the foundation of any machine learning model is the data it trains on. In the world of character level text generation, this translates to sequences of characters. Let’s walk through how we prepare this data for single batch training.
samples = [
    "Hello world",
    "This is a simple dataset",
    "We are learning deep learning",
    "Text generation is fun",
    "PyTorch is a powerful library"
]
Sample Texts: We start with a list of sample sentences. These will serve as our mini-dataset. Each string here is a sequence of characters that we will feed into our LSTM.
# Create a vocabulary and data loaders
char_counts = Counter(" ".join(samples))
vocab = sorted(char_counts, key=char_counts.get, reverse=True)
vocab_size = len(vocab)
char_to_int = {char: i for i, char in enumerate(vocab)}
int_to_char = {i: char for char, i in char_to_int.items()}
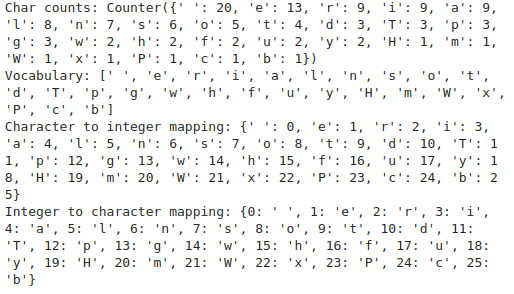
print(f"Char counts: {char_counts}")
print(f"Vocabulary: {vocab}")
print(f"Character to integer mapping: {char_to_int}")
print(f"Integer to character mapping: {int_to_char}")
Counting Characters: Using Python’s Counter, we tally up how many times each character appears across all samples. This helps in understanding the distribution of characters in our data.
Vocabulary Creation: By sorting our characters based on frequency, we create a vocabulary. We then craft two mapping dictionaries: one that maps characters to integers and another for the reverse.
In machine learning models, we often represent characters by unique integers rather than their literal forms. This transformation simplifies computations.
Here is a snippet of the above print snippets from the above code block.
class TextDataset(Dataset):
    def __init__(self, samples, char_to_int):
        self.samples = samples
        self.char_to_int = char_to_int

    def __len__(self):
        return len(self.samples)

    def __getitem__(self, idx):
        sample = self.samples[idx]
        chars = torch.LongTensor([self.char_to_int[char] for char in sample])
        input_seq = chars[:-1]
        target_seq = chars[1:]
        return input_seq, target_seq
Custom Dataset: The TextDataset class is our custom data wrapper, allowing PyTorch to understand how to access and process our samples. It returns input and target sequences, both essential for training our model.
- Input sequences are characters from the start to the second-last character.
- Target sequences are characters from the second character to the end. These targets are what our model will aim to predict.
batch_size = 1

dataset = TextDataset(samples, char_to_int)
dataloader = DataLoader(
    dataset,
    batch_size=batch_size,
    shuffle=True,
)
Batch Processing: With a single sample per batch, we leverage PyTorch’s DataLoader.
Inspecting the DataLoader: The below code iterates over the dataloader to fetch a single batch of data. This reveals the nature of input and target sequences.
iterator=iter(dataloader)
inputs, targets = next(iterator)
print(inputs, targets)
# Number of samples in one batch.
num_inputs = len(inputs)
num_targets = len(targets)
print(f"Num samples in one batch: {num_inputs} inputs, {num_targets} targets")
for i in range(num_inputs):
    num_input_chars = len(inputs[i])
    num_target_chars = len(targets[i])
    print(num_input_chars, num_target_chars)

We can see that there is only one input and one target sequence per batch. Furthermore, each sequence is 21 characters long.
Creating a Character Level LSTM Model
Let’s start with the model creation process. While creating text generation models, we need to take care of the shapes and how each layer interacts with the other. The following code block shows the entire code that we need to create the LSTM model.
class CharTextGenerationLSTM(nn.Module):
    def __init__(
        self,
        vocab_size,
        embedding_dim,
        hidden_size,
        num_layers
    ):
        super(CharTextGenerationLSTM, self).__init__()
        self.embedding = nn.Embedding(vocab_size, embedding_dim)
        self.lstm = nn.LSTM(
            input_size=embedding_dim,
            hidden_size=hidden_size,
            num_layers=num_layers,
            batch_first=True
        )
        self.fc = nn.Linear(hidden_size, vocab_size)
        self.hidden_size = hidden_size
        self.num_layers = num_layers

    def forward(self, x, hidden=None):
        if hidden == None:
            hidden = self.init_hidden(x.shape[0])
        x = self.embedding(x)
        out, (h_n, c_n) = self.lstm(x, hidden)
        out = out.contiguous().view(-1, self.hidden_size)
        out = self.fc(out)
        return out, (h_n, c_n)

    def init_hidden(self, batch_size):
        h0 = torch.zeros(self.num_layers, batch_size, self.hidden_size).to(device)
        c0 = torch.zeros(self.num_layers, batch_size, self.hidden_size).to(device)
        return h0, c0
Embedding Layer: Before feeding our characters into the LSTM, we transform them into dense vectors using an embedding layer. This layer captures the semantic meaning of each character.
LSTM Layer: At the heart of our model lies the LSTM layer. It remembers patterns over time and sequences, which is why it’s perfect for text generation.
input_size: Size of the input data (in our case, the embedding dimension).hidden_size: Number of LSTM units or neurons.num_layers: Number of LSTM layers stacked on top of each other.
Fully Connected (FC) Layer: After processing our sequences through the LSTM layer, we pass the output through this fully connected layer. This helps in making final predictions for the next character in the sequence.
The output shape from this layer will be the same as the number of unique characters in our dataset.
Forward Method: It dictates how data flows through our network. Starting from the input x, it flows through the embedding layer, LSTM layer, and finally the FC layer. Along the way, we manage the LSTM’s hidden states, essential for its sequential memory.
Hidden State Initialization: LSTMs have a unique architecture where they use a hidden state and a cell state to remember patterns. The init_hidden method initializes these states.
Here, we initialize the embeddings from scratch (randomly). However, it is also possible to use pretrained GloVe embeddings for such tasks.
Training Hyperparameters
Before we start the training, let’s define some hyperparameters.
# Training Setup
embedding_dim = 16
hidden_size = 32
num_layers = 1
learning_rate = 0.01
epochs = 100
We are using an embedding dimension of 16. This will result in 16 features in the output of the embedding layer. The hidden size is 32. This is the number of neurons for the LSTM layer and we will only have one LSTM layer. While stacking multiple layers can capture more intricate patterns, it’s also more computationally intensive. We will start simple here.
The learning rate is 0.01 and we will train for 100 epochs.
Training the Character Level Text Generation Model
Let’s define the device, the optimizer, and the loss function.
device = torch.device('cuda' if torch.cuda.is_available() else 'cpu')
model = CharTextGenerationLSTM(
    vocab_size,
    embedding_dim,
    hidden_size,
    num_layers
).to(device)
criterion = nn.CrossEntropyLoss()
optimizer = optim.Adam(model.parameters(), lr=learning_rate)
We are using the CrossEntropyLoss as the model predicts the probability of each character.
Our final model contains only 7600 parameters roughly.
Now, let’s create the training loop.
# Training
def train(model, epochs, dataloader, criterion):
    model.train()
    for epoch in range(epochs):
        running_loss = 0
        for input_seq, target_seq in dataloader:
            input_seq, target_seq = input_seq.to(device), target_seq.to(device)
            outputs, _ = model(input_seq)
            loss = criterion(outputs, target_seq.view(-1))

            optimizer.zero_grad()
            loss.backward()
            optimizer.step()
            running_loss += loss.detach().cpu().numpy()
        epoch_loss = running_loss / len(dataloader)
        print(f"Epoch {epoch} loss: {epoch_loss:.3f}")

train(model, epochs, dataloader, criterion)
The Training Function: It’s where the magic happens. In each epoch:
- Forward Pass: We feed the input data through the model.
- Calculate Loss: We compute how off our predictions are from the actual values.
- Backward Pass: The error is back-propagated to adjust the model’s internal parameters.
- Optimize: We make a step with the optimizer to adjust the model’s weights.
At the end of each epoch, we’re printing the loss to track how our model is doing. A decreasing loss typically means our model is learning, while a wildly fluctuating loss might indicate that the learning rate is too high, or our model isn’t stable.
By the end of the training, the loss becomes around 0.024.
Inference using Our Single Batch Trained Model
To judge the capability of the model, we need to run inference as well. Our main aim here is to check whether the model was able to remember the training data (overfitting). If so, then we are on the right path.
# Inference with one character as input.
def generate_text_one_char(model, start_char, length):
model.eval()
generated_text = start_char
input_seq = torch.LongTensor([char_to_int[start_char]]).unsqueeze(0).to(device)
h, c = model.init_hidden(1)
for _ in range(length):
with torch.no_grad():
output, (h, c) = model(input_seq, (h, c))
# Greedy approach.
next_token = output.argmax(1).item()
generated_text += int_to_char[next_token]
input_seq = torch.LongTensor([next_token]).unsqueeze(0).to(device)
return generated_text
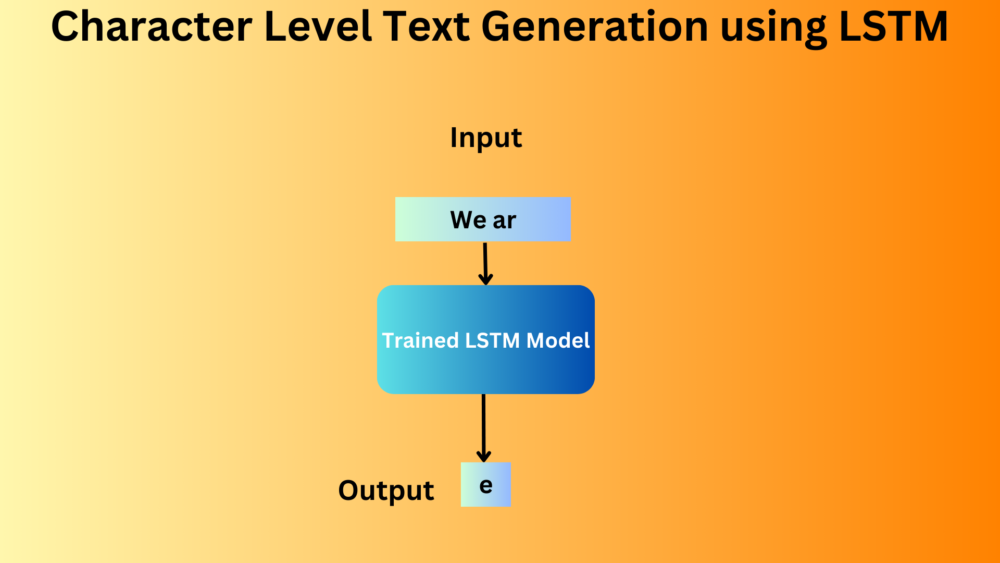
print("Generated Text:", generate_text_one_char(model, start_char='W', length=50))
One of the important components during inference is initializing sequence and hidden State. The initial character is converted into its integer representation and prepared to be passed into the model. We also initialize the hidden state h and cell state c of the LSTM.
For the specified length, we continue feeding the model’s output back as its next input, thereby “growing” our sequence.
- Forward Pass: The model predicts the next character’s distribution.
- Choosing the Next Character: We employ a greedy approach, meaning we simply choose the character with the highest probability (using
argmax). There are other sampling strategies (like top-k sampling), but greedy is a straightforward method. - Updating the Input: The chosen character becomes the input for the next loop iteration.
We provide the character W to the model and this is the sequence of 50 characters it comes up with.
Generated Text: We are learning deep learning deep learning deep le
Well, it looks like for the time being, our model is able to memorize the training data.
Using Larger Batch Sizes for Data Loaders
When training deep learning models, especially recurrent ones like LSTMs, using batches is a common practice. Processing data in batches can significantly speed up training. However, it’s not always straightforward. Let’s dive into an example with a larger batch size and see the challenge it presents.
batch_size = 2

dataloader = DataLoader(
    dataset,
    batch_size=batch_size,
    shuffle=True,
)

iterator=iter(dataloader)
inputs, targets = next(iterator)
print(inputs, targets)
# Number of samples in one batch.
num_inputs = len(inputs)
num_targets = len(targets)
print(f"Num samples in one batch: {num_inputs} inputs, {num_targets} targets")
for i in range(num_inputs):
    num_input_chars = len(inputs[i])
    num_target_chars = len(targets[i])
    print(num_input_chars, num_target_chars)
We’re increasing the batch size to 2, meaning we want to process two sequences simultaneously.
After creating the dataloader, we are using an iterator to fetch a batch. This batch contains input sequences and their corresponding target sequences.
However, a problem arises here. Since our data samples (text sequences) are of different lengths, PyTorch encounters an issue when it tries to create a batch. It expects each sequence in the batch to be of the same length so that it can stack them together into a single tensor.
The error message:
RuntimeError: stack expects each tensor to be equal size, but got [21] at entry 0 and [10] at entry 1
This is PyTorch telling us, “Hey, I can’t put these sequences together. One is 21 characters long and the other is only 10!”
How to address different sample batch creation for text generation data loaders?
There are a few common strategies to deal with sequences of different lengths. However, the most common is padding.
Padding: Add ‘padding’ characters to the shorter sequences until they match the length of the longest sequence in the batch. In PyTorch, we often use nn.utils.rnn.pad_sequence for this purpose.
Padding with Larger Batch Size
To pad the input sequences, we often use the
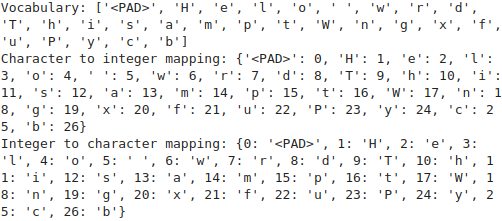
# Add thetoken to the vocabulary and the mappings vocab = [" "] + list(char_counts.keys()) vocab_size = len(vocab) char_to_int = {char: i for i, char in enumerate(vocab)} int_to_char = {i: char for char, i in char_to_int.items()}
Added
Updated the Vocabulary and Mappings: After adding the padding token, we update the char_to_int and int_to_char dictionaries. This ensures that
Printing the vocabulary and character mapping, this time, we can see the extra
However, the story does not end here. Now, we need a collation function and update the data loader.
# Collate Function.
def collate_fn(batch):
    # Sort sequences by length in descending order.
    batch = sorted(batch, key=lambda x: len(x[0]), reverse=True)

    # Separate input and target sequences.
    input_seqs, target_seqs = zip(*batch)

    # Get lengths of each sequence.
    lengths = [len(seq) for seq in input_seqs]

    # Pad input and target sequences to the maximum sequence length.
    pad_input_seqs = torch.nn.utils.rnn.pad_sequence(
        input_seqs, batch_first=True, padding_value=0
    )
    pad_target_seqs = torch.nn.utils.rnn.pad_sequence(
        target_seqs, batch_first=True, padding_value=0
    )

    return pad_input_seqs, pad_target_seqs

dataset = TextDataset(samples, char_to_int)
dataloader = DataLoader(
    dataset,
    batch_size=batch_size,
    shuffle=True,
    collate_fn=collate_fn
)
This is an essential step when dealing with sequences of varying lengths in PyTorch.
- Sorting by Length: First, we sort the sequences in descending order of length. This is a common practice, especially when working with packed sequences.
- Pad Sequences: Using
torch.nn.utils.rnn.pad_sequence, we pad both input and target sequences to the length of the longest sequence in the batch. Thepadding_valueis set to0, which corresponds to your
By providing the collate_fn argument to the DataLoader, we instruct PyTorch to use your custom collate function when batching sequences together. This ensures that all sequences in a batch have the same length, thanks to padding.
We can test our implementation as well.
iterator = iter(dataloader)
inputs, targets = next(iterator)
print(inputs, targets)
# Number of samples in one batch.
num_inputs = len(inputs)
num_targets = len(targets)
print(f"Num samples in one batch: {num_inputs} inputs, {num_targets} targets")
for i in range(num_inputs):
    num_input_chars = len(inputs[i])
    num_target_chars = len(targets[i])
    print(num_input_chars, num_target_chars)
Here is the output.
tensor([[ 9, 10, 11, 12,  5, 11, 12,  5, 13,  5, 12, 11, 14, 15,  3,  2,  5,  8,
         13, 16, 13, 12,  2],
        [ 1,  2,  3,  3,  4,  5,  6,  4,  7,  3,  0,  0,  0,  0,  0,  0,  0,  0,
          0,  0,  0,  0,  0]]) tensor([[10, 11, 12,  5, 11, 12,  5, 13,  5, 12, 11, 14, 15,  3,  2,  5,  8, 13,
         16, 13, 12,  2, 16],
        [ 2,  3,  3,  4,  5,  6,  4,  7,  3,  8,  0,  0,  0,  0,  0,  0,  0,  0,
          0,  0,  0,  0,  0]])
Num samples in one batch: 2 inputs, 2 targets
23 23
23 23
This time we have two input and two target sequences in each batch. Also, each sequence is 23 characters long. This length will vary in each batch according to the largest sequence length.
If we train the model now, and again generate text with the same starting character as before, we should get the same output. This is accomplished in the Jupyter notebook.
Character Level LSTM Training by Reading Data from a Text File
Let’s extend our current setup to read data from a text file and train the LSTM model. Here are the steps to training a character level LSTM model by reading data from a text file.
- Reading Data from a Text File
- Preprocessing the Data
- Creating Datasets and Dataloaders
- Training the Model
Our dataset is present in the data/alice_1.txt file. It is a short fictional story containing a few hundred words.
Let’s move on with creating the vocabulary from the text file.
with open('data/alice_1.txt', 'r', encoding='utf-8') as file:
    samples = file.readlines()

# Strip newlines and filter out empty lines
samples = [line.strip() for line in samples if line.strip() != ""]

# Create a vocabulary and data loaders
char_counts = Counter("".join(samples))
vocab = sorted(char_counts, key=char_counts.get, reverse=True)
vocab = [""] + list(char_counts.keys())
vocab_size = len(vocab)
char_to_int = {char: i for i, char in enumerate(vocab)}
int_to_char = {i: char for char, i in char_to_int.items()}
We read the text file, remove the empty lines, and store the rest of the sentences in the samples list. The rest of the code remains the same for creating the vocabulary and character mappings.
After that, almost all the code remains the same. The following code block creates the dataset and the data loader.
batch_size = 4

dataset = TextDataset(samples, char_to_int)
dataloader = DataLoader(
    dataset,
    batch_size=batch_size,
    shuffle=True,
    collate_fn=collate_fn
)
Next, initializing the model, the optimizer, and the loss function.
model = CharTextGenerationLSTM(
    vocab_size,
    embedding_dim,
    hidden_size,
    num_layers
).to(device)
criterion = nn.CrossEntropyLoss()
optimizer = optim.Adam(model.parameters(), lr=learning_rate)
This time, we will train the model for 1000 epochs.
train(model, epochs=1000, dataloader=dataloader, criterion=criterion)
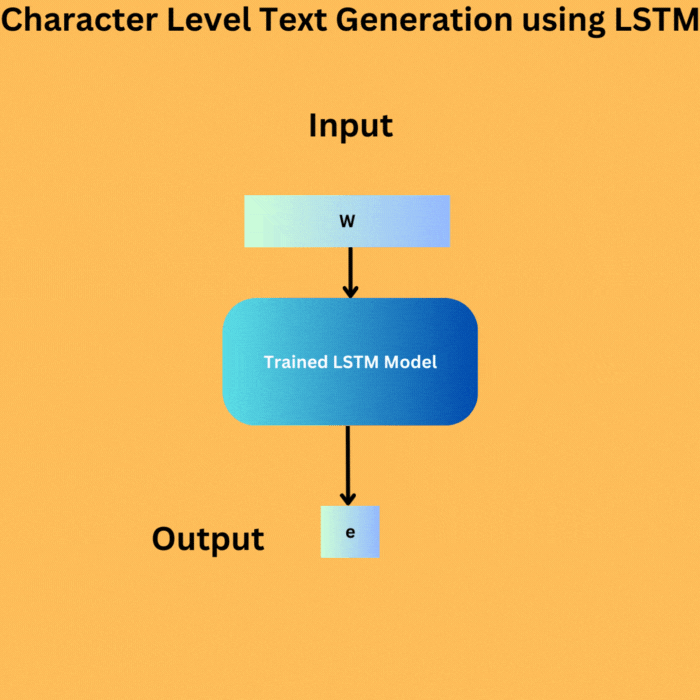
The first word in the text file is Alice. So, while generating the text, we will pass A as the starting character and see what the model generates.
print("Generated Text:", generate_text_one_char(model, start_char='A', length=100))
Following is the output.
Generated Text: Alice was a croquent seemed to manited with to to to to to to cavigation and inner trale and decarnce
We can see that the model generates the first three words correctly, and then the output is completely random and meaningless.
This is one of the major drawbacks of character level text generation models. They fail to capture long term dependencies when the dataset is large.
Inference with More than One Character
Although providing one character as a starting point did not help, will passing more than one character help? Let’s check.
# Inference with more than one character as input.
def generate_text_multiple_char(model, start_string, length):
    model.eval()
    generated_text = start_string
    input_seq = torch.LongTensor([char_to_int[char] for char in start_string]).unsqueeze(0).to(device)

    h, c = model.init_hidden(1)
    for _ in range(length):
        output, (h, c) = model(input_seq, (h, c))
        next_token = output.argmax(1)[-1].item()  # Get the prediction for the last character
        generated_text += int_to_char[next_token]

        # Update input_seq to include the predicted character
        input_seq = torch.cat((input_seq, torch.LongTensor([[next_token]]).to(device)), 1)[:, 1:]

    return generated_text

print("Generated Text:", generate_text_multiple_char(model, start_string="Alice was a", length=100))
In the above code block, we change the inference function to a certain extent so that it can process multiple characters. We pass “Alice was a” as the starting string and get the following output.
Following is the output.
Generated Text: Alice was a curious ad dith and dioke of she wheshing maction, Alice encoverserco, hed to to hastimor the encha
Again, the model generates the next word after the input correctly but the rest of the output is meaningless.
Takeaway
From the above experiment, it is evident that training a character level LSTM for very high quality text generation will be difficult. The next step here is training a word level text generation model which is the common approach in today’s world of LLMs. That is how the GPTs, LLama, and all other LLMs work. We will go through that process in the next blog post.
Summary and Conclusion
In this blog post, we created a character level LSTM model. We trained an LSTM model that takes one character as input and tries to predict the next character. Although quite good at handling small samples, the model suffers when training on large datasets. This is where word level text generation models come in that we will cover in the next blog post. I hope this blog post was worth your time.
If you have any doubts, thoughts, or suggestions, please leave them in the comment section. I will surely address them.
You can contact me using the Contact section. You can also find me on LinkedIn, and X.

3 thoughts on “Character Level Text Generation using LSTM”