
Effective human action recognition in videos using deep learning is a very active area of study. Researchers and practitioners are trying to come up with new and effective deep learning models to tackle the problem. And needless to say, over the years, we have some deep learning models that are quite good at recognizing actions in videos.
This is mainly true for recognizing human actions in videos using deep learning and neural networks. In this tutorial, we will also try to recognize human actions in videos using deep learning and neural networks.
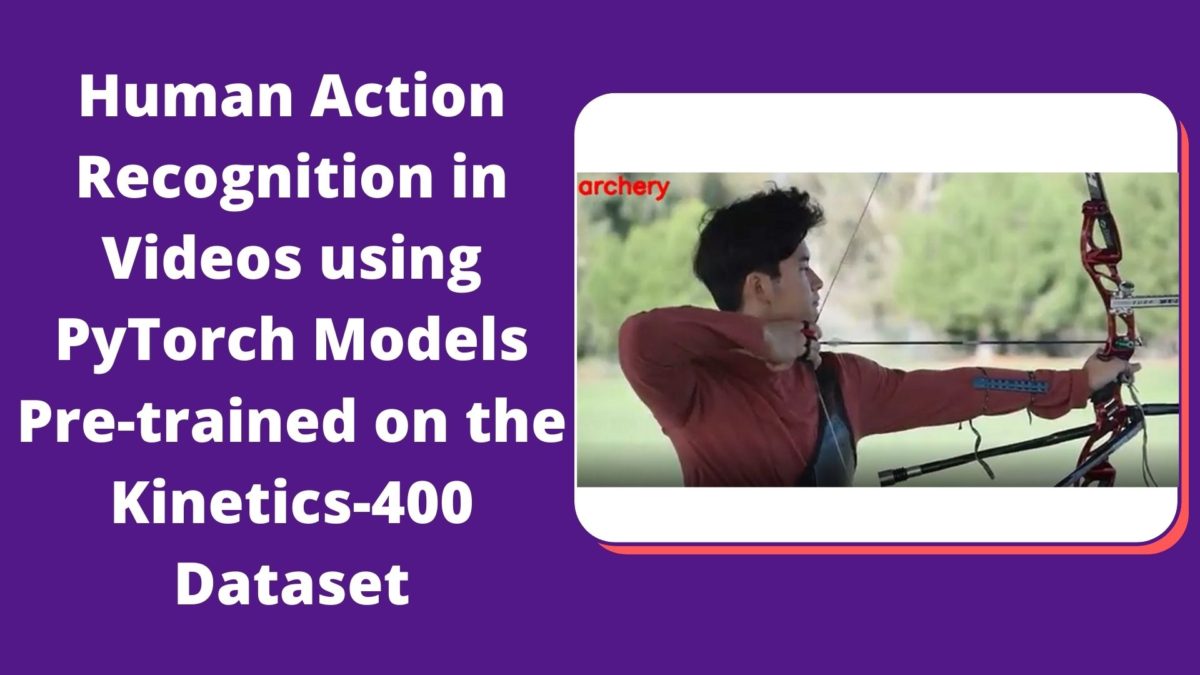
In this tutorial, we use pre-trained PyTorch models to recognize human actions in videos. Particularly, we will use the ResNet 3D deep learning model that has been trained on the Kinetics-400 dataset.
So, what will you learn in this tutorial?
- How to use a pre-trained PyTorch ResNet 3D deep learning model to recognize actions in videos?
- What should be the proper input and output format while inferencing on new videos?
- What are some of the important factors to keep in mind while using such a pre-trained deep learning model?
Now, you may be asking, “what kind of results can we expect to get after we go through this tutorial?“. The following clip will give you a good example.
I hope that you are excited to move forward. And you may notice at the end of the video, the classification changes to some other labels. We will address the reason for that as well.
Note: We will not be training our own neural network in this tutorial. Instead, we will use a pre-trained model and try to carry out inference on new and unseen videos. I hope that using such a hands-on approach will also help the readers to get an idea of how to train their own 3D Convolutional Neural Networks on videos. If you want to learn about training your own model for human action recognition, then you may refer to this article.
A Brief Introduction on Human Action Recognition
So, one of the major questions is, “why this tutorial?” The main reason is that I was searching for some pre-trained models for action recognition and I found that PyTorch provided a few. But I did not find any tutorials on the internet to use them effectively. I thought that if I write a tutorial on this, then it would help many other deep learning practitioners too.
The Kinetics-400 Dataset
The Kinetics-400 dataset by DeepMind contains 400 human action classes. Kay et al. published the paper The Kinetics Human Action Video Dataset explaining the dataset in much depth and giving us a good insight into the dataset.
The Kinetics-400 dataset contains 400 classes of human actions and each class contains at least 400 clips. Each of these clips are around 10 seconds and they have been taken from YouTube videos.
This dataset at the time of release, was mainly helpful as there were not many datasets that had a large collection of human action for deep learning. Quoting the authors here.
… we believe that having one will facilitate research in this area – both because the dataset is large enough to train deep networks from scratch, and also because the dataset is challenging enough to act as a performance benchmark where the advantages of different architectures can be teased apart.
The Kinetics Human Action Video Dataset
After this, subsequently, there were other such papers and datasets as well, mainly Kinetics-600 and Kinetics-700 datasets. As the name suggests, these datasets contain 600 and 700 classes of human actions respectively. You can find more details here.
But our main focus is upon the Kinetics-400 dataset in this tutorial. This is because, the pre-trained model that we will use, that is the ResNet 3D model has been trained on the Kinetics-400 dataset.
Among the 400 classes, the following are some of the classes that you will find in the dataset.
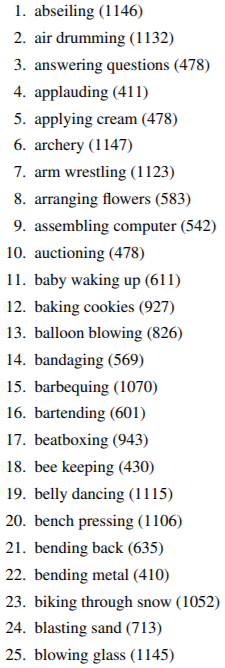
Also, the following image shows some of the frames from the video clips that make up the dataset.

I hope that this gives you a good idea of what types of video clips there are in the dataset. We will not go much deeper into the details of the paper here. But it will be much better if you give the paper a read, maybe after going through this tutorial.
The PyTorch ResNet 3D Pre-trained Model
By now we know that we will be using the ResNet 3D PyTorch model in this tutorial. This deep learning model is similar to the well know ResNet architecture. But in ResNet 3D, we use 3D convolutional layers instead of the 2D convolutional layers.
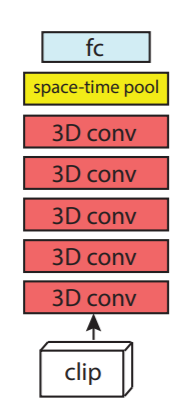
Figure 3 shows the basic architecture of the ResNet 3D neural network model. You can see that when we provide a video clip to it, it passes through 3D convolutions. Basically, it is 3D ResNet. If you want to know more about this, then please read the paper A Closer Look at Spatiotemporal Convolutions for Action Recognition by Train et al.
The ResNet 3D model that PyTorch provides is an 18 layers model. So, it is safe to say that it is a ResNet 3D 18 architecture. This model has been trained on the Kinetics-400 dataset already and we will be using these pre-trained weights to recognize actions in our own videos. If you visit this link, then you will find that PyTorch actually provides a total of three Kinetics-400 pre-trained models. There is also ResNet Mixed Convolution and ResNet (2+1)D. Hopefully, we will do some interesting projects with these models as well in the future.
Input Format for ResNet 3D
Now, we know that the ResNet 3D deep learning model consists of 3D convolutional layers. Due to this reason, the input format also changes. We cannot give the typical image format input of [batch_size x channels x height x width]. For images and 2D convolutions, it is a 4-dimensional input.
But when we provide videos as input to 3D convolutional layers, then the format changes a bit. It has to be a 5-dimensional input. The format is [batch_size x channels x num_frames x height x width]. Here:
batch_size: It is the number of videos per mini-batch. For us, this is going to be 1 as we will be inferencing on 1 video at a time.channels: This is the number of colour channels. There we will be 3 channels, RGB.num_frames: This is the number of frames to consider from the video clip for prediction. Typically, this is the number of frames that the deep learning model will get to see while predicting. And this is one of the most important factors which impacts both performance and speed of prediction.
Another important factor that we need to keep in mind is the normalization of the data. The ResNet3D model has already been trained on the Kinetics-400 dataset. Thus, while inferencing, we have to follow the normalization values for the dataset. Before feeding our video frames to the model, we have to normalize them using mean = [0.43216, 0.394666, 0.37645] and std = [0.22803, 0.22145, 0.216989].
This is all about the ResNet 3D model for now. If you wish to learn more, then do give the paper a read.
Libraries and Frameworks that We Need
Before moving further, let’s quickly check whether we have all the libraries and frameworks installed or not.
- The first one is obviously PyTorch. Be sure to install the latest version of PyTorch (1.6 at the time of writing this). This will ensure a smooth experience for all of us.
- The next one is Albumentations which is an image transformation and image processing library mainly for deep learning.
There are a few other generic libraries which I hope that you already have as a deep learning practitioner. If not, feel free to install them along the way.
The Project Structure and the Input Data
We will follow the following input structure for this tutorial.
│   action_recognition.py
│   labels.txt
│   utils.py
│
├───input
│       archery.mp4
|        ...
│
├───outputs
- Inside the
inputfolder will have all the video clips that we will use for inferencing. - The outputs folder will contain all the output videos that we will save after they have been classified by the ResNet 3D deep learning model.
- We have two python scripts, the details of which we will see later on while writing the code for them.
- Then we have a
labels.txtfile. This contains all the 400 labels that we need to classify the actions in videos. You need not do anything to prepare thelabels.txtfile. You can simply download the file by clicking the button below and move it to your project directory.
Now, coming to the input videos that we will use. You already know all the classes the model can identify. You are free to choose any video of your choice and inference on that. Still, if you want, you can use the videos that we will use in this tutorial. I am providing the link to download a zip file that contains three videos and they have been taken from Pixabay.
This input folder contains an archery video, a person playing a piano, and another video of a woman doing yoga. If you download this file, then extract it in your project directory and keep the videos inside the input folder.
I hope that you have set up everything by now. From the next section onward, we will start writing the code.
Human Action Recognition using PyTorch ResNet 3D Pre-trained on the Kinetics-400 Dataset
We have to write code for two Python scripts. One is utils.py and the other one is action_recognition.py. Both files contain minimal code. Once we have the basics right, using pre-trained models in PyTorch becomes really easy.
Let’s start with the utils.py file.
Writing Some Utility Code
Here, we will write the code for the utils.py file. This will contain very less code. We will define the transforms for the image frames and read the class names from the labels.txt file.
So, let’s write the code in utils.py.
import albumentations as A

# define the transforms
transform = A.Compose([
    A.Resize(128, 171, always_apply=True),
    A.CenterCrop(112, 112, always_apply=True),
    A.Normalize(mean = [0.43216, 0.394666, 0.37645],
                std = [0.22803, 0.22145, 0.216989],
                always_apply=True)
])

# read the class names from labels.txt
with open('labels.txt', 'r') as f:
        class_names = f.readlines()
        f.close()
The above is all that we need for the utility codes.
- First, we have the image transforms that we define using the
albumentationslibrary. We resize the image to 128×171 dimension which is in regard to the training dimensions. Then we apply center cropping to the frames to crop them to 112×112 dimensions. This cropping is expected for the best results while using the PyTorch video action recognition models. If you want to know more about the training code, transformations, and utilities, then do visit the PyTorch official docs for video classification. Finally, we normalize the dataset according to the expected Kinetics-400 normalization values. - Starting from line 13, we read the
labels.txtfile and read the class names according to each new line.
Keeping these utility codes separate will make our main action recognition code a bit cleaner.
Writing the Code for Human Action Recognition
In this section, we will write the code for human action recognition using PyTorch ResNet 3D deep learning model. I will try to make everything really simple to follow through.
All the code in this section will go into the action_recognition.py file.
Let’s start with the imports.
import torch
import torchvision
import cv2
import argparse
import time
import numpy as np
import utils
Along with all the required modules and libraries, we are also importing the code from utils.py that we just wrote.
Prepare the Argument Parser
Here, we will prepare the argument parser to parse the command line arguments that we will give while executing the action_recognition.py file.
# construct the argument parser
parser = argparse.ArgumentParser()
parser.add_argument('-i', '--input', help='path to input video')
parser.add_argument('-c', '--clip-len', dest='clip_len', default=16, type=int,
                    help='number of frames to consider for each prediction')
args = vars(parser.parse_args())

#### PRINT INFO #####
print(f"Number of frames to consider for each prediction: {args['clip_len']}")
--inputis the path to the file video clip.--clip-lenis the number of frames to consider for each forward pass while inferencing in the video using the ResNet 3D model. This means that if we provide the value as 16, the model will predict the class action name by looking at 16 consecutive frames from the video clip. This is a very important argument as it affects both the quality of predictions and the speed of predictions (Frames Per Second). Using more frames may give better predictions but may decrease the FPS. Similarly, decreasing the number of frames for each forward pass may increase the FPS but we may also get wrong predictions.
Prepare the Class Names and the ResNet 3D Model
We can get the class names directly from the utils script. For the ResNet 3D model, we will use the torchvision module to get it. If this is your first time using it, then it will be downloaded first.
# get the lables
class_names = utils.class_names
device = torch.device('cuda' if torch.cuda.is_available() else 'cpu')
# load the model
model = torchvision.models.video.r3d_18(pretrained=True, progress=True)
# load the model onto the computation device
model = model.eval().to(device)
We are also getting the ResNet 3D neural network model into eval() mode and loading it onto the computation device.
Preparing the Video Capture Object and Some Preliminary Code
There are a few preliminary codes that we need to take care of before we feed our video clip to the ResNet 3D model.
The next few lines of code initialize the OpenCV VideoCapture() object and read the video as well.
cap = cv2.VideoCapture(args['input'])
if (cap.isOpened() == False):
    print('Error while trying to read video. Please check path again')

# get the frame width and height
frame_width = int(cap.get(3))
frame_height = int(cap.get(4))
On lines 6 and 7, we get the height and width of the video frames.
Next, we will define a name to save the video after the model inferences on it. We will also initialize a VideoCapture() object for saving the video and defining the codec.
save_name = f"{args['input'].split('/')[-1].split('.')[0]}"
# define codec and create VideoWriter object
out = cv2.VideoWriter(f"outputs/{save_name}.mp4",
                      cv2.VideoWriter_fourcc(*'mp4v'), 30,
                      (frame_width, frame_height))
Now, we just have a few more variables to define.
frame_count = 0 # to count total frames
total_fps = 0 # to get the final frames per second
# a clips list to append and store the individual frames
clips = []
The frame_count will help us keep track of the total number of frames. The total_fps will helps us keep track of the total FPS that we get throughout the inference. Finally, we will use clips list to append the individual frames from the video before feeding it to the ResNet 3D neural network model.
Human Action Recognition Inference on the Video using ResNet 3D Neural Network Model
We are all set to feed our video clip to the ResNet 3D neural network model and run the inference. This is going to be a large while loop. I am not dividing the code into multiple blocks as it will break the flow of the while loop. We will get into the explanation part after we write the code.
# read until end of video
while(cap.isOpened()):
    # capture each frame of the video
    ret, frame = cap.read()
    if ret == True:
        # get the start time
        start_time = time.time()
        image = frame.copy()
        frame = cv2.cvtColor(frame, cv2.COLOR_BGR2RGB)
        frame = utils.transform(image=frame)['image']
        clips.append(frame)
        if len(clips) == args['clip_len']:
            with torch.no_grad(): # we do not want to backprop any gradients
                input_frames = np.array(clips)

                # add an extra dimension
                input_frames = np.expand_dims(input_frames, axis=0)

                # transpose to get [1, 3, num_clips, height, width]
                input_frames = np.transpose(input_frames, (0, 4, 1, 2, 3))

                # convert the frames to tensor
                input_frames = torch.tensor(input_frames, dtype=torch.float32)

                input_frames = input_frames.to(device)

                # forward pass to get the predictions
                outputs = model(input_frames)

                # get the prediction index
                _, preds = torch.max(outputs.data, 1)

                # map predictions to the respective class names
                label = class_names[preds].strip()

            # get the end time
            end_time = time.time()
            # get the fps
            fps = 1 / (end_time - start_time)
            # add fps to total fps
            total_fps += fps
            # increment frame count
            frame_count += 1

            wait_time = max(1, int(fps/4))
            cv2.putText(image, label, (15, 25),
                        cv2.FONT_HERSHEY_SIMPLEX, 0.8, (0, 0, 255), 2,
                        lineType=cv2.LINE_AA)
            clips.pop(0)
            cv2.imshow('image', image)
            out.write(image)
            # press `q` to exit
            if cv2.waitKey(wait_time) & 0xFF == ord('q'):
                break

    else:
        break
Explanation of the Above Code Block
- Starting from lines 2 till 5, we have all the general code for checking for a video frame and reading the frame. Here, two important lines are lines 9 and 10, we convert the frame to RGB color from the default BGR color mode of OpenCV. And at line 10, we transform the image using the transforms that we have defined in the
utils.pyscript. - Note that we are appending the individual frames to the clips list on line 11. Then on line 12, we check whether the number of frames in the
clipslist is equal to the argument that we have passed while executing the script. If this is so, then we move forward. - On line 14, we convert
clipsinto NumPy array first and store it asinput_frames. We do not modify the originalclipsas we will need it later. - On line 17, we add an extra dimension to make the list five-dimensional which is very important.
- Then on line 19, we transpose the
input_framesso as to make it[batch_size, 3, num_clips, height, width]. For us, this will be[1, 3, 16, 112, 112]. I hope that you understand this point clearly. - Next, at line 23, we convert
input_framesto torch tensors. Line 25 loads the frames to the computation device. - At line 28, we make a forward pass and feed the clips to the ResNet 3D model. Then save the outputs in
outputs. - Line 31 gets the prediction index from
outputsand line 34 maps the prediction index to the class name that we have defined before. - From lines 37 to 43, we calculate the total frames and total FPS.
- On line 46, we put the class name on the frame that we want to show. We also pop the last frame from the
clipslist at line 49. - Line 50 shows the frame with the class name on the screen and line 51 saves it on the disk.
Release the VideoCapture Object and Calculate the Average FPS
This is the final part of the code. We will release the VideoCapture() object and destroy all video frame windows. Then we will calculate the average FPS (Frames Per Second) of the inference.
# release VideoCapture()
cap.release()
# close all frames and video windows
cv2.destroyAllWindows()

# calculate and print the average FPS
avg_fps = total_fps / frame_count
print(f"Average FPS: {avg_fps:.3f}")
Execute action_recognition.py for Human Action Recognition
We are all set to execute action_recognition.py script and run inference on our videos.
We have three videos, archery.mp4, playing_piano.mp4, and yoga.mp4. Let’s start with the archery video.
Open up your terminal or command line and type the following.
python action_recognition.py --input input/archery.mp4 --clip-len 16
Let’s see how well our ResNet 3D neural network model performs.
We can see that the ResNet 3D model predicts the action for those parts correctly where the human and the bow are present in a single frame. By the end of the video, the predictions are wrong. This is most probably because the neural network has not learned that pulling the arrow out of a target board may also be part of archery.
Now, let’s move on to the piano-playing video.
python action_recognition.py --input input/playing_piano.mp4 --clip-len 16
The following is the clip after the inference.
The ResNet 3D model recognizes the action as playing organ instead of piano. In my opinion, this is not wrong at all. This is because an organ and a piano are very similar looking. Maybe if the whole piano would have been visible in more frames, then the model would have correctly recognized it.
Finally, let’s move on to the yoga video.
python action_recognition.py --input input/yoga.mp4 --clip-len 16
The following clip is saved to the disk.
Here, the neural network predictions are shuffling between taichi and yoga. All the frames where the model predicts taichi is most probably because of the hand movement. Taichi is a form of martial art and ResNet 3D is connecting the hand movement with taichi.
Further Steps to Take
We see that the model performs well but not great. Some of the time it predicts some other label because of a seemingly loose connection to the action. For example, confusion between taichi and yoga because of the hand movement. Another example is predicting a piano as an organ instrument as it does not get to see the whole musical instrument.
Now, what can you do further? You see that we have used 16 frames from each video clip at once for the predictions. Try increasing the number to 32. Or try decreasing it to 8 and 4. See what happens. Take note of how the human action recognition predictions improve or deteriorate and how it affects the FPS. This will result in even more learning.
You may also try the other models that PyTorch provides for video classification – ResNet Mixed Convolution and ResNet (2+1)D.
Here are some links to all the resources below that you may find useful.
- PyTorch video classification docs.
- PyTorch video classification code.
- DeepMind Kinetics papers and datasets.
- Paper – The Kinetics Human Action Video Dataset.
- Companion paper for the original Kinetics 400 dataset – Quo Vadis, Action Recognition? A New Model and the Kinetics Dataset.
- This paper explores the benefit of pre-training an action classification network on Kinetics, and then using the features from the network for action classification on other (smaller) datasets.
- Paper – A Closer Look at Spatiotemporal Convolutions for Action Recognition.
Summary and Conclusion
In this tutorial, you learned how to use PyTorch ResNet 3D neural network pre-trained on the Kinetics-400 dataset for human action recognition. You got to see the strength and weaknesses of the model as well. I hope that you learned a lot from this tutorial.
If you have any doubts, thoughts, or suggestions, then please do reach out using the comment section. I will surely address them.
You can contact me using the Contact section. You can also find me on LinkedIn, and X.

Excellent tutorial sir. How about custom training on any other activity dataset? Just how to approach that ?
Hello Gaurav. I am glad that you liked the post. And if you want to train on any custom dataset, then the following tutorial might just be for you. https://debuggercafe.com/action-recognition-in-videos-using-deep-learning-and-pytorch/
Here, we train a deep learning model on custom sports activities. I think you will get what you are looking for in that tutorial. I hope this helps.
how to create a custom datasets for pose recognition.
Hello Rajesh. Not going to lie, that’s a bit of a manual process and time-taking as well. And perhaps this is one of the best ones out there.
https://github.com/jsbroks/coco-annotator
Hello
Learned a great deal. I want to leverage the pre-trained functionality and add one more class by augmenting the pre-trained model – number of classes then become 401 classes. Before I spend effort to collect 400+ video clips for the new class, please point me to an appropriate tutorial. To be clear, I want to augment leveraging the pretrained model and get a new model that will classify 401 classes. A paper, code, even a book – please point me in correct direction.
Hello Troy. At the moment, I don’t have a blog post that used this model for fine-tuning. But I think that this GitHub Repo will be able to help you =>
https://github.com/kenshohara/3D-ResNets-PyTorch