In the last article, we covered a short introduction to the latest NVIDIA Nemotron 3 Nano Omni model. We also built a simple Gradio application for multimodal chat powered by the NVIDIA API. In this article, we will take a step further. We will be deploying the Nemotron 3 Nano Omni model using vLLM on Modal Serverless.
Why go for the self-deployment route for Nemotron 3 Nano Omni?
- We were using the free NVIDIA credits, which had rate limits. With self-deployment, although we spend a little, we are not bound to NVIDIA rate limits anymore.
- With Modal Serverless, we only pay per API call (when the GPU is in use). We do not incur costs when the deployment cluster is idle.
- And the biggest upside is that we control the data. We do not need to send it to NVIDIA servers. The requests go to the deployment cluster and are deleted when we destroy the cluster.
What will we cover while deploying Nemotron 3 Nano Omni on Modal Serverless?
- Setting up the local environment and Modal deployment script.
- Creating a simple Gradio frontend for a chat application.
- Adding support for text, image, audio, and video chat with per-session memory management.
- Covering a few of the nuances and limitations.
Project Directory Structure
Let’s take a look at the project directory structure.
nemotron-gradio-modal/
├── backend
│   ├── app.py
│   └── requirements.txt
├── frontend
│   ├── app.py
│   └── requirements.txt
├── README.md
└── requirements.txt
Inside the root directory, we have nemotron-gradio-modal, which contains:
- A
backendsubdirectory withapp.py. This script contains the deployment code. - The
app.pyscript inside thefrontendsubdirectory contains the Gradio frontend code. - We have a
README.mdand arequirements.txtfile. This requirements file contains all the consolidated libraries. The separate requirements files inside thefrontendandbackendsubdirectories are just placeholders at the moment.
The entire codebase is available for download as a zip along with this article.
Download Code
Installing Requirements
We can install all the libraries and frameworks that we need via the requirements file.
pip install -r requirements.txt
For us, to work locally, the following libraries are hard requirements:
modalfastapiopenaigradiopython-dotenv
The other ones like vllm, torch, and transformers are necessary for the backend/app.py image deployment. However, they are installed as part of the container image, so they are skippable locally. Still, it’s good to have them, in case of debugging.
Code for Deploying Nemotron 3 Nano Omni on Modal
In this section, we will cover the backend deployment code and the necessary frontend code for the deployment of the Nemotron 3 Nano Omni model.
Setting Up Modal
Before we jump into the deployment script, we need to set up modal. First, we need a Modal account. We can open one at modal.com. Upon successful account creation, we receive a $5 credit, which is enough to run the experiments for this article.
As we have already installed the modal library, we need to link our Modal account via terminal. Open your terminal/CLI and execute the following:
modal setup
Once you execute the above, a new window in your default browser should open to authorize the access token in your currently logged-in account.
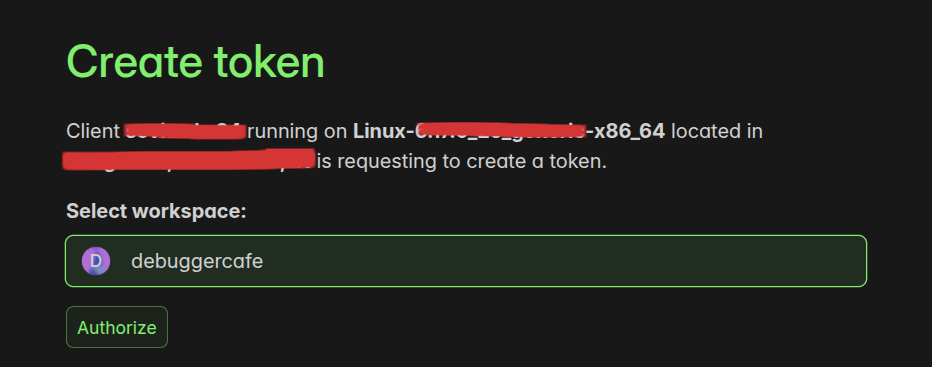
The second part here is adding your Hugging Face token to the Modal secret. Create a new access token for your Hugging Face account with write access and execute the following.
modal secret create hf-secret HF_TOKEN=YOUR_HF_TOKEN
Replace YOUR_HF_TOKEN in the above command with your Hugging Face token. This is necessary for accessing models and artifacts that have fine-grained account-level access.
That’s it, in a few seconds, we have our local system and Modal account connected.
Deployment Script for Modal
Let’s take a look at the deployment script for Modal.
The code is present inside backend/app.py.
Let’s start with the imports, defining the model name from Hugging Face, and initializing the application and defining the port.
import modal
import os
import subprocess

MODEL_NAME = "nvidia/Nemotron-3-Nano-Omni-30B-A3B-Reasoning-NVFP4"

app = modal.App("nemotron-omni")

VLLM_PORT = 8000
We are using the Nemotron-3-Nano-Omni-30B-A3B-Reasoning-NVFP4 model and not the FP16 one. Using the quantized model will help us deploy the model on NVIDIA L40S 40GB VRAM GPU with around 32K context length.
Creating a Modal Image
This part becomes a bit tricky. There are several examples on the Modal website; however, sometimes, we need to explore which versions work well with vLLM, especially when CUDA and other related libraries are involved.
image = (
modal.Image.from_registry(
"nvidia/cuda:12.6.0-devel-ubuntu22.04",
add_python="3.11",
)
.entrypoint([])
.apt_install(
"git",
"clang",
"build-essential",
"ffmpeg",
"libsndfile1",
)
.run_commands(
"pip install --upgrade pip wheel setuptools"
)
.pip_install(
"torch==2.10.0",
index_url="https://download.pytorch.org/whl/cu126",
)
.pip_install(
"vllm==0.20.0",
"fastapi",
"openai",
"transformers",
"huggingface_hub[hf_xet]",
"hf_transfer",
)
.run_commands(
"pip install "
"git+https://github.com/deepseek-ai/[email protected] "
"--no-build-isolation"
)
.env({
"HF_XET_HIGH_PERFORMANCE": "1",
})
)
Some of the important components in the above code block:
- We are using the CUDA 12.6 Docker image with Ubuntu 22.04 and Python 3.11. After some retries, this seemed to deploy the application without errors.
- The pip install covers some of the necessary libraries, including PyTorch, Transformers, and the correct vLLM version.
- One of the important components is the
DeepGEMMrequirement. We need the correct version. Even without installing the library, the deployment is successful. However, the application results in an error when making an API call.
Creating the Modal Volume and Serving the Model
The final code block creates a volume and serves the model with the desired parameters.
volume = modal.Volume.from_name(
    "nemotron-cache",
    create_if_missing=True,
)

GPU = "L40S"


@app.function(
    image=image,
    gpu=GPU,
    timeout=60 * 60,
    scaledown_window=300,
    secrets=[modal.Secret.from_name("hf-secret")],
    volumes={
        MODEL_DIR: volume,
    },
)
@modal.concurrent(max_inputs=10)
@modal.web_server(
    port=VLLM_PORT,
    startup_timeout=60 * 45,
)
def serve():
    model_path = (
        f"{MODEL_DIR}/"
        "Nemotron-3-Nano-Omni-30B-A3B-Reasoning-NVFP4"
    )

    if not os.path.exists(model_path):

        subprocess.run(
            [
                "huggingface-cli",
                "download",
                MODEL_NAME,
                "--local-dir",
                model_path,
            ],
            check=True,
        )

        volume.commit()

    cmd = [
        "vllm",
        "serve",
        model_path,

        "--served-model-name",
        MODEL_NAME,

        "--host",
        "0.0.0.0",

        "--port",
        str(VLLM_PORT),

        "--trust-remote-code",

        "--tensor-parallel-size",
        "1",

        "--dtype",
        "auto",

        "--kv-cache-dtype",
        "fp8",

        "--gpu-memory-utilization",
        "0.80",

        "--max-model-len",
        "32768",

        "--max-num-seqs",
        "1",

        "--max-num-batched-tokens",
        "32768",

        "--limit-mm-per-prompt",
        '{"video":1,"image":1,"audio":1}',

        "--allowed-local-media-path",
        "/",

        "--enforce-eager",

        "--reasoning-parser",
        "nemotron_v3",

        "--enable-auto-tool-choice",

        "--tool-call-parser",
        "qwen3_coder",

        "--media-io-kwargs",
        '{"video":{"fps":1,"num_frames":512}}',

        "--video-pruning-rate",
        "0.25",

        "--uvicorn-log-level",
        "info",
    ]

    print("Launching vLLM...")
    print(" ".join(cmd))

    subprocess.Popen(
        cmd,
    )
All the artifacts that we will download will be stored in the nemotron-cache directory. The GPU is NVIDIA L40S with 40GB VRAM. We have defined a scaledown window of 5 minutes. That means, if we do not make any API calls for 5 minutes, the container scales down. This saves cost, and we do not always need to stop the application. However, other resources like the storage might be active for longer, which incurs some cost. Eventually, they scale to 0 as well. Later, we will see how to stop the application entirely.
Furthermore, the concurrent calls are defined as 10 at the moment. This means that the server can accept 10 API calls as ingress. However, there is another vLLM parameter that we need to check to ensure that the application can handle multiple API calls in the same instance. That is the max-num-seqs in the serve method, which is 1 at the moment. This means all the additional API calls to the server will be queued and processed 1 at a time. We do this specifically to handle GPU memory gracefully. Otherwise, we need a GPU with more VRAM.
Some other vLLM parameters to look at:
max-model-len: This is an important one. This defines the total context length, including both input and output tokens. If input + requested generation exceeds the limit, then the application errors out. So, we control a slightly shorter max model length from the frontend UI that we will see later.limit-mm-per-prompt: We are allowing only 1 multimodal input per user chat session (not user turn). That means in consecutive chat histories, we truncate the multimodal inputs from the previous turns. This is also for saving memory.media-io-kwargs: Right now, we are sampling the videos at 1 FPS and a maximum of 512 frames. This should be enough for learning and experimentation.
Finally, we launch the subprorcess. This is all the backend code we need to know for the moment. Let’s deploy the application. Execute the following in the terminal while being in the backend directory.
modal deploy app.py
It will take a few minutes when you deploy for the first time. After the deployment is complete, you will get the endpoint URL in the following format:
https://YOUR-NAME--nemotron-omni-serve.modal.run
In the above, YOUR-NAME is the workspace name. For example, for me, it was debuggercafe. After the two dashes, nemotron-omni is the App name we used in the backend script. The rest is a general Modal URL endpoint format. So, for me, the final endpoint was:
https://debuggercafe--nemotron-omni-serve.modal.run
Next, we can check whether the backend is running or not by hitting /v1/models endpoint. The following is the format:
curl https://YOUR-ENDPOINT/v1/models
For my deployment, it was the following:
curl https://debuggercafe--nemotron-omni-serve.modal.run/v1/models
A successful deployment and request would return the following.
{
  "object": "list",
  "data": [
    {
      "id": "nvidia/Nemotron-3-Nano-Omni-30B-A3B-Reasoning-NVFP4",
      "object": "model",
      "created": 1779756431,
      "owned_by": "vllm",
      "root": "/models/Nemotron-3-Nano-Omni-30B-A3B-Reasoning-NVFP4",
      "parent": null,
      "max_model_len": 32768,
      "permission": [
        {
          "id": "modelperm-93025a1ab8253478",
          "object": "model_permission",
          "created": 1779756431,
          "allow_create_engine": false,
          "allow_sampling": true,
          "allow_logprobs": true,
          "allow_search_indices": false,
          "allow_view": true,
          "allow_fine_tuning": false,
          "organization": "*",
          "group": null,
          "is_blocking": false
        }
      ]
    }
  ]
}
The Frontend Gradio Application
We have the frontend Gradio code in the frontend/app.py script. However, before that, we also have to create a .env file inside the frontend subdirectory and add our Modal deployment URL.
API_BASE_URL=https://YOUR-ENDPOINT/v1
For vLLM, we will use the /v1 endpoint since the server follows OpenAI-compatible API specifications. Replace the above with your own endpoint and save the file inside the frontend directory.
Be careful who you share the endpoint with when your application is actively deployed. As we do not have authentication in place at the moment, anyone with the endpoint URL can make a request, which will incur cost.
Coming to the frontend/app.py, it might seem that a lot is going on here. However, most of it is boilerplate Gradio UI and CSS code. There are a few functions that I would recommend taking a closer look at:
media_type_from_path_or_mimefile_to_data_uribuild_messagebuild_file_partnormalize_content_partsandnormalize_user_content
The above functions contain the logic for building file paths for multimedia input, creating the message history, and normalizing the user messages by stripping the multimedia input from the previous turns. We covered these in the last article, where we built the Nemotron 3 Omni chat application using the NVIDIA API. I highly recommend going through that once to have a better understanding of the above functions.
Executing the Gradio Application
We can run the application by executing the following command inside the frontend directory.
python app.py
Let’s do some light testing here. We will test the model on the following fronts:
- Simple text chat
- Understanding a short video with audio
- Transcribing an audio file
Text chat:
In the above video, we enable thinking mode and ask the model to introduce itself, which it did pretty well. There is not much to analyze here.
Image chat:
Here, we ask the model two questions about the image without the thinking mode enabled. All the answers are correct. We can see quite well how the answers are shorter and more concise without the thinning mode.
Audio chat:
This time, we ask the model to transcribe the above audio. As we enabled thinking mode, it first broke down the audio word by word, then answered.
Video chat:
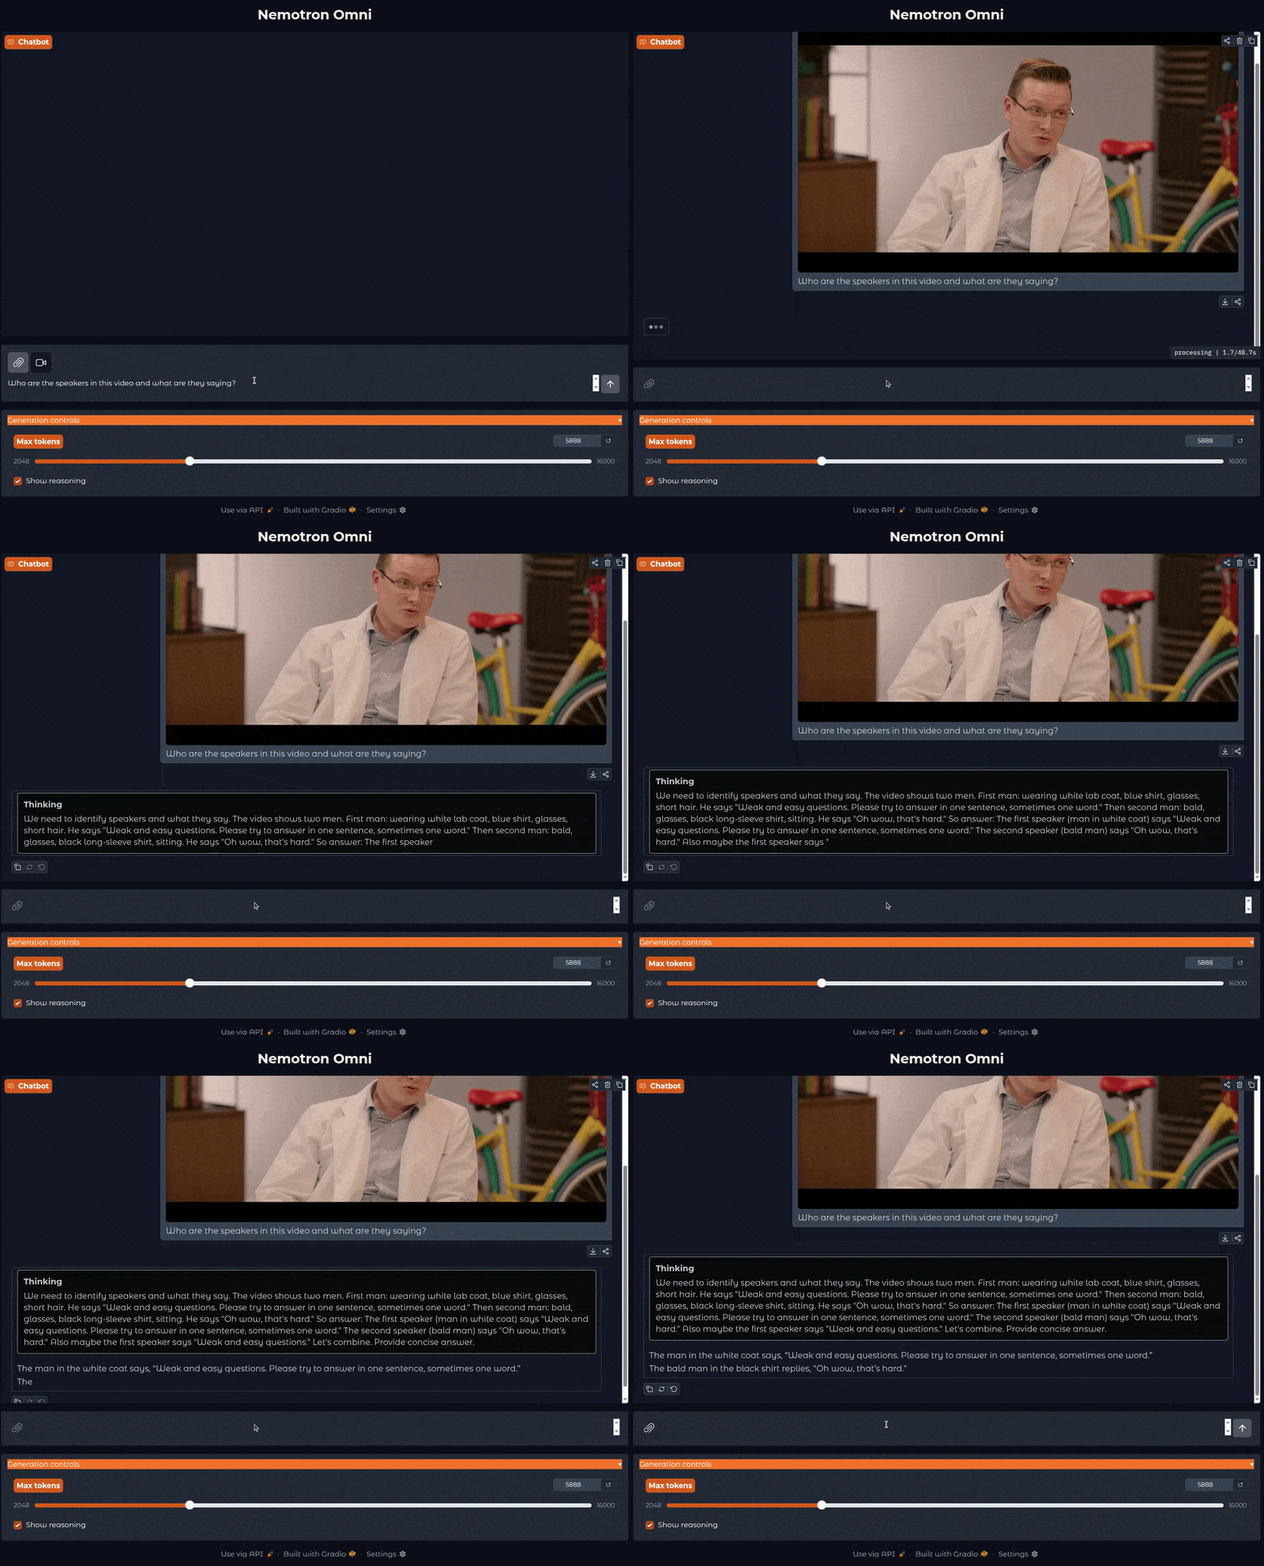
In this case, we have a short clip from YouTube and ask the model to describe the speakers and break down what each person is saying.
The overall interpretation is correct; however, the model made a small mistake in interpreting “quick” as “weak”.
Stopping the Application
To stop the application entirely, go to your application dashboard in your Modal account. It will be under Apps.
Next, go to the Overview tab and click on Stop app.
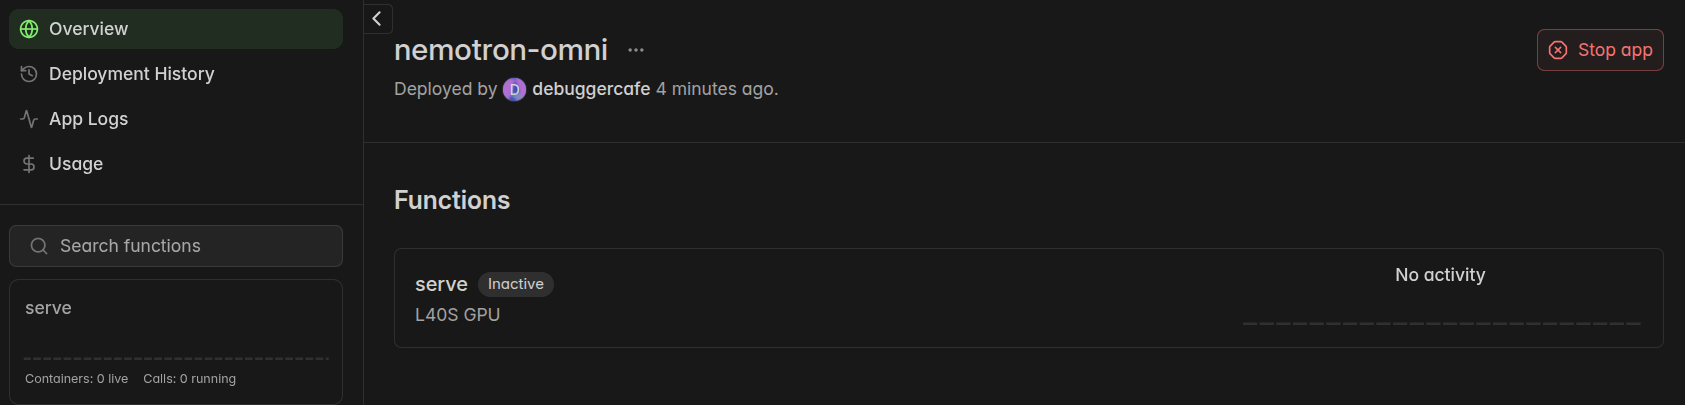
This will stop the application entirely until we deploy it again from the backend script via: modal deploy app.py.
Summary and Conclusion
In this article, we covered the process of deploying the Nemotron 3 Nano Omni model on Modal Serverless. We started with the setup, then covered the backend deployment script, moved to the frontend code, and analyzed a few chat results. In the next article, we will create a full-fledged application built around the model. I hope this article was worth your time.
If you have any questions, thoughts, or suggestions, please leave them in the comment section. I will surely address them.
You can contact me using the Contact section. You can also find me on LinkedIn, and X.


1 thought on “Deploying Nemotron 3 Nano Omni on Modal Serverless”