
In the last article, we built a simple real-time transcription application using RealtimeSTT. This project now evolves into Open Transcribe – a more complete, usable, and streamlined application.
Over the last few days, the focus has been on turning that prototype into something that we can really use without friction. This includes simplifying the setup, reducing boilerplate, and making the entire application runnable with a single command.
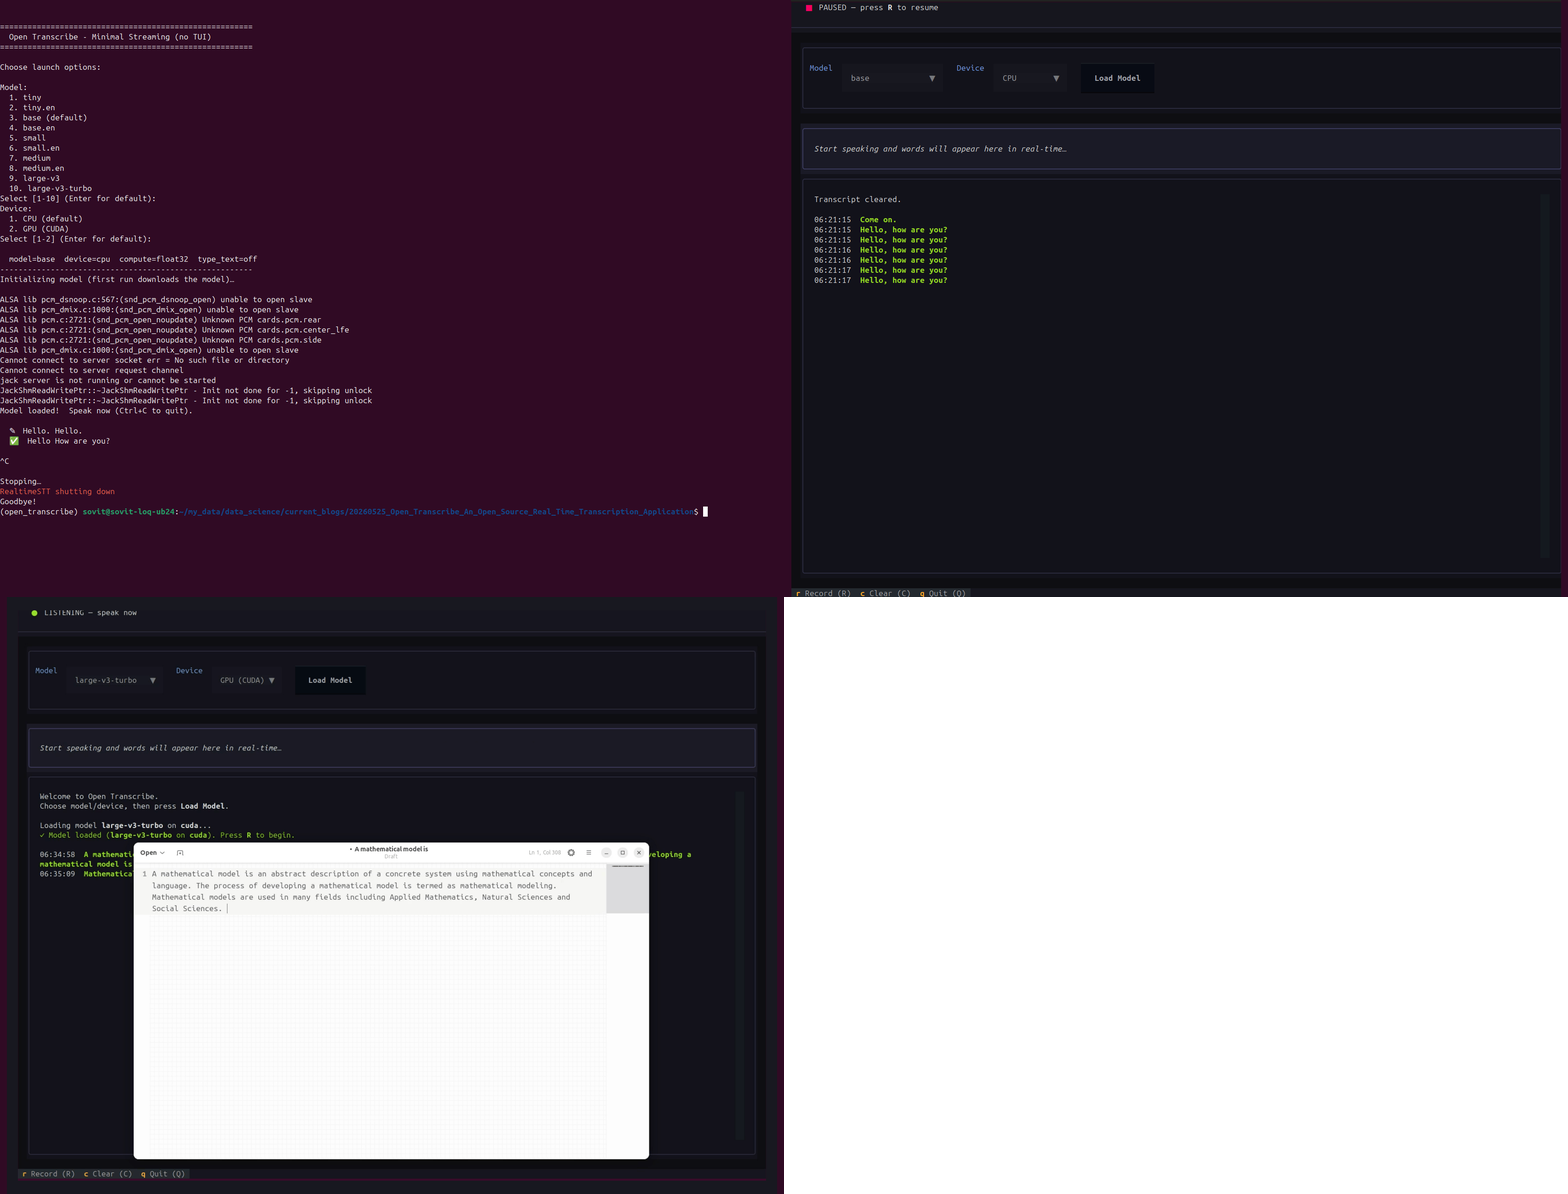
Running open-source real-time transcription applications locally is harder than it should be. There are dependency issues, setup overhead, and executing boilerplate code, or often creating a scaffolding over already present open-source repositories. Open Transcribe reduces all the complexities and brings the functionalities under one roof. The goal is to make a real-time transcription application work as easily as possible locally. That too with a clean interface.
What are we covering in this article?
- What are the updates that we have made to the Open Transcribe project?
- The codebase updates that were made to bring in those changes.
- How to run the application in CLI and TUI (Terminal User Interface) mode?
Note: This is a focused, short update. We won’t dive into every part of the codebase-instead, we’ll highlight the most important changes and demonstrate how to use the application.
What Recent Updates Were Made to Open Transcribe?
A few overhauls were made to the real-time transcription application. Along with renaming it to Open Transcribe, the following updates took place:
- Better cross-platform support: Now running perfectly on Windows, macOS, and Linux.
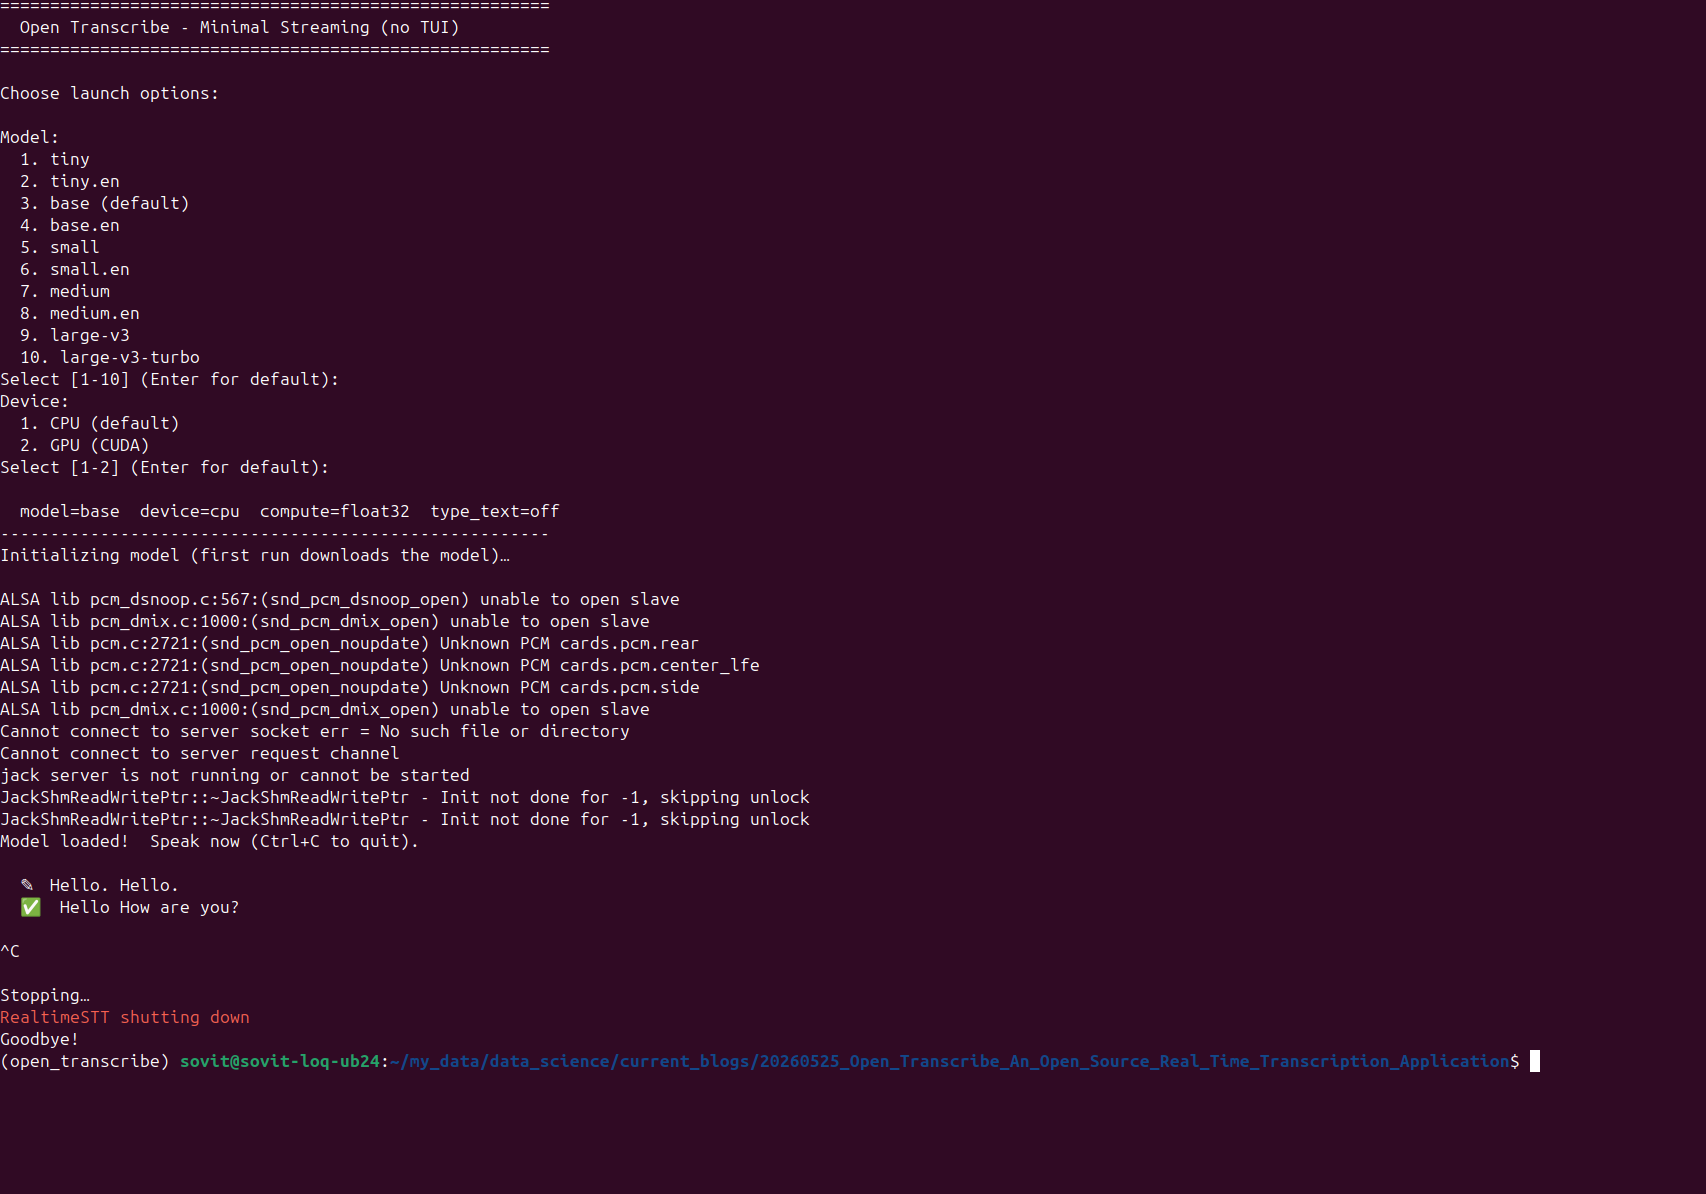
- Model + device selection during application start: Option to choose between all the OpenAI Whisper models and the compute device when starting the application.
- CPU fallback: If GPU is selected while it is not available, then the application correctly falls back to CPU usage.
- A beautiful TUI: A slightly updated and minimal TUI for an interactive experience.
- An optional type-to-cursor mode: An option to type everything being said to whichever screen where the mouse cursor is present (just like WisprFlow).
Project Directory Structure
Let’s check out the project directory structure.
├── examples
│   ├── minimal_streaming.py
│   └── type_to_cursor.py
├── src
│   ├── ui
│   │   ├── app.py
│   │   └── __init__.py
│   ├── audio_stream.py
│   ├── config.py
│   ├── __init__.py
│   ├── main.py
│   └── text_output.py
├── pyproject.toml
├── README.md
└── requirements.txt
- The
examplesandsrcdirectories contain all the example code and logical components of the codebase. - The
examplesdirectory contains standalone CLI-based runnable scripts. These help in easier debugging. - All the UI components are present in
src/uimodule.
As the codebase is evolving quickly, a stable version is provided with this article in the form of a zip file.
Download Code
Setting up and Installing Optional Dependencies
All the installation steps are provided in the README.md file with OS specific instructions. Please refer to the Quick Start section and follow the steps.
If you want to enable and test the type-to-cursor functionality, then uncomment the pyautogui requirement in the requirements.txt file before installation.
# Core Speech-to-Text
# faster-whisper==1.1.1
realtimestt==0.3.104

# Audio Processing
sounddevice==0.4.6
numpy==1.26.4
webrtcvad==2.0.10

# UI & Terminal
textual==0.70.0
rich==13.7.0

# Configuration & Utilities
pydantic==2.5.3
python-dotenv==1.0.0

# Optional: For better performance
ctranslate2>=3.24.0

requests==2.32.5

# Optional: type finalized text to active cursor
pyautogui==0.9.54
This completes all the setup steps necessary to run the application.
Covering the Important Code Snippets of Open Transcribe
In this section, we will cover the important and updated code snippets of Open Transcribe.
We want to mostly cover the updated snippets for the new dropdown in TUI for choosing the model and device. And also the type-to-cursor functionality. There are other minor updates in general as well, which we can ignore for now.
Configuration Management
The heart of Open Transcribe’s flexibility lies in the Config dataclass in src/config.py. This is where we centralized all configurable parameters, making it trivial to switch between models, devices, and features.
@dataclass
class Config:
    """Configuration for Open Transcribe speech-to-text.

    All defaults are battle-tested on Windows/Mac/Linux CPU.
    """

    # Model selection
    model: str = "base"
    language: str = "en"
    device: Literal["cpu", "cuda"] = "cpu"
    compute_type: str = "float32"

    # Realtime STT behaviour
    enable_realtime_transcription: bool = True
    post_speech_silence_duration: float = 1.0  # seconds of silence before finalizing

    # Optional dictation mode: type finalized text at active cursor
    type_text: bool = False
    type_text_append_space: bool = True

    def summary(self) -> str:
        type_text_mode = "on" if self.type_text else "off"
        return (
            f"model={self.model}  device={self.device}  "
            f"compute={self.compute_type}  type_text={type_text_mode}"
        )
This simple but powerful structure lets us pass configuration around the entire application. The summary() method gives users instant feedback about their current setup.
The Audio Streaming Engine
The AudioStream class is where the magic happens. It wraps RealtimeSTT and provides clean callback hooks for real-time and finalized transcription.
class AudioStream:
    """Real-time audio capture => transcription via RealtimeSTT.

    Provides two callback streams:
        on_realtime:  partial text while you are still speaking (streaming)
        on_final:     final confident text after you pause speaking
    """

    def __init__(
        self,
        config: Config,
        on_realtime: Optional[Callable[[str], None]] = None,
        on_final: Optional[Callable[[str], None]] = None,
        on_error: Optional[Callable[[str], None]] = None,
    ):
        self.config = config
        self.on_realtime = on_realtime
        self.on_final = on_final
        self.on_error = on_error
        self.recorder: Optional[AudioToTextRecorder] = None
        self.cursor_typer: Optional[CursorTyper] = None
        self.is_listening = False
        self._thread: Optional[threading.Thread] = None

    def initialize(self) -> None:
        """Create the AudioToTextRecorder.  Heavy (downloads model on first run)."""
        if self.config.type_text and self.cursor_typer is None:
            try:
                self.cursor_typer = CursorTyper(append_space=self.config.type_text_append_space)
            except CursorTyperError as exc:
                raise RuntimeError(str(exc)) from exc

        self.recorder = AudioToTextRecorder(
            model=self.config.model,
            language=self.config.language,
            device=self.config.device,
            compute_type=self.config.compute_type,
            spinner=False,
            enable_realtime_transcription=self.config.enable_realtime_transcription,
            on_realtime_transcription_update=self._handle_realtime,
            post_speech_silence_duration=self.config.post_speech_silence_duration,
            silero_deactivity_detection=True,
        )
We have covered the above class in detail in the last article, where we built an audio transcription application. I highly recommend going through it to understand the internal workings.
Type-to-Cursor Functionality
This is perhaps one of the most useful components of the application – type-to-cursor. We start the application, start speaking, and the final text appears in whichever text window the mouse cursor is active.
The core logic for this stays in src/text_output.py. It uses the pyautogui library for the functionality.
class CursorTyper:
    """Types text into the currently focused application."""

    def __init__(self, append_space: bool = True) -> None:
        self.append_space = append_space
        try:
            import pyautogui  # type: ignore
        except Exception as exc:
            raise CursorTyperError(
                "pyautogui is required for --type-text mode. "
                "Install it with: pip install pyautogui"
            ) from exc

        self._pyautogui = pyautogui

    def type_text(self, text: str) -> None:
        payload = text
        if self.append_space:
            payload = f"{payload} "
        self._pyautogui.typewrite(payload)
The error handling here is intentional. If pyautogui isn’t installed and the user tries to use type-to-cursor mode, they get a clear, actionable error message rather than a cryptic import failure.
The examples/type_to_cursor.py script provides a minimal CLI-based script (without the TUI) to try out the type-to-cursor functionality.
For the main application, type-to-cursor gets activated via main.py using a command-line argument. When we invoke the application with the --type-text flag, the argument parser captures it:
def main() -> None:
    parser = argparse.ArgumentParser(description="Open Transcribe")
    parser.add_argument(
        "--type-text",
        action="store_true",
        help="Type finalized transcription text at the active cursor.",
    )
    args = parser.parse_args()

    config = Config(type_text=args.type_text)
    app = TranscribeApp(config)
    app.run()
The flag gets passed directly into the Config object. This single boolean ripples through the entire application, enabling the type-to-cursor pipeline.
When the TUI initializes the audio stream, the AudioStream.initialize() method checks if type-to-cursor is enabled:
def initialize(self) -> None:
    """Create the AudioToTextRecorder.  Heavy (downloads model on first run)."""
    if self.config.type_text and self.cursor_typer is None:
        try:
            self.cursor_typer = CursorTyper(append_space=self.config.type_text_append_space)
        except CursorTyperError as exc:
            raise RuntimeError(str(exc)) from exc

    self.recorder = AudioToTextRecorder(
        model=self.config.model,
        language=self.config.language,
        device=self.config.device,
        compute_type=self.config.compute_type,
        spinner=False,
        enable_realtime_transcription=self.config.enable_realtime_transcription,
        on_realtime_transcription_update=self._handle_realtime,
        post_speech_silence_duration=self.config.post_speech_silence_duration,
        silero_deactivity_detection=True,
    )
If type_text is True, we instantiate a CursorTyper object. This is a lazy-loading pattern – if we don’t use type-to-cursor mode, pyautogui never gets imported.
Here’s where the actual magic happens. When RealtimeSTT finalizes a transcription (after we pause), the _handle_final method is called:
def _handle_final(self, text: str) -> None:
    if text:
        cleaned_text = text.strip()
        if cleaned_text:
            if self.cursor_typer:
                try:
                    self.cursor_typer.type_text(cleaned_text)
                except Exception as exc:
                    if self.on_error:
                        self.on_error(f"Type-to-cursor failed: {exc}")
            if self.on_final:
                self.on_final(cleaned_text)
Notice the order here. If a cursor_typer exists (which it will if --type-text was passed), the text gets typed into the active window before the callback fires. This means the text appears on screen, and the UI also gets notified so it can update its transcript display.
A Summary of the Worflow for Type-to-Cursor
When you run python main.py --type-text, here’s the complete flow:
- Argument parsing captures
--type-text=>Config(type_text=True) - Audio initialization detects
type_text=True=> createsCursorTyperinstance - We speak => RealtimeSTT captures and streams partial text
- We pause => RealtimeSTT finalizes transcription
_handle_final()fires => checks ifcursor_typerexists- If it does => calls
cursor_typer.type_text(cleaned_text)=> text appears in active window - UI callback also fires => transcript updates in Open Transcribe window
We try to keep the codebase minimal while making the application as useful as possible. Think of it as your personal dictation app that you can run locally using any small or large Whisper model. In fact, any user can run the Whisper V3 Turbo model locally (runs faster on GPU), and they can use the dication + type-to-cursor functionality to a good extent.
With Whisper V3 Turbo + Open Transcribe + type-to-cursor mode, we can:
- Write emails without touching the keyboard
- Draft articles by speaking your thoughts aloud
- Compose messages on the fly
- Take hands-free notes during meetings
Why This Matters
Commercial dictation tools are fantastic. But they cost money and send your voice to servers somewhere. Open Transcribe is free. It runs entirely on your hardware. Your audio never leaves your machine. You own the entire pipeline.
Open Transcribe in Working
In this section, we will focus on the various demos using Open Trancribe and how we can use it.
We have two user interfaces, one TUI and one CLI.
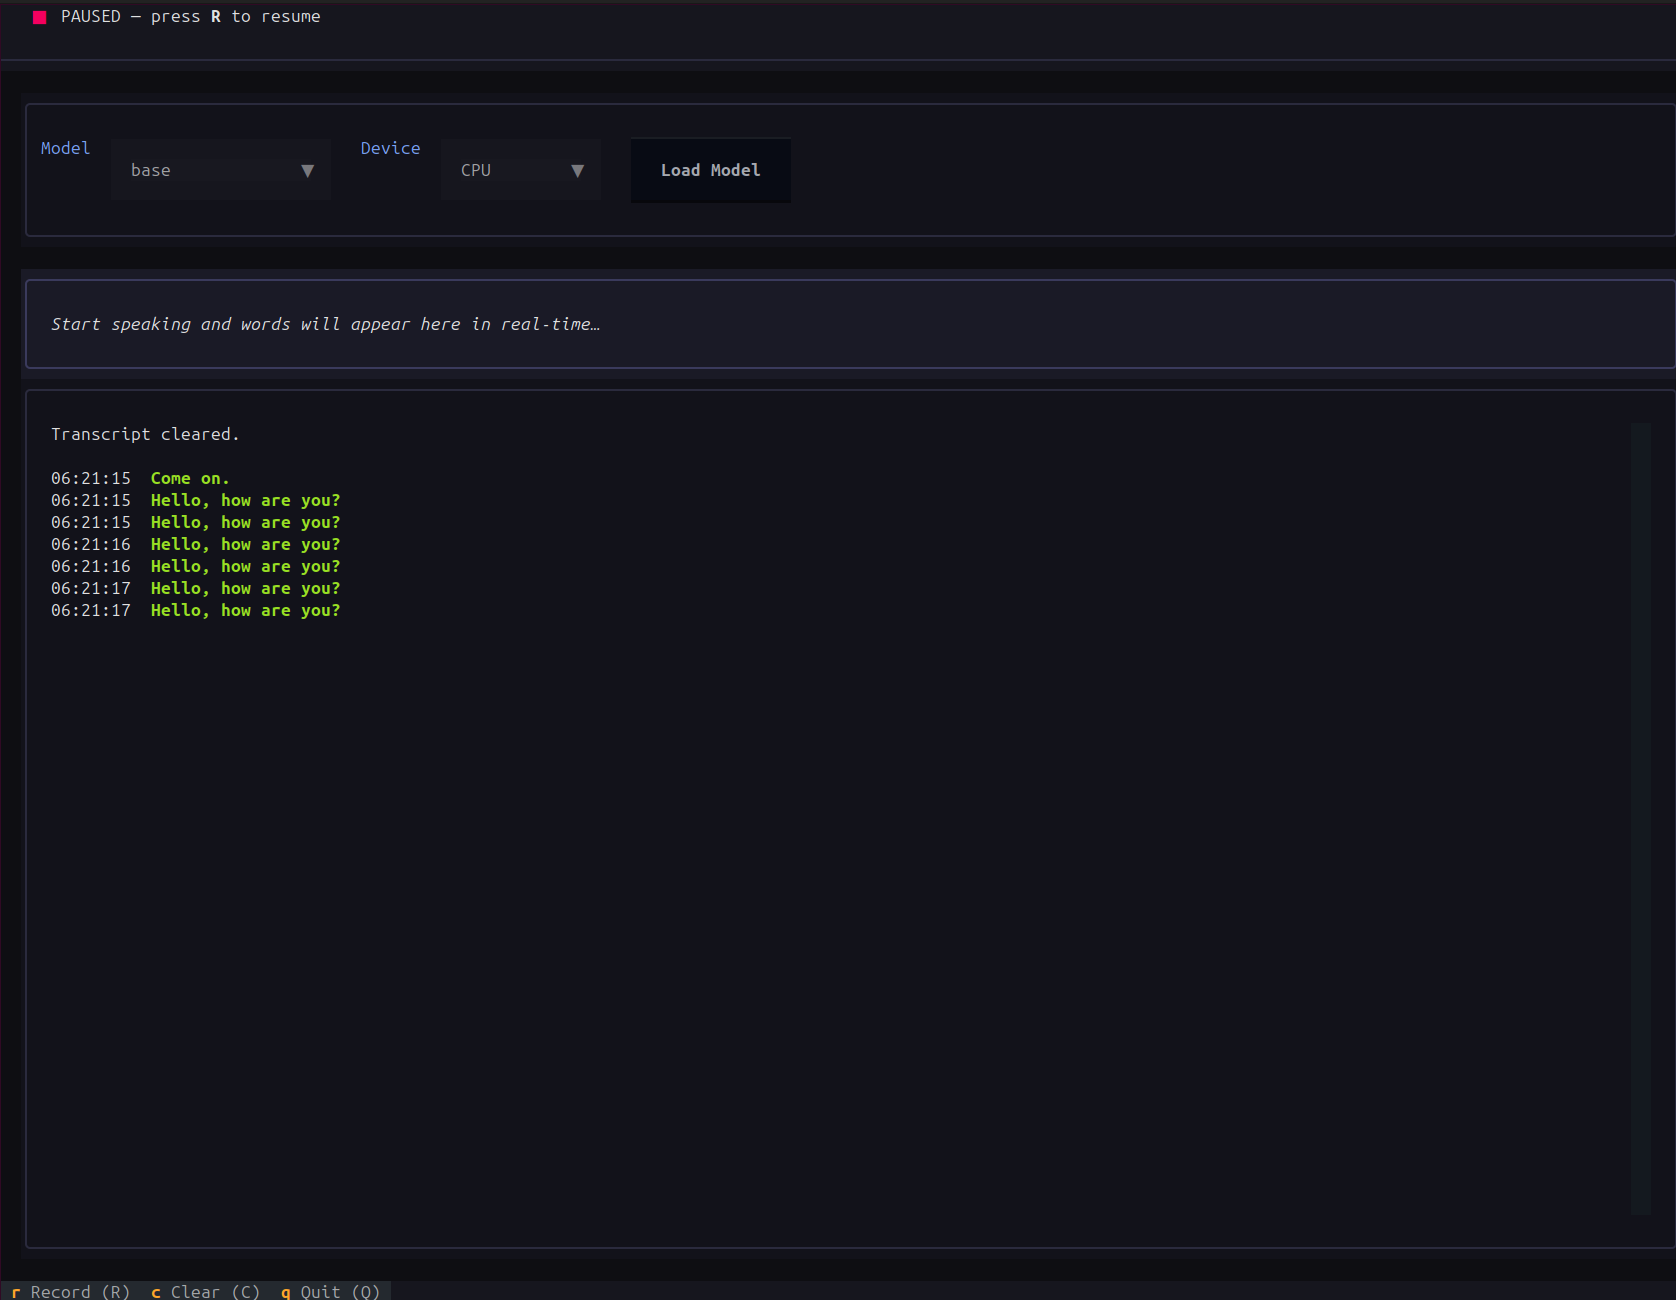
Let’s check the TUI in Open Transcribe working here. We can start the application using the following command.
python src/main.py
After the model gets loaded, we can press R on the keyboard so that the model starts listening to that we are saying.
In the above video, we choose the Whisper Base model and the CPU as the computation device. The base model can run even on the CPU in real-time. We can observe some minor mistakes, as the model is not that powerful.
We can again press R to pause, C to clear all the transcriptions from the TUI, and Q to quit.
Let’s switch to a more powerful model.
Here, we are running the Whisper V3 Turbo model on the GPU. It consumes around 4.2GB VRAM. However, on a laptop with an RTX 5050 GPU, it can easily run in real-time. And as we can see, the transcription is entirely correct.
The next video shows the type-to-cursor functionality. For this, we need pass an additional command line flag.
python src/main.py --type-text
After the model gets loaded, we press R and open a text editor where the cursor is active. As each final transcription is displayed in the TUI, it simultaneously appears in the text editor as well.
We can use the above functionality to draft articles, write emails, or even use it for web search instead of typing everything manually.
If you have a Windows or macOS system, please give it a try as well on that system to see how it performs.
Further Improvements
Of course, we are a long way from making it a full-fledged application; however, it is a good starting point.
As a next course of action, we can fine-tune the Whisper Base model on specific microphone sounds, with fan noise, background noise, low audio scenarios, or where people are whispering. If we can bring it to the quality of Whisper V3 Turbo, then the base model can be run on CPU and WebGPU for real-time transcription, or even on CUDA GPUs for super-fast transcriptions.
Summary and Conclusion
In this article, we introduced a new open-source real-time audio transcription project, Open Transcribe. We discussed what updates were made to the codebase, which models were added, and what functionalities it serves. We will cover more such articles as more updates are made to the project.
If you have any questions, thoughts, or suggestions, please leave them in the comment section. I will surely address them.
You can contact me using the Contact section. You can also find me on LinkedIn, and X.