
In this article, we will take a practical approach to some basic image manipulation and transformation using OpenCV and Python. OpenCV is one of the best computer vision libraries and it is easy to use as well. If you want to become a master in the field of computer vision and deep learning, then OpenCV is one library that you must check out.
So, in this blog post, we will check out some basic image manipulation and transformation techniques. This will help you get started really easily whenever you find a new image dataset for your own project.
Install OpenCV
To follow along with this article, you will need the OpenCV library. If you have it already, then it’s well and good. Else, you can easily install it using pip command.
pip install opencv-python
That’s it. You are all set now to follow along.
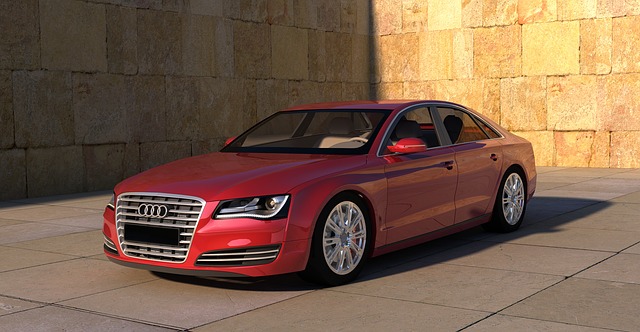
Just one more thing. We will carry out all the image manipulations on one image only. This will keep things really simple to follow. So, you can either choose one image of your choice or download the following image.
Reading and Visualizing Image using OpenCV
Let’s start with very basic stuff. That is reading an image and visualizing it using OpenCV.
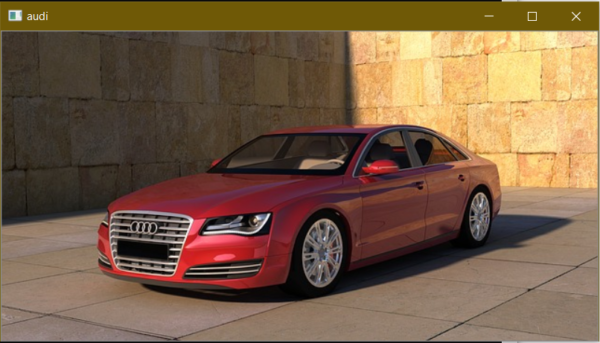
The following is the code for reading and showing an image using OpenCV
import cv2

# read the image
image = cv2.imread('Images/audi-640.jpg')
# show the image on screen
cv2.imshow('audi', image)
cv2.waitKey(0)
So, what does this code do?
First of all, we import cv2. Then we read the image using OpenCV’s imread() method. This method takes the image path as an argument. Here, the path is Images/audi-640.jpg
After that, we use the imshow() method. This method takes two arguments. First one is the window name where the image appears. The second one is the image that we have read using the imread() method.
The final line is the waitKey(0) method. This makes the image window to quit whenever you press any of the keys from the keyboard.
The above code will give the following output image.
Color Formats in OpenCV
When we read and load an image from disk using OpenCV, then by default it follows the BGR (Blue, Green, Red) color format. This is not the standard RGB format that many of us are acquainted with.
The BGR color format does not pose any problem in general. The main problem arises when we try to visualize the image using libraries like Matplotlib.
For example, to visualize the above image using Matplotlib, we write the following code.
import matplotlib.pyplot as plt

plt.imshow(image)
plt.title('BGR Image in Matplotlib')
plt.axis('off')
plt.show()
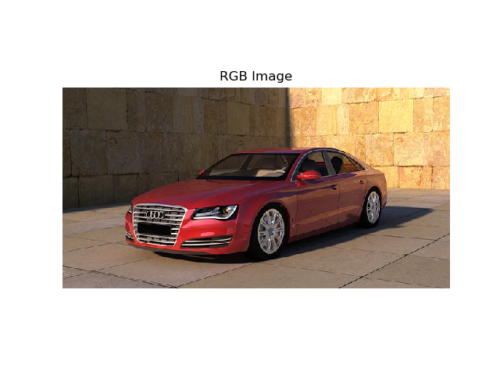
And this is the image that we get.
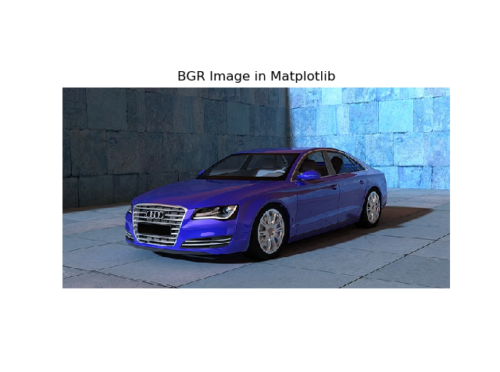
You can see that the color blue is standing out in this image resulting in the loss of the real colors of the image.
Now, let’s see how we can correct it. We can use OpenCV’s cv2.cvtColor() method to convert our BGR image format to RGB. This method changes the default BGR format of OpenCV to RGB format.
The following is the code snippet to change the color format of the image from BGR to RGB.
image_rgb = cv2.cvtColor(image,  cv2.COLOR_BGR2RGB)
plt.imshow(image_rgb)
plt.title('RGB Image')
plt.axis('off')
plt.show()
In the above code, cv2.cvtColor() takes two arguments. One is the original image reference that we have read using OpenCV’s imread() method and the second one is the argument to change the color format. We have used cv2.COLOR_BGR2RGB. There are many other options as well. To know about other color space conversions in OpenCV, you can visit this link.
This is the output image of the above code.
From the above, you should always keep one thing in mind. You need not change the color format if you are not using Matplotlib library to visualize the image.
Resizing Images using OpenCV
In this section, we will learn how to resize an image using OpenCV. First, let’s take a look at the default dimensions of the image that we are using.
After reading the image using imshow() method, the image reference is a NumPy array. Therefore, we only need to use the .shape to know the image dimensions.
print(image.shape)
We get the output as a format of (height, width, channel). For the image that we are using it is (332, 640, 3). So, the image is 332 pixels high, 640 pixels wide and has 3 channels by default. The 3 channels refer to the 3 colors (red, green, blue). If it would have been a grayscale image, then the channels would have been 1 (hues of color gray only).
Sometimes, we will need to reduce the image dimensions by resizing it. When carrying out deep learning training, bigger images can increase the learning time of networks by a huge margin. In that case, resizing the images before feeding them to the neural network model is a good idea.
The following code shows how to resize an image.
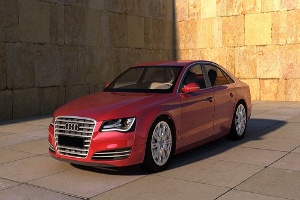
image_resized = cv2.resize(image, (300, 200))
cv2.imshow('audi', image_resized)
cv2.waitKey(0)
print(image_resized.shape)
We use the resize() method, which takes two arguments. The first one is the original image reference. The second one is the new image dimensions in the form of (width, height). When you print the resized image shape, you should get the output as (200, 300, 3).
Now that we have resized the image, we can save the image to the disk. Let’s try doing that. Writing an image to disk is takes just one line of code.
cv2.imwrite('car_image_resized.jpg', image_resized)
We use the imwrite() method which takes two arguments. The first one is the names of the file that you want the image to be saved as. The second one is the image reference in the actual code. In our case they are car_image_resized.jpg and image_resized respectively.
The following the resized image which we have saved to the disk.
Cropping an Image
Sometimes, we may need to crop an image before we can begin to work on it. Basically speaking, cropping an image is actually NumPy array slicing.
To crop an image affectively, we need to keep a few things in mind. The image pixels area in an image starts from the top-left corner. So, when slicing an image, first we give how many pixels from the top we want to slice (along the y-axis). Then we give how much width we want to slice (along the x-axis).
The following code block crops the car image to focus on the headlamps and the logo. Then it also saves the cropped image to disk.
image_cropped = image[150:250, 100:300]
cv2.imshow('Copped Image', image_cropped)
cv2.waitKey(0)
cv2.imwrite('cropped_car_image.jpg', image_cropped)

While cropping an image, there is nothing specific to OpenCV. However, we use OpenCV to visualize and save the image.
Image Translation using OpenCV
Translation of an image is moving or relocating an image or object from one location to another. We can relocate the image in any direction using a transformation matrix. The following is a transformation matrix for translation.
$$
\left[\begin{array}{cccc}
1 & 0 & t_x \\
0 & 1 & t_y \\
\end{array}\right]
$$
In the above matrix:
\(t_x\): the units we want to move the image to move to the right (along the x-direction).
\(t_y\): the units we want to move the image downwards (along the y-direction).
We can use the warpAffine() method in OpenCV to carry out the image translation operation. Let’s write the code first.
import numpy as np

# get the width and height
height, width = image.shape[:2]
# create the translation matrix
tx, ty = width / 4, height / 4
translation_matrix = np.float32([
    [1, 0, tx],
    [0, 1, ty]
])
# apply translation
final_size = (width, height)
image_translated = cv2.warpAffine(
    image, translation_matrix, final_size
)
cv2.imshow('Image Translation', image_translated)
cv2.waitKey(0)
So, first, we get the height and width of the image. Then we create the translation variables tx and ty by dividing the original width and height by 4. This means that we want the image to be translated width / 4 units to the right and height / 4 units to the bottom. After that we create the translation_matrix.
We also assign width and height to final_size variable that we have used in warpAffine() method. This is to imply that we want the final image dimensions to be the same as the original one.
Finally the warpAffine() method takes three arguments. They are the original image we want to translate, the translation matrix, and the final size of the image.
This the image that is saved to the disk
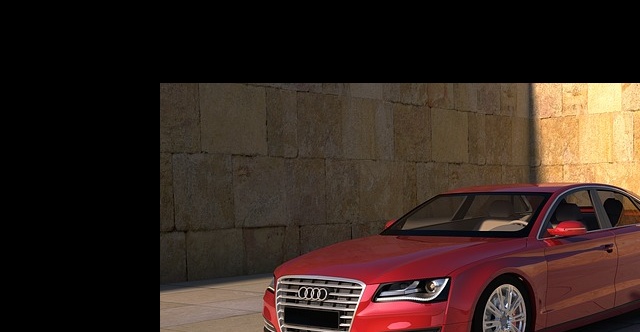
Notice that we get the image size as the original one because of the final_size variable. Also the image gets cropped as we translate the image using the same dimensions as the original one.
Image Rotation using OpenCV
Now, let’s try to rotate an image using OpenCV. And this is going to be just as easy as the previous operations.
First, let’s write the code for rotating an image.
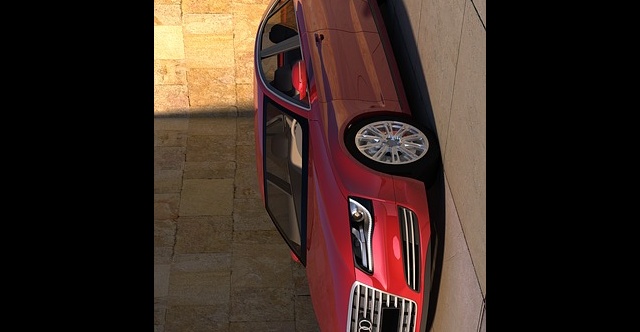
# get the rotation matrix
rotation_matrix = cv2.getRotationMatrix2D(
    (width / 2, height / 2), 90, 1
)
# rotate the image
image_rotated = cv2.warpAffine(
    image, rotation_matrix, (width, height)
)
cv2.imshow('Image Rotation', image_rotated)
cv2.waitKey(0)
cv2.imwrite('rotated_image.jpg', image_rotated)
First, we construct the rotation matrix using getRotationMatrix2D(). The first argument is the center of the image, the second one is the angle by which we want to rotate the image. The final argument 1 implies we want to keep the scale of the image the same as the original one.
Then we use warpAffine() method to rotate the image. The following is the saved rotated image.
Summary and Conclusion
In this article, you saw how to perform image transformations and manipulations using OpenCV. I hope that you found the article useful. Leave your thoughts in the comment section. You can find me on LinkedIn and Twitter as well.
