
In this article, you will get to learn how to carry out image foreground extraction using OpenCV contour detection method. We will use the OpenCV computer vision library along with the contour detection technique for this.
A Bit of Background and Introduction
Foreground extraction is a very popular task in the field of computer vision. Using the method of foreground extraction, we try to extract any image or object that is of interest to us, and discard the rest of the background. Recent deep learning based image segmentation techniques have made this really easier. But we can achieve this using pure computer vision techniques as well.
Grabcut is one of the most popular methods when it comes to computer vision based image foreground extraction. You can find more about foreground extraction using Grabcut in this amazing post by Adrian Rosebrock.
After reading that article, I thought of doing the same, but without using Grabcut. In Grabcut we provide a rectangular area where the object of interest might be present. After that, the Grabcut algorithm handles the rest.
So, how are we going to do that without using the Grabcut algorithm?
Using OpenCV Contour Detection for Image Foreground Extraction
In simple terms, we need to find the area or pixels bounding the object of interest. After that we can treat it as a foreground image and discard the rest of the things as background image.
We can do this by using the contour detection technique. Using contour detection, we can find the pixels surrounding the object that we want to extract and then proceed further. We will see in detail how we can achieve image foreground extraction using OpenCV contour detection further into this article.
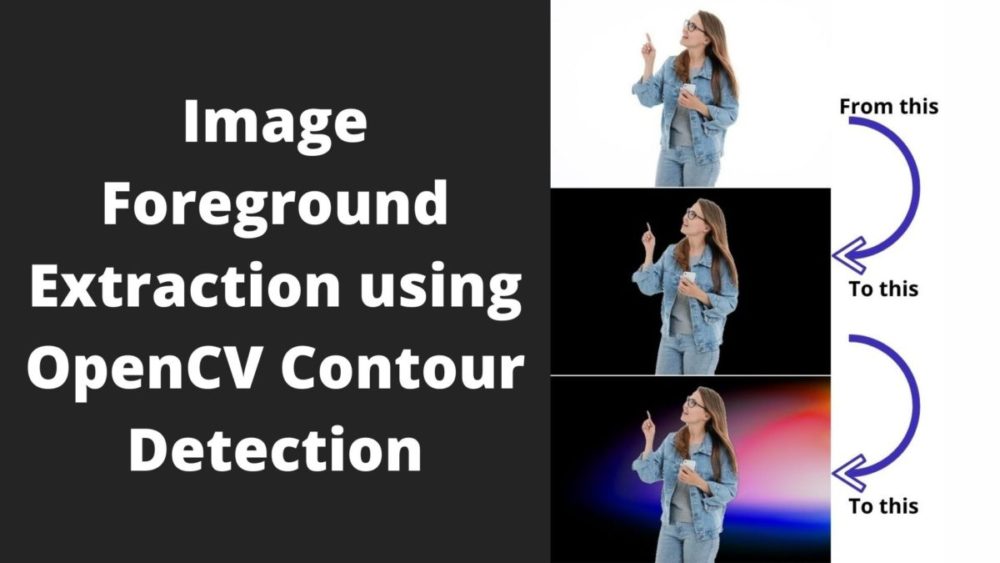
Not only that, we will also try to change the background of the resulting foreground to make things a little bit more interesting. So, you can expect something like the following image.
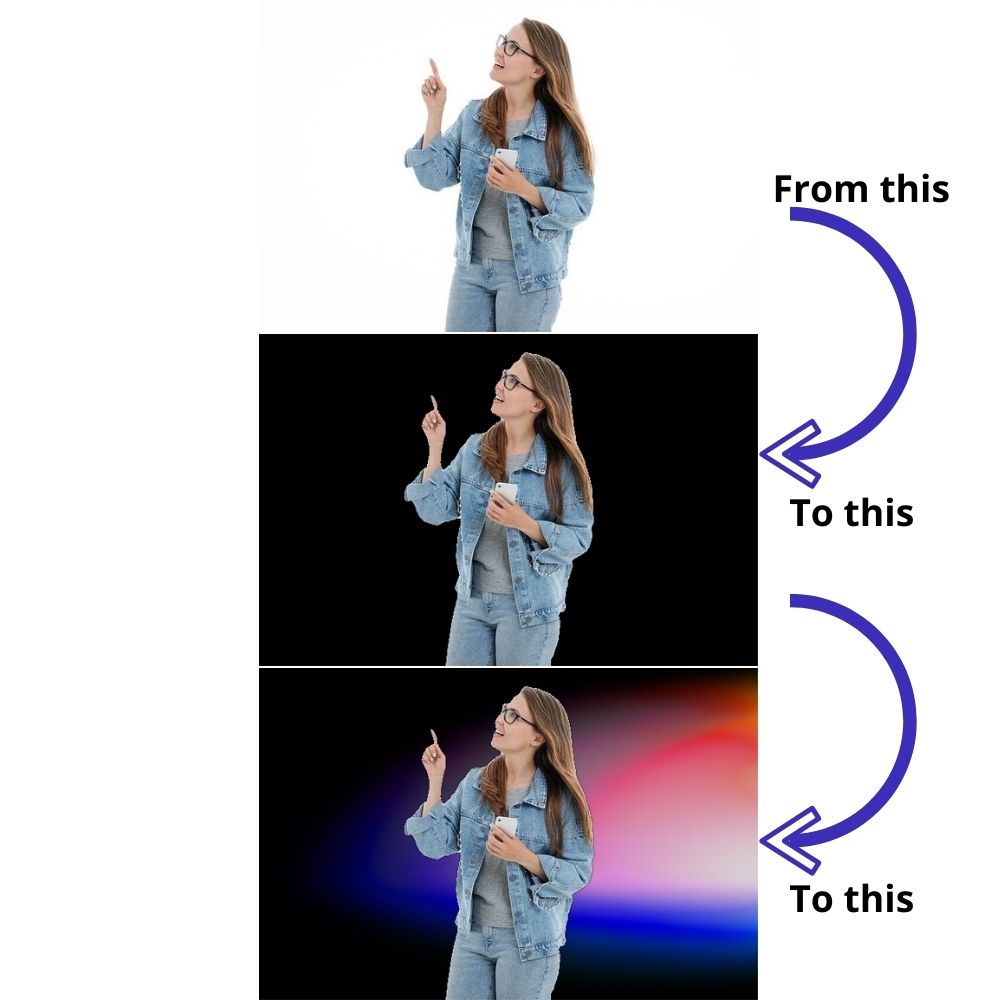
In figure 1, the top image shows the original unedited image which has a white background. Nothing too fancy. The middle image shows the foreground image. That is when we have extracted only the person from the top image. That’s all ok. What you see in the bottom-most image is after we have merged the extracted foreground image with a new colorful background. Now, that is pretty interesting.
I hope that you are interested to follow this article through to the end. Let’s move ahead.
Libraries and Dependencies
For this tutorial, there is just one major library that we need. That is the OpenCV computer vision library.
I have used version 4.2.0.32. Although I recommend using the same version that I am using, still you should not be facing any issues if using any 4.x versions.
Sometimes, the very recent versions of opencv-python have issues with the imshow() function. At least, I have faced some errors regarding the same a few times. If you are using any of the newer versions and face issues, then try installing version 4.2.0.32 and you will be able to proceed smoothly.
Directory Structure
We will be using the following directory structure for this tutorial.
│   extract_foreground.py
│   utils.py
│
├───input
│       background.jpg
│       image_1.jpg
│       image_2.jpg
│       image_3.jpg
│
├───outputs
│       ...
- Directly inside the parent project directory, we have two Python files,
extract_foreground.pyandutils.py. - The input folder contains the input images that we will be using in this tutorial. There are four images in total.
- And finally, the
outputsfolder will contain the output images after we run our Python scripts.
Coming to the input images, you can download them by clicking the button below.
After downloading, just unzip the file inside your project directory and you are good to go. All the images are taken from Pixabay and are free to use.
We have everything set up now. From the next section onward, we will move into the coding part of this tutorial.
Image Foreground Extraction using OpenCV Contour Detection
From here onward, we will get into the details of the two Python files while writing the code for them.
We will start with the utils.py Python script and then move into the main extract_foreground.py file.
Utility Functions for Image Foreground Extraction using OpenCV Contour Detection
All the code here will go into the utils.py file. This Python file contains a few utility functions that we can execute when required. We are keeping these functions separate so that our code remains as clean and readable as possible.
The following code block contains the two imports that we need for the utility functions.
import cv2
import numpy as np
We only need the cv2 and numpy module.
Function to Find the Largest Contour
The very first function that we will write is to find the largest contour area in an image.
The find_largest_contour() function accepts a binary image, finds all the contours in the image, and returns the largest contour area.
The following code block contains the function definition.
def find_largest_contour(image):
    """
    This function finds all the contours in an image and return the largest
    contour area.
    :param image: a binary image
    """
    image = image.astype(np.uint8)
    contours, hierarchy = cv2.findContours(
        image,
        cv2.RETR_TREE,
        cv2.CHAIN_APPROX_SIMPLE
    )
    largest_contour = max(contours, key=cv2.contourArea)
    return largest_contour
- The
imageparameter in the above function is a binary image containing only black and white pixels (either 0 or 1). - At line 10, we find all the contours in the image.
- Line 15 finds the largest contour among all the contours that are calculated. We can easily do this by using the
max()function and by providing thecontoursas an iterable andcv2.contourAreaas the key. Finally, we return thelargest_contour.
Function to Show OpenCV Images
We may require to visualize the images many times in the extract_foreground.py file. Instead of executing the OpenCV’s imshow() and waitKey() several times, we can define a function instead that will handle the visualizations with only one line of code.
def show(name, image):
    """
    A simple function to visualize OpenCV images on screen.
    :param name: a string signifying the imshow() window name
    :param image: NumPy image to show
    """
    cv2.imshow(name, image)
    cv2.waitKey(0)
Whenever we want to visualize an image, we will call the show() function while passing the window name string and the image array as arguments. At least, it will reduce one line of code each time.
Function to Apply New Background to the Extracted Foreground Image
Now, you have seen in figure 1 how we can add a new background to the extracted foreground image. We may not want to do that with every foreground image. Therefore, we will write a function for that. And we will call the function whenever we want to apply the new background to the extracted foreground image.
def apply_new_background(mask3d, foreground, save_name):
    """
    This function applies a new background to the extracted foreground image
    if `--new-background` flag is `True` while executing the file.
    :param mask3d: mask3d mask containing the foreground binary pixels
    :param foreground: mask containg the extracted foreground image
    :param save_name: name of the input image file
    """
    # normalization of mask3d mask, keeping values between 0 and 1
    mask3d = mask3d / 255.0
    # get the scaled product by multiplying
    foreground = cv2.multiply(mask3d, foreground)
    # read the new background image
    background = cv2.imread('input/background.jpg')
    # resize it according to the foreground image
    background = cv2.resize(background, (foreground.shape[1], foreground.shape[0]))
    background = background.astype(np.float)
    # get the scaled product by multiplying
    background = cv2.multiply(1.0 - mask3d, background)
    # add the foreground and new background image
    new_image = cv2.add(foreground, background)
    show('New image', new_image.astype(np.uint8))
    cv2.imwrite(f"outputs/{save_name}_new_background.jpg", new_image)
The apply_new_background() function accepts three parameters. One is mask3d, that is the foreground image mask. The foreground parameter is the extracted foreground object in RGB format. And the save_name is string using which we will save the new image to the disk.
- The first steps are to normalize
mask3dand get the scaled image ofmask3dandforegroundusingcv2.multiply(lines 34 and 36). - Then we read the background image, resize it to match the shape of the foreground image, and convert its data type for further operations.
- At line 43, we again use
cv2.multiplyto get the scaled product for1 - mask3dand newbackground. - Then we get the new image with the background by adding the foreground and background image.
- At last, we show the image on the screen and save it to disk.
We have completed all the utility functions that we need. We can now move ahead to write the code for image foreground extraction using OpenCV contour detection.
Code For Image Foreground Extraction using OpenCV Contour Detection
Moving further, we will write the code in the extract_foreground.py file. This Python file will contain all the code that we need to extract the foreground image/object using OpenCV contour detection method.
Let’s start with importing all the modules and libraries that we need.
import numpy as np
import cv2
import argparse

from utils import show, apply_new_background, find_largest_contour
We are importing all the functions from utils.py which we covered in the previous section.
Now, let’s define the argument parser to parse the command line arguments.
# define the argument parser
parser = argparse.ArgumentParser()
parser.add_argument('-i', '--input', help='path to the input image',
                    required=True)
parser.add_argument('-n', '--new-background', dest='new_background',
                    action='store_true')
args = vars(parser.parse_args())
There are two flags in the above code block.
--inputis for the path of the input image file that we will provide while executing the code.--new-backgrounddetermines whether to apply the new background image to the extracted foreground or not. Be default, it stores the value asFalse. While executing the code, if we pass-nor--new-backgroundthen only we will call the function to apply the new background to the extracted foreground image.
Reading the Image and Converting to Binary Image
Now, we will read the image that we want to extract the foreground object from. We will also apply thresholding to convert it into a binary image containing only black and white pixels.
image = cv2.imread(args['input'])
show('Input image', image)
# blur the image to smmooth out the edges a bit, also reduces a bit of noise
blurred = cv2.GaussianBlur(image, (5, 5), 0)
# convert the image to grayscale
gray = cv2.cvtColor(blurred, cv2.COLOR_BGR2GRAY)
# apply thresholding to conver the image to binary format
# after this operation all the pixels below 200 value will be 0...
# and all th pixels above 200 will be 255
ret, gray = cv2.threshold(gray, 200 , 255, cv2.CHAIN_APPROX_NONE)
After reading the image, we are applying Gaussian blurring to smoothen out the edges. This also removes very minor noise in the background. Then we convert the image to grayscale format and apply the thresholding for converting it to binary image.
Find the Largest Contour Area
As we have converted the image to binary format, we can easily find all the contours in the image.
# find the largest contour area in the image
contour = find_largest_contour(gray)
image_contour = np.copy(image)
cv2.drawContours(image_contour, [contour], 0, (0, 255, 0), 2, cv2.LINE_AA, maxLevel=1)
show('Contour', image_contour)
We call the find_largest_contour() at line 24 while passing the binary image as the argument. The function returns the largest contour area. Then we create a copy of the original image and apply that contour area on the image. We mark all the pixels with green color to visualize the contour area perfectly. We will get to see the output of this while executing the code.
Creating a Mask and Marking the Sure and Probable Pixels
To do any further operations, we first have to create a new mask (a black background). This will have the same size as the grayscale image. As we have not resized the image yet, this means that this mask will be the same size as the original image.
Let’s see the code for the next few operations and then get to the explanation part.
# create a black `mask` the same size as the original grayscale image
mask = np.zeros_like(gray)
# fill the new mask with the shape of the largest contour
# all the pixels inside that area will be white
cv2.fillPoly(mask, [contour], 255)

# create a copy of the current mask
res_mask = np.copy(mask)
res_mask[mask == 0] = cv2.GC_BGD # obvious background pixels
res_mask[mask == 255] = cv2.GC_PR_BGD # probable background pixels
res_mask[mask == 255] = cv2.GC_FGD # obvious foreground pixels
- First, we create the above-discussed mask at line 29.
- At line 32, we fill an area on the created mask with white pixels whose shape is going to be the same as that of the largest contour that we have obtained till now. For example, if the largest contour area is of a person, then we create that shape on the new mask and fill that area with white pixels.
- The next few lines are important. Line 35 creates a copy of the
maskso as to not to edit the original mask. - While creating the new mask, we had all the pixel values as zero. This means that the mask was all black. Then we filled it with a white-colored contour shape marking all the pixels as 255. This means that we know for sure that all the black pixels make up the background and all the white pixels make up the foreground or the object.
- So, at line 36, we say that whichever pixels have a value of 0 are surely background pixels. This we do using
cv2.GC_BGD. - Line 37 says that whichever pixels have a value of 255 are probably foreground. We do this using
cv2.GC_PR_BGD. - But as all pixels are either 0 or 255, we know for sure that pixels with a value of 255 are surely foreground. So, we mark the obvious foreground as well at line 38 using
cv2.GC_FGD.
This is very important that we do the above steps, else, none of the future processing on the new mask will work correctly.
Creating a Final Mask with the Known Foreground and Background Pixels
By now, we know which pixels are surely background, which pixels are probably foreground, and which pixels are surely foreground. Using this knowledge, we will create a final binary mask.
The following code block contains the code for that.
# create a mask for obvious and probable foreground pixels
# all the obvious foreground pixels will be white and...
# ... all the probable foreground pixels will be black
mask2 = np.where(
    (res_mask == cv2.GC_FGD) | (res_mask == cv2.GC_PR_FGD),
    255,
    0
).astype('uint8')
In the res_mask, we have already marked the obvious and probable foreground pixels. So, while creating the new mask2, whichever pixels are surely foreground in res_mask are filled with a value of 255. And whichever pixels are probable foreground in res_mask are filled with a value of 0 in mask2. In the end, we convert the whole new mask2 into a 8-bit unsigned integer format. Finally, the above steps give us a binary mask (2-dimensional) with all the pixels as either black or white.
Currently, it might be a bit difficult to imagine everything. Everything will be clear while executing the code.
Making the Mask 3-Dimensional and Getting the Final Foreground Image
Currently, mask2 is binary and 2-dimensional as well. But if we want to use it for any operations in the future along with a colored image (3-dimensional), then we will not able to do it in its current form. Therefore, we will create a final mask out of mask2 which will be 3D.
# create `new_mask3d` from `mask2` but with 3 dimensions instead of 2
new_mask3d = np.repeat(mask2[:, :, np.newaxis], 3, axis=2)
mask3d = new_mask3d
mask3d[new_mask3d > 0] = 255.0
mask3d[mask3d > 255] = 255.0
# apply Gaussian blurring to smoothen out the edges a bit
# `mask3d` is the final foreground mask (not extracted foreground image)
mask3d = cv2.GaussianBlur(mask3d, (5, 5), 0)
show('Foreground mask', mask3d)
Using mask2, we create a new_mask3d with an added dimension at the end to replicate a 3D image. Then the mask3d becomes our final mask on which we do the pixel-wise operations at lines 50 and 51. At line 54, we are applying Gaussian blurring to the final 3D mask to make the edges a bit smoother.
Now, let’s get the final foreground image.
# create the foreground image by zeroing out the pixels where `mask2`...
# ... has black pixels
foreground = np.copy(image).astype(float)
foreground[mask2 == 0] = 0
show('Foreground', foreground.astype(np.uint8))
At line 58, we create a copy of the original image and save it as foreground. Then whichever pixels in mask2 are zero, we make them zero in the foreground as well. They are the background pixels which we don’t need. This we are doing at line 59. And we have our final foreground image. This means that we have successfully carried out image foreground extraction using OpenCV contour detection.
There are just a few steps left. First is saving all foreground image, the final 3D mask, and the image with the detected contour.
# save the images to disk
save_name = args['input'].split('/')[-1].split('.')[0]
cv2.imwrite(f"outputs/{save_name}_foreground.png", foreground)
cv2.imwrite(f"outputs/{save_name}_foreground_mask.png", mask3d)
cv2.imwrite(f"outputs/{save_name}_contour.png", image_contour)
If you remember, we discussed applying a new background to the foreground image if the --new-background flag is True. As we have already written the function for that in utils.py, that is just two lines of code for us now.
# the `--new-background` flag is `True`, then apply the new background...
# ... to the extracted foreground image
if args['new_background']:
    apply_new_background(mask3d, foreground, save_name)
This marks the end of coding for foreground extraction using OpenCV contour detection. The next step is executing the code and analyzing the outputs.
Executing the Code and Analyzing the Outputs
Now, its time to see what results we will get after executing the code.
I hope that you have already downloaded the input images. We will start with image_3.jpg inside the input folder.
python extract_foreground.py --input input/image_3.jpg --new-background
Let’s take a look at the results.

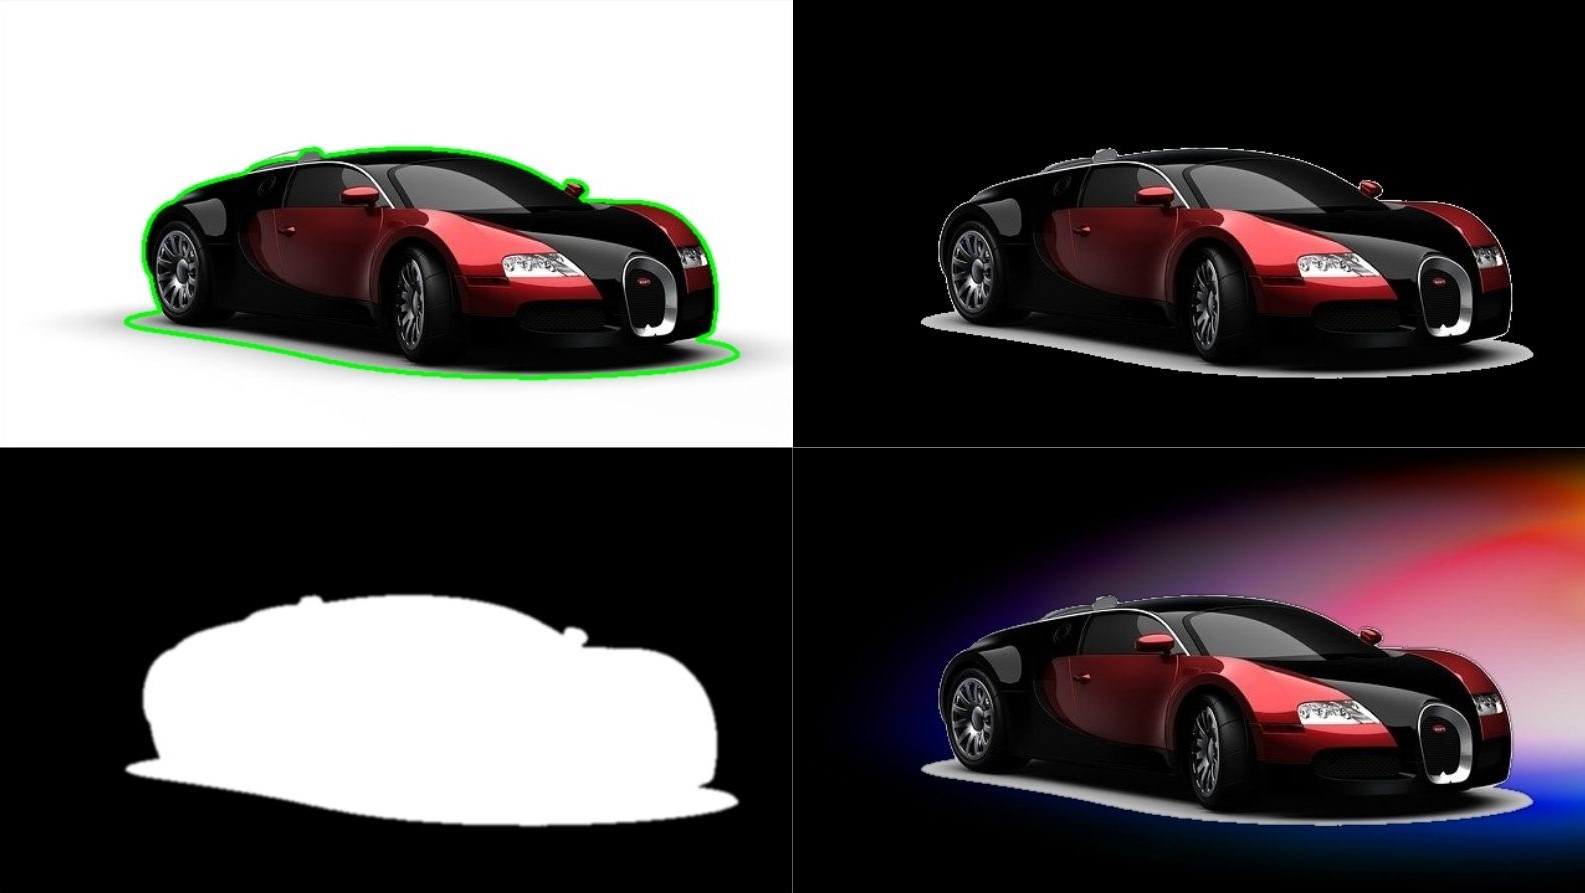
What you see in figure 2 are all the results for image_3.jpg that are saved to the disk after running the script. The top-left image shows the image after drawing the largest contour on the image. We can see that the contour is *almost* perfect except for the spectacles. This also means that further results will be affected as well. The top-right image shows the extracted foreground image on top of a black background and we can clearly see the missing part of the spectacles. The bottom-right image shows the final 3D mask. The mask is a bit blurry as we have applied Gaussian blurring to it. This will help in better blending when we merge it with a new background. That we can see in the bottom-right image. With the new background, the image looks a lot better, still, the corner of the spectacles are missing.
The above results are not perfect but are really good for starting out and using such a simple method. But this simple contour detection method has its drawbacks as well. Let’s check that with image_1.jpg.
python extract_foreground.py --input input/image_1.jpg --new-background
We can clearly see the limitations of the our method in figure 3. While detecting the contour, the algorithm is also considering the shadow of the car as a part of the object. This we are getting while drawing the largest contour that we can see in the top-left image. As further results depend on this contour detection step only, everything has the shadow as part of the object. Still, the car looks good with the new background.
Some Takeaways
We got to know the limitations of image foreground extraction using OpenCV contour detection in the previous step. But there are a few ways to overcome this as well.
- Using a good edge detection technique before applying contour detection.
- Using the Grabcut algorithm and following the steps as expected for image foreground extraction.
- We can use deep learning segmentation techniques to extract the objects of choice.
Hopefully, we will get into the above topics in detail in future articles.
Summary and Conclusion
In this tutorial, you got to learn to carry out image foreground extraction using OpenCV and the contour detection technique. We saw how effective the technique is and also saw the limitations. I hope that you learned something new from this tutorial.
If you have any doubts, thoughts, or suggestions, then please leave them in the comment section. I will surely address them.
You can contact me using the Contact section. You can also find me on LinkedIn, and X.

just a comment/question. Still trying to figure things out myself, but your above line 37. Should that say gc_pr_fgd? since at 255 its probably foreground
Hello Ken. Thanks for pointing that out. I will check out the code and get back.
After executing the code, the result image does not come out, but only this code “show(‘Input image’, image)” comes out, and then it does not so sure the program is still running or not.
It does normal to finish the program or is it my program is wrong?
Hi Angret. Do you mean that the images output OpenCV windows do not pop up or the images are not saved to the disk? If the images are not getting saved to the disk, then please create an `outputs` folder and then run the code. The result will be saved to the disk.
My question is:
After executing the code, Why does not all the results images show and save it in the path even though i follow the code of the above??
Hello Margret. Sorry for the inconvenience. Actually, you will need to create the `outputs` directory and then the images will be saved in that directory. I forgot to add that in the code or mention that in the post. Will update it soon.