

When learning about a new deep learning library/tool, getting hold of its training pipeline is quite important. Knowing how to train a deep learning model using the toolbox can become useful when trying to solve a new problem in the domain. It is more so when the toolbox/library deals with object detection. Writing a deep learning training pipeline from scratch can be very difficult. So, using existing tools becomes a relevant skill. For that reason, in this tutorial, we will see how to get started with object detection training using MMDetection.
MMDetection is a great tool for deep learning based object detection. It provides a lot of pretrained models (literally in hundreds). We can either use them for inference right out of the box or fine-tune them on our own datasets. But when learning about the MMDetection toolbox, getting around training deep learning models can become a bit tricky. So, in this tutorial, we will cover all the basics of using MMDetection for training and fine-tuning an object detection model.
This is the third post in the Getting Started with MMDetection for Object Detection series.
- Install MMDetection on Ubuntu and Windows for RTX and GTX GPUs
- Image and Video Inference using MMDetection
- Getting Started with MMDetection Training for Object Detection.
If you are new to the series, going through the previous posts will really help you. In fact, going through the inference post will help you get a good idea of the structure of the files and folders of the MMDetection repository.
Topics to Cover
- First, we will clone the MMDetection repository. This is quite important as we will be dealing with its model configuration files.
- Then we will download the Pascal VOC 2007 dataset and extract it. We will check out the reasons for choosing this dataset in the respective section.
- After that, we will download the model weights that we want to fine-tune. Specifically, we will use the Faster RCNN ResNet50 FPN model which has been pretrained on the COCO dataset.
- Next, we will set the model and training configuration which are mandatory steps before we start the training of the model.
- After the training completes, we will also carry out inference on videos using the trained model. This will help us validate that our model is indeed working as expected.
Note: This is a beginner-friendly post to learn about training object detection models using MMDetection. We will hardcode a few things as well. We will deal with more models and custom datasets in the next tutorial.
With this, let’s start the technical part of this tutorial.
Directory Structure
The following is the project directory structure that we will follow in this tutorial.
├── checkpoints
│   └── faster_rcnn_r50_fpn_1x_coco_20200130-047c8118.pth
├── data
│   └── VOCdevkit
├── inference_data
│   ├── video_1.mp4
│   └── video_2.mp4
├── mmdetection
│   ├── configs
│   ├── demo
│   ├── docker
│   ├── docs
│   ├── mmdet
│   ├── requirements
│   ├── resources
│   ├── tests
│   ├── tools
│   ├── CITATION.cff
│   ├── LICENSE
│   ├── MANIFEST.in
│   ├── model-index.yml
│   ├── pytest.ini
│   ├── README.md
│   ├── README_zh-CN.md
│   ├── requirements.txt
│   ├── setup.cfg
│   └── setup.py
├── outputs
│   ├── faster_rcnn_r50_fpn_1x_coco_fine_tune
│   ├── video_1.mp4
│   └── video_2.mp4
├── cfg.py
├── download_weights.py
├── inference_video.py
├── README.md
├── train.py
└── weights.txt
- The
checkpointsdirectory contains the pretrained Faster RCNN model from MMDetection that we will use for fine-tuning and training. - The
datadirectory contains the Pascal VOC 2007 dataset. Later on, we will see how to download this dataset. - After that, we have the
inference_datadirectory. This contains two videos that we will use for inference after training the model. - Next, we have the
mmdetectiondirectory/repository that we need to clone to get access to the model configuration files. - The
ouptutsdirectory contains two things. The training outputs are in the subdirectories according to the model that we train. And the video inference outputs. - Directly inside the parent project directory, we have:
- Four Python scripts that we need for preparing the model, training, and inference. We will get down to these in the coding section.
- A
weights.txtcontaining almost all the URLs to download the pretrained weights from MMDetection. - A
README.mdcontaining the steps to execute the training and also the credits for the videos that we use for inference.
When downloading the zip file for this tutorial, you will get access to almost all the files and folders in the proper structure. The only things that they will not contain are the Pascal VOC 2007 dataset to decrease the size and the mmdetection repository as it is always better to clone a GitHub repo on your own. We will get down to these steps in a while.
Prerequisites
It is important to note that you will need MMCV and MMDetection installed on your system. If you need to set up these two, then please follow the first tutorial in this series.
MMDetection Training for Object Detection
Without any further delay, let’s get on to the coding part of the tutorial. We will go through each of the steps serially. Along with that, we will also dive into the explanation wherever necessary.
Download Code
Clone the MMDetection Repository
In the previous section, we saw that the project directory also contains the mmdetection repository/folder. We will need that to access all the model configuration files. So, let’s clone the repository first. Inside the project directory, open your terminal and execute the following command.
git clone https://github.com/open-mmlab/mmdetection.git
We can see the mmdetection folder in the directory after that. You may also explore the directory structure before moving forward. You will find all the model configuration files in the mmdetection/configs directory.
The Pascal VOC 2007 Dataset
In this tutorial, we will use the Pascal VOC dataset for fine-tuning the Faster RCNN ResNet50 FPN model.
Okay! First, let’s answer answer “why this dataset?”
MMDetection already supports the training of the object detection models in most of the benchmark dataset formats. This includes the COCO detection format (JSON annotations), the Pascal VOC detection format (XML annotations), and the Kitti dataset format among others.
As we are just starting to learn about custom object detection training using MMDetection, we will keep things simple. Instead of using the entire Pascal VOC (2007 + 2012) dataset, we will use the 2007 detection dataset only.
So, how will this help us? Though we will have to configure a few things for the dataset, we will not need to write any custom classes. So, things will be easier in the dataset configuration part and we can focus on starting the object detection training pipeline more. And in the next post, we can see how to use our own custom datasets for training detection models.
Although one thing to note here is that the Faster RCNN ResNet50 FPN model has already been trained on the COCO dataset which contains 80 classes. We can easily say that the 20 classes from the Pascal VOC dataset are subsets of the COCO dataset. So, with fine-tuning, the model should give pretty good resulsts and it will be easier for the model to learn as well. And as our focus here is learning about the detection pipeline, we do not need to focus much on the model optimization for the dataset.
Download the Dataset
If you are on Ubuntu OS, you can easily download the training and test dataset by executing the following commands in the terminal.
wget http://host.robots.ox.ac.uk/pascal/VOC/voc2007/VOCtrainval_06-Nov-2007.tar
wget http://host.robots.ox.ac.uk/pascal/VOC/voc2007/VOCtest_06-Nov-2007.tar
However, if you face any issues, you can use the following official links as well:
Next, create a directory named data (if not already present) in the project directory and extract the two Pascal VOC sets.
tar xf VOCtrainval_06-Nov-2007.tar -C data
tar xf VOCtest_06-Nov-2007.tar -C data
The following are a few images along with their annotations from the dataset.
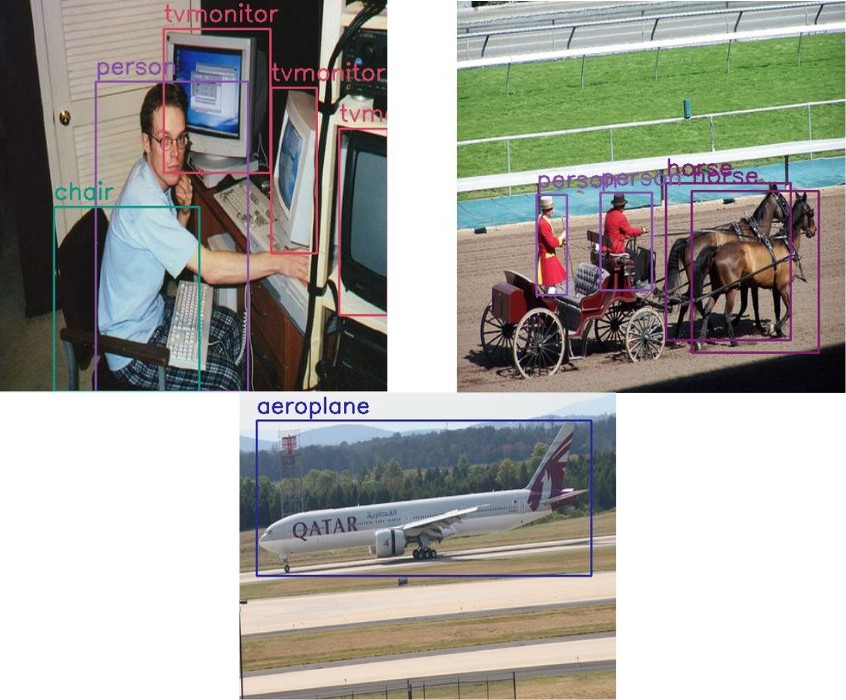
There are only a few samples from the 2501 training, 2510 validation, and 4952 test images.
Download the Pretrained Weights
Next, we will download the Faster RCNN ResNet50 FPN weights. The code for downloading the weights will be very similar to what we had in the previous post where we provided the model name to the inference function and weights were either downloaded or loaded from the disk. There are only a few minor changes here.
The code for this will go into the download_weights.py file.
The first code block contains the import statements and the function that downloads the weights.
import os
import requests
import yaml
import glob as glob
import argparse

from tqdm import tqdm

def download_weights(url, file_save_name):
    """
    Download weights for any model.

    :param url: Download URL for the weihgt file.
    :param file_save_name: String name to save the file on to disk.
    """
    data_dir = 'checkpoints'
    if not os.path.exists(data_dir):
        os.makedirs(data_dir)
    # Download the file if not present.
    if not os.path.exists(os.path.join(data_dir, file_save_name)):
        print(f"Downloading {file_save_name}")
        file = requests.get(url, stream=True)
        total_size = int(file.headers.get('content-length', 0))
        block_size = 1024
        progress_bar = tqdm(
            total=total_size,
            unit='iB',
            unit_scale=True
        )
        with open(os.path.join(data_dir, file_save_name), 'wb') as f:
            for data in file.iter_content(block_size):
                progress_bar.update(len(data))
                f.write(data)
        progress_bar.close()
    else:
        print('File already present')
The download_weights function accepts a model URL and the file name with which we want to save the model. It then downloads the model weights from the MMDetection repository.
Then we have the function to parse the model meta files.
def parse_meta_file():
    """
    Function to parse all the model meta files inside `mmdetection/configs`
    and return the download URLs for all available models.

    Returns:
        weights_list: List containing URLs for all the downloadable models.
    """
    root_meta_file_path = 'mmdetection/configs'
    all_metal_file_paths = glob.glob(os.path.join(root_meta_file_path, '*', 'metafile.yml'), recursive=True)
    weights_list = []
    for meta_file_path in all_metal_file_paths:
        with open(meta_file_path,'r') as f:
            yaml_file = yaml.safe_load(f)

        for i in range(len(yaml_file['Models'])):
            try:
                weights_list.append(yaml_file['Models'][i]['Weights'])
            except:
                for k, v in yaml_file['Models'][i]['Results'][0]['Metrics'].items():
                    if k == 'Weights':
                        weights_list.append(yaml_file['Models'][i]['Results'][0]['Metrics']['Weights'])
    return weights_list
This is exactly the same as we had in the previous post. This parses through each of the model meta files (YAML files) and returns a list containing the URLs.
Next is the get_model function which accepts a model name and calls the parse_meta_file and down_weights functions accordingly.
def get_model(model_name):
    """
    Either downloads a model or loads one from local path if already
    downloaded using the weight file name (`model_name`) provided.

    :param model_name: Name of the weight file. Most likely in the format
        retinanet_ghm_r50_fpn_1x_coco. SEE `weights.txt` to know weight file
        name formats and downloadable URL formats.

    Returns:
        model: The loaded detection model.
    """
    # Get the list containing all the weight file download URLs.
    weights_list = parse_meta_file()

    download_url = None
    for weights in weights_list:
        if model_name == weights.split('/')[-2]:
            print(f"Founds weights: {weights}\n")
            download_url = weights
            break

    assert download_url != None, f"{model_name} weight file not found!!!"

    # Download the checkpoint file.
    download_weights(
        url=download_url,
        file_save_name=download_url.split('/')[-1]
    )
Calling this function will download the weights into the checkpoints directory.
Finally, we have the write_weights_txt_file function and main code block.
def write_weights_txt_file():
    """
    Write all the model URLs to `weights.txt` to have a complete list and
    choose one of them.
    EXECUTE `utils.py` if `weights.txt` not already present.
    `python utils.py` command will generate the latest `weights.txt`
    file according to the cloned mmdetection repository.
    """
    # Get the list containing all the weight file download URLs.
    weights_list = parse_meta_file()
    with open('weights.txt', 'w') as f:
        for weights in weights_list:
            f.writelines(f"{weights}\n")
    f.close()

if __name__ == '__main__':
    write_weights_txt_file()

    parser = argparse.ArgumentParser()
    parser.add_argument(
    '-w', '--weights', default='faster_rcnn_r50_fpn_1x_coco',
    help='weight file name'
    )
    args = vars(parser.parse_args())

    get_model(args['weights'])
The write_weights_txt_file creates a weights.txt file containing all the weight file URLs. The main code block executes the get_model function by passing the model name which is faster_rcnn_r50_fpn_1x_coco by default.
We just need to execute this Python script and it will download the weights.
python download_weights.py
Founds weights: https://download.openmmlab.com/mmdetection/v2.0/faster_rcnn/faster_rcnn_r50_fpn_1x_coco/faster_rcnn_r50_fpn_1x_coco_20200130-047c8118.pth

Downloading faster_rcnn_r50_fpn_1x_coco_20200130-047c8118.pth
100%|████████████████████████████████████████████████████████████████| 167M/167M [00:15<00:00, 10.7MiB/s]
You should see a progress bar when executing the script for the first time and downloading the weights.
Preparing the Model Configuration File
Preparing the model configuration file in the correct way is perhaps one of the most important steps.
This configuration file will contain many things that will be used for training and validation. Some of the important ones are:
- The correct model name and architecture.
- The correct paths to the training and validation data.
- Providing the appropriate batch size and number of classes for the dataset.
- Providing the correct checkpoint path if we want to use a pretrained model.
There are other properties to mention in the configuration file as well. Let’s see to those while writing the code in the cfg.py file.
The first code block here contains the import statements and the default configuration file that we want to use.
from mmcv import Config
from mmdet.apis import set_random_seed

cfg = Config.fromfile('mmdetection/configs/faster_rcnn/faster_rcnn_r50_fpn_1x_coco.py')
print(f"Default Config:\n{cfg.pretty_text}")
We can see on line 4 that we are loading the configuration file for faster_rcnn_r50_fpn_1x_coco.py and printing it.
The default configuration file will look something like the following:
Default Config:
model = dict(
    type='FasterRCNN',
    backbone=dict(
        type='ResNet',
        depth=50,
        num_stages=4,
        out_indices=(0, 1, 2, 3),
        frozen_stages=1,
        norm_cfg=dict(type='BN', requires_grad=True),
        norm_eval=True,
        style='pytorch',
        init_cfg=dict(type='Pretrained', checkpoint='torchvision://resnet50')),
...
workflow = [('train', 1)]
opencv_num_threads = 0
mp_start_method = 'fork'
auto_scale_lr = dict(enable=False, base_batch_size=16)
It contains a lot of properties and settings. Now, let’s start editing the ones that we need.
The Dataset Paths
We will start with editing the dataset paths.
# Modify dataset type and path.
cfg.dataset_type = 'VOCDataset'
cfg.data_root = 'data/VOCdevkit/'

cfg.data.test.type = 'VOCDataset'
cfg.data.test.data_root = 'data/VOCdevkit/'
cfg.data.test.ann_file = 'VOC2007/ImageSets/Main/test.txt'
cfg.data.test.img_prefix = 'VOC2007/'

cfg.data.train.type = 'VOCDataset'
cfg.data.train.data_root = 'data/VOCdevkit/'
cfg.data.train.ann_file = 'VOC2007/ImageSets/Main/trainval.txt'
cfg.data.train.img_prefix = 'VOC2007/'

cfg.data.val.type = 'VOCDataset'
cfg.data.val.data_root = 'data/VOCdevkit/'
cfg.data.val.ann_file = 'VOC2007/ImageSets/Main/test.txt'
cfg.data.val.img_prefix = 'VOC2007/'
We know that we will be using the Pascal VOC 2007 dataset. So, the first two lines in the above block define the dataset type and the root path of the dataset. We have it inside the data folder. And providing data/VOCdevkit as the root path allows us not to write any custom dataset function. MMDetection library will handle searching for the appropriate folders and paths. The following is the default structure.
VOCdevkit/
└── VOC2007
    ├── Annotations
    ├── ImageSets
    ├── JPEGImages
    ├── SegmentationClass
    └── SegmentationObject
Next, we define the dataset types and root paths for training, testing, and validation data. You may notice that we are providing the same dataset type and root path for all three sets. A few important notes:
cfg.data.train.ann_file,cfg.data.test.ann_file, andcfg.data.val.ann_filetell the internal MMDetection code where to look for the text files which contain the image file and XML file names.cfg.data.train.img_prefix,cfg.data.test.img_prefix, andcfg.data.val.img_prefixtell MMDetection code where to look for the directory structure. Here, it is inside theVOC2007folder insidedata/VOCdevkit- One major thing is that we are using the
trainvalset for training. This is a combination of training and validation data consisting of 5011 samples. We are using thetestset for validation which consists of 4952 samples. Now, note that thetrainandvalattributes (lines 15 to 23) will be used during training. Thetrainattributes are for training the model and thevalattribute paths will be used for validation. But thetest(lines 10 to 13) attribute paths are not used while training. We need to write a separate script after training to carry out a separate test case on this dataset. But we will not carry out this testing phase as the training is already happening on the training+validation data and validation happening on the test data.
The Rest of the Configurations
The rest of the configurations are almost self explanatory.
# Batch size (samples per GPU).
cfg.data.samples_per_gpu = 2

# Modify number of classes as per the model head.
cfg.model.roi_head.bbox_head.num_classes = 20
# Comment/Uncomment this to training from scratch/fine-tune according to the
# model checkpoint path.
cfg.load_from = 'checkpoints/faster_rcnn_r50_fpn_1x_coco_20200130-047c8118.pth'

# The output directory for training. As per the model name.
cfg.work_dir = 'outputs/faster_rcnn_r50_fpn_1x_coco_fine_tune'

# The original learning rate (LR) is set for 8-GPU training.
# We divide it by 8 since we only use one GPU.
cfg.optimizer.lr = 0.02 / 8
cfg.lr_config.warmup = None
cfg.log_config.interval = 5

# Evaluation Metric.
cfg.evaluation.metric = 'mAP'
# Evaluation times.
cfg.evaluation.interval = 5
# Checkpoint storage interval.
cfg.checkpoint_config.interval = 5

# Set random seed for reproducible results.
cfg.seed = 0
set_random_seed(0, deterministic=False)
cfg.gpu_ids = range(1)
cfg.device = 'cuda'
cfg.runner.max_epochs = 10

# We can also use tensorboard to log the training process
cfg.log_config.hooks = [
    dict(type='TextLoggerHook'),
    dict(type='TensorboardLoggerHook')]

# We can initialize the logger for training and have a look
# at the final config used for training
print(f'Config:\n{cfg.pretty_text}')
- We define the batch size with
cfg.data.samples_per_gpu. MMDetection easily supports multi-GPU training. But this code was written for single GPU training. - Then we modify the number of classes and provide the path to the pretrained weights that we want to use (lines 28 to 31).
- The
cfg.work_dirdefines where we want to store the training results. MMDetection will create the directory if not present. - Lines 42 to 47 are quite important. We will be using mAP as the metric. The evaluation on the test set will happen every 5 epochs and the model checkpoint will also be saved after 5 epochs.
- It is quite important that we carry out the training on a GPU and that’s why
cfg.deviceis'cuda'. - We can see on line 54 that
cfg.runner.max_epochsdefines the number of epochs to train for. We will train for 10 epochs in total. As we are using a pretrained model and we are just learning to use the MMDetection pipeline, this should be enough.
From the above training, validation, and test dataset configuration, you may have guessed one thing. That we can also have our own custom dataset in the same format and provide the path appropriately. This is exactly what we will be doing in the next tutorials. Also please note that the attributes and options of configurations tend to change with different model architectures. For example, YOLO models may have slightly different configuration files for the model head part. We will see how to deal with those in future tutorials.
The Training Script
The training is going to be really simple. We will write the training code in the train.py file.
The following block contains the entire code.
from mmdet.datasets import build_dataset
from mmdet.models import build_detector
from mmdet.apis import train_detector
from cfg import cfg

import os.path as osp
import mmcv

# Build dataset
datasets = [build_dataset(cfg.data.train)]

# Build the detector
model = build_detector(cfg.model)
# Add an attribute for visualization convenience
model.CLASSES = datasets[0].CLASSES

# Create work_dir
mmcv.mkdir_or_exist(osp.abspath(cfg.work_dir))
train_detector(model, datasets, cfg, distributed=False, validate=True)
That’s all we need for the training script. There is nothing much to explain here apart from understanding the imports and the specific MMDetection syntax that we need.
- We initialize the dataset on line 10 using the
cfgmodule. - Then we build the model using the imported
cfgmodule. - Then we create the working directory to store the results.
- Finally, we call the
train_detectorfunction while passing the model, the dataset, and the configuration module as the mandatory arguments. We also tell that we don’t wantdistributedtraining and the validation dataset should be used to validate the model.
That’s all we need to start the training.
Execute train.py for Starting the MMDetection Training for Object Detection
Note: All the training, validation, and inference shown in this post have been done on a machine with 10 GB RTX 3080 GPU, i7 10th generation CPU, and 32 GB of RAM. Your training and inference speed may vary depending on the hardware.
Within the parent project directory, open the terminal/command line and execute the following command.
python train.py
The following are the sample outputs.
2022-06-13 21:22:01,710 - mmdet - INFO - Automatic scaling of learning rate (LR) has been disabled.
2022-06-13 21:22:01,809 - mmdet - INFO - load checkpoint from local path: checkpoints/faster_rcnn_r50_fpn_1x_coco_20200130-047c8118.pth
.
.
.
2022-06-15 08:08:36,932 - mmdet - INFO - Saving checkpoint at 10 epochs
[>>>>>>>>>>>>>>>>>>>>>>>>>>>>>>>>>>>>>>>>>>>>>>>>>>] 4952/4952, 26.7 task/s, elapsed: 185s, ETA:     0s
---------------iou_thr: 0.5---------------
2022-06-15 08:11:44,509 - mmdet - INFO -
+-------------+------+------+--------+-------+
| class       | gts  | dets | recall | ap    |
+-------------+------+------+--------+-------+
| aeroplane   | 285  | 553  | 0.930  | 0.875 |
| bicycle     | 337  | 665  | 0.941  | 0.876 |
| bird        | 459  | 913  | 0.891  | 0.791 |
| boat        | 263  | 734  | 0.871  | 0.723 |
| bottle      | 469  | 830  | 0.836  | 0.756 |
| bus         | 213  | 489  | 0.944  | 0.872 |
| car         | 1201 | 1946 | 0.944  | 0.893 |
| cat         | 358  | 808  | 0.964  | 0.856 |
| chair       | 756  | 2387 | 0.851  | 0.700 |
| cow         | 244  | 621  | 0.947  | 0.870 |
| diningtable | 206  | 846  | 0.927  | 0.791 |
| dog         | 489  | 1276 | 0.963  | 0.854 |
| horse       | 348  | 725  | 0.951  | 0.892 |
| motorbike   | 325  | 727  | 0.935  | 0.867 |
| person      | 4528 | 7737 | 0.938  | 0.879 |
| pottedplant | 480  | 1232 | 0.779  | 0.586 |
| sheep       | 242  | 538  | 0.930  | 0.844 |
| sofa        | 239  | 904  | 0.958  | 0.811 |
| train       | 282  | 596  | 0.929  | 0.859 |
| tvmonitor   | 308  | 676  | 0.899  | 0.788 |
+-------------+------+------+--------+-------+
| mAP         |      |      |        | 0.819 |
+-------------+------+------+--------+-------+
2022-06-15 08:11:44,555 - mmdet - INFO - Epoch(val) [10][4952]	mAP: 0.8192, AP50: 0.8190
The above table is for the validation that happens on epoch number 10. Another validation happens after epoch 5 as well.
The final mAP is 0.8192 which is pretty good for just 10 epochs of training. Obviously, training for another 20 epochs will give much better results.
The training also saves the TensorBoard logs in the working directory. The following are the training loss graphs.

Carrying Out Inference
Let’s use the final saved model that is epoch_10.pth for carrying out inference on a couple of videos.
The entire inference code is present in the inferece_video.py file. It is very similar to the code in the previous tutorial with a few minor changes for loading the model as we are loading just one model here. We will not cover the inference code for that reason here anymore. Going over the code will help you know about all the command line arguments that we can pass.
Execute the following code in the terminal to carry out inference on the first video present in the inference_data data directory.
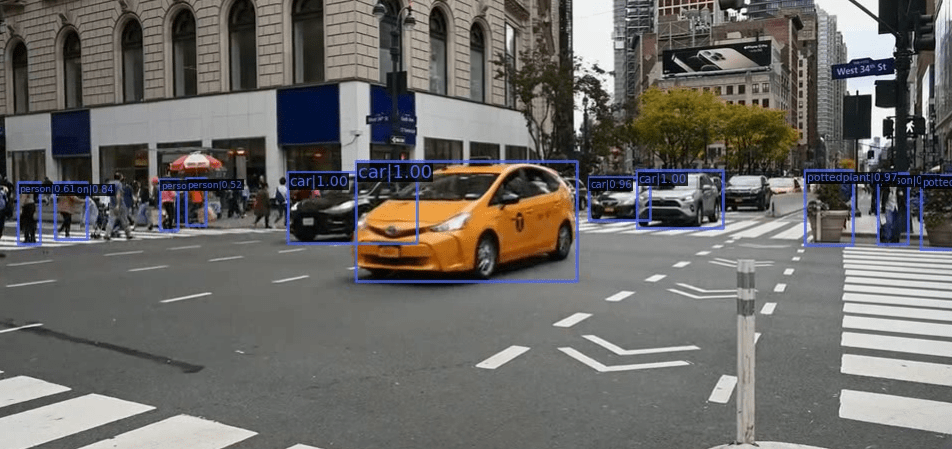
python inference_video.py --input inference_data/video_1.mp4
The model gave around 22 FPS on the RTX 3080 GPU and it is expected to have low FPS from such a large model as well.
The following is the video result.
Although we are not evaluating the model’s prediction performance very critically here. Still, it is doing pretty good with just 10 epochs of training.
Let’s run inference on the second video which is a bit difficult.
python inference_video.py --input inference_data/video_2.mp4
As expected, the model is not performing very well here. The detections are fluctuating a lot and it is not able to detect the dog in any of the frames. The model is also missing out on the horses in the final few frames.
Summary and Conclusion
In this tutorial, we saw how to get started with MMDetection training for object detection. We used the Pascal VOC 2007 dataset to keep things simple here. In the next tutorial, we will learn how to use our own custom dataset for training a different MMDetection model. I hope that this tutorial was helpful to you.
If you have any doubts, thoughts, or suggestions, please leave them in the comment section. I will surely address them.
You can contact me using the Contact section. You can also find me on LinkedIn, and X.

1 thought on “Getting Started with MMDetection Training for Object Detection”