
Deep Learning involving images can be a fascinating field to work with. And most probably the project involves working with Convolutional Neural Networks. Whether it is an image classification or image recognition based project, there is always one common factor, a lot of images. And most of the time you need lots of them to carry out the process of deep learning properly.
You neither want you model to overfit nor underfit. You also don’t want that your model should recognize images wrongly. Well, there is only one way out of it. Get a lot of image data. But sometimes it is not that easy to get perfect images from a website. In this case, Google Images can help. Then again, you should not be downloading the images manually. It will consume a lot of time and resources as well.
Therefore, in this article you will know how to build your own image dataset for a deep learning project. Python and Google Images will be our saviour today.
Let’s start.
Using Google Images to Get the URL
Before downloading the images, we first need to search for the images and get the URLs of the images. For that, we are going to use a couple of lines of JavaScript. This part is inspired by fast.ai. But you would not be needing the fast.ai library to follow along. After the JavaScript part, we will be writing our own python code to download the images.
Although, you should surely check the fast.ai website if you want to get into the practical side of deep learning pretty quickly. It has some really good content to get anyone started.
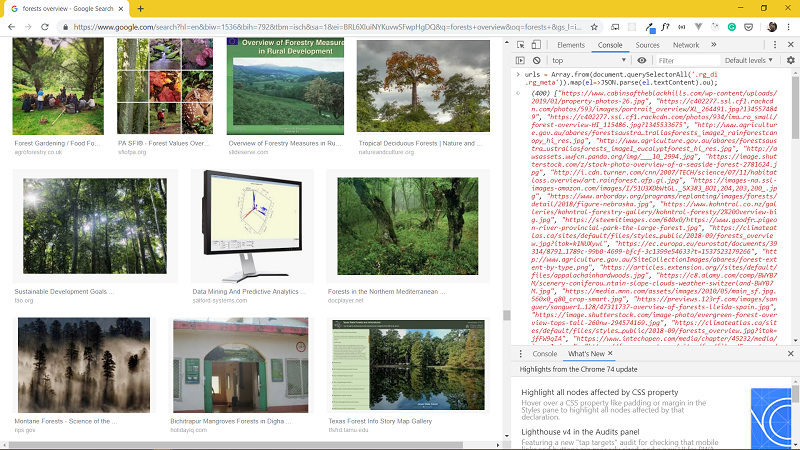
Today, we will be downloading overview images of forests. First, head to Google Images. Then type ‘forests overview’. You will find a lot of relevant images.
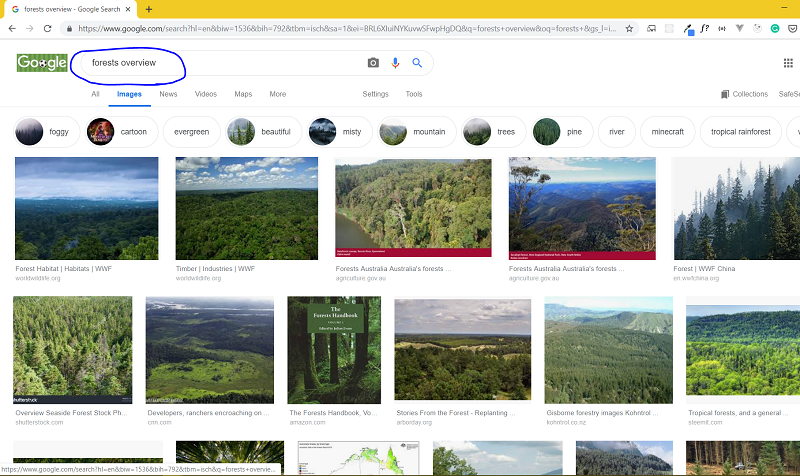
Okay, now scroll down until you get all the relevant images that you need. You can also scroll down till you see no more images are loading. Now open the browser’s developer console by right-clicking and going to Inspect.
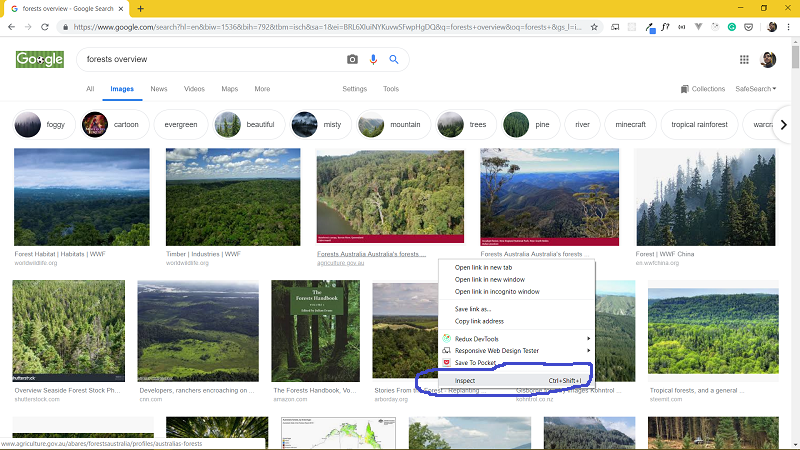
Now click on Console tab.
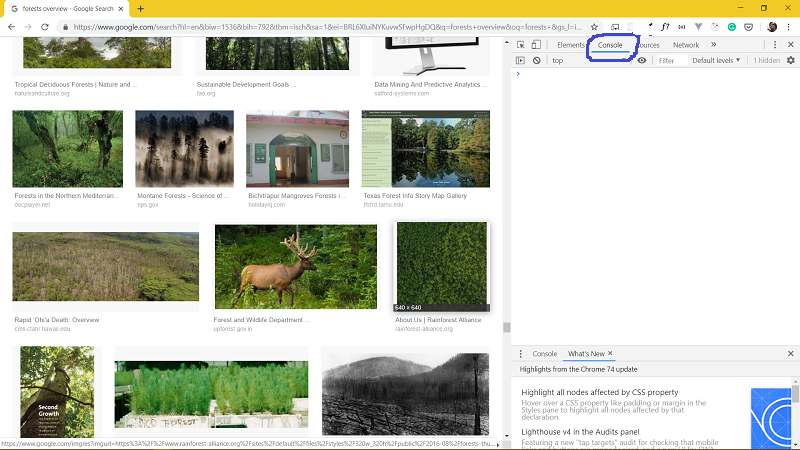
Let’s use some JavaScript code now to download all the image URLs. Copy and paste the following line of code in the console window.
urls=Array.from(document.querySelectorAll('.rg_i')).map(el=> el.hasAttribute('data-src')?el.getAttribute('data-src'):el.getAttribute('data-iurl'));
Now press Enter
Just one more line of code:
window.open('data:text/csv;charset=utf-8,' + escape(urls.join('\n')));
After you hit Enter, a file should download. This file contains all the URLs of the images.
Writing Python Script to Download the Images
Now we are all set to download the images using the URL file. Before we move further, just make sure that you have OpenCV and requests packages installed. If not, then install them using pip:
pip install opencv-pythonpip install requests
Now open your Jupyter Notebook or your IDE and follow along with the code.
# import required packages
import requests
import cv2
import os

from imutils import paths

url_path = open('download').read().strip().split('\n')
total = 0

if not os.path.exists('images'):
    os.mkdir('images')
image_path = 'images'

for url in url_path:
    try:
        req = requests.get(url, timeout=60)

        file_path = os.path.sep.join([image_path, '{}.jpg'.format(
            str(total).zfill(6))]
        )
        file = open(file_path, 'wb')
        file.write(req.content)
        file.close()

        print('Downloaded {}'.format(file_path))
        total += 1

    except:
        print('Could not download {}. Downloading next file'.format(file_path))
In the above block of code, we first import the required packages. The requests package will send a request to each of the URLs. cv2 and paths will come into play in the next section after the files are downloaded.
We open and read the URL file. The file should have the name download by default. Then we make an images directory to store the images. Next, inside the try block we send a request to each of the URLs. After the image is downloaded we store it in a file whose naming format will be 000000.jpg, 000001.jpg and so on. If any error occurs while downloading the image, then the except block will be executed and that file will be skipped.
By now you must be having all the images inside your images directory. There is just one more step before you can use the images for your own deep learning project.
Removing Images which Cannot be Opened
We have downloaded all the images. Now we should delete all the images which OpenCV will not be able to open. Doing this step now will ensure a smoother experience during the actual project pipeline.
The following code should suffice:
for imagePath in paths.list_images('images'):
    delete_image = False

    try:
        image = cv2.imread(imagePath)

        if image is None:
            delete_image = True

    # if OpenCV cannot load the image
    except:
        delete_image = True

    if delete_image:
        print('Deleting {}'.format(imagePath))
        os.remove(imagePath)
Using paths we get the image path. Then we initialize delete_image to False. After that, if the image cannot be loaded from the disk (line 7) or if OpenCV cannot read the image (line 11 and 12), we set delete_image to True. This ends the coding part. Next, you should take a look at all the images and remove those which do not resemble `forests overview`. This will ensure that our model does not learn irrelevant features.
Conclusion
After reading this article and carrying out the above steps, you should be able to get proper images for your deep learning project. In fact, you can use this code as a boiler plate for downloading images from Google Images. You just need to change the URL file each time.
Like and share the article with others. Don’t forget to subscribe to the newsletter. Follow me on Twitter, Facebook and LinkedIn to get more content and read more awesome machine learning article.

The solution you gave is not happening on my chrome console. As soon as i write the first lines in the console it returns an empty json files. No url were returned from that console pasting . Kindly help sir.
Hey Guarav. I checked the code and for some reason, it wasn’t working as expected. I have updated the first line of code. Please do check it and let me know. And thanks for pointing it out. It was an important part of the code.
Hey thanks buddy, It worked like a charm. Now after collecting the images how should the labelling be done. Is it done individually on the images or the folder itself. Kindly help. Thank you so much.
I hope that you have all the images arranged in the respective folder. For example, dog folder containing all dog examples, cat folder containing all cat examples and so on. If that is the case, then I pointing to some articles of mine that you can use to fully label and train the images.
https://debuggercafe.com/wild-cats-image-classification-using-deep-learning/ => For Keras and TensorFlow.
https://debuggercafe.com/getting-95-accuracy-on-the-caltech101-dataset-using-deep-learning/ => For PyTorch
Hey, thanks a lot! After trying a lot of different methods, this was the one which finally worked.
You are welcome and glad to help.
Hey, Sovit!
Nice article!
I just wanted to know if this would download 100 and 100s of images or can i manually decide the number of images to download from the webpage?
First of all, I am happy that you liked it.
In my experience, it downloads something around 400 images at a time. Although I am currently trying to find a way to download more images as I am working on a GAN project right now. I will surely update the article if I find a way.
Well , it worked pretty well but i was able to download only 80 images.
Will scrolling to the end of the page be of any help?
Nevertheless, it was a quick and elegant technique to get the job done!
Appreciate your hard work brother!
Thanks again 🙂
Yes, scrolling to the end will download somewhere around 400 images.
there are nothing happen after use those command.
no file/anything downloaded after use second line of js code.
Hi Shuvo. I just checked the code and it is working fine on my side. Are you sure no file named `download` is getting downloaded? By the way, which browser are you using? Because I have tested everything on the chrome browser. So, maybe chaging browser might help.
hi , i cant seem to get the python method to work, url_path = open(‘download’) returns “filenotfound” , besides that I’m unsure where in the code i can put url to the website id like to scrape?
any tips would be appreciated.
Hello Yan. Please make sure that the download file is in the same directory as the Python script. That seems to be the issue here. You don’t need to put the URL in the code. You just need to provide the file name.
I have your problem too, you only need to change “url_path” and “image_path”. They should be a complete catalog