In deep learning and computer vision, models tackle a specific task. For example, we can find models for image classification, object detection, and image segmentation also. But there are very few models out there which perform end-to-end vision perception on both, object detection and semantic segmentation. But one of the very recent arXiv publications, that is HybridNets tackles that issue. So, in this tutorial, we will go through a very simple and short introduction to HybridNets using PyTorch.
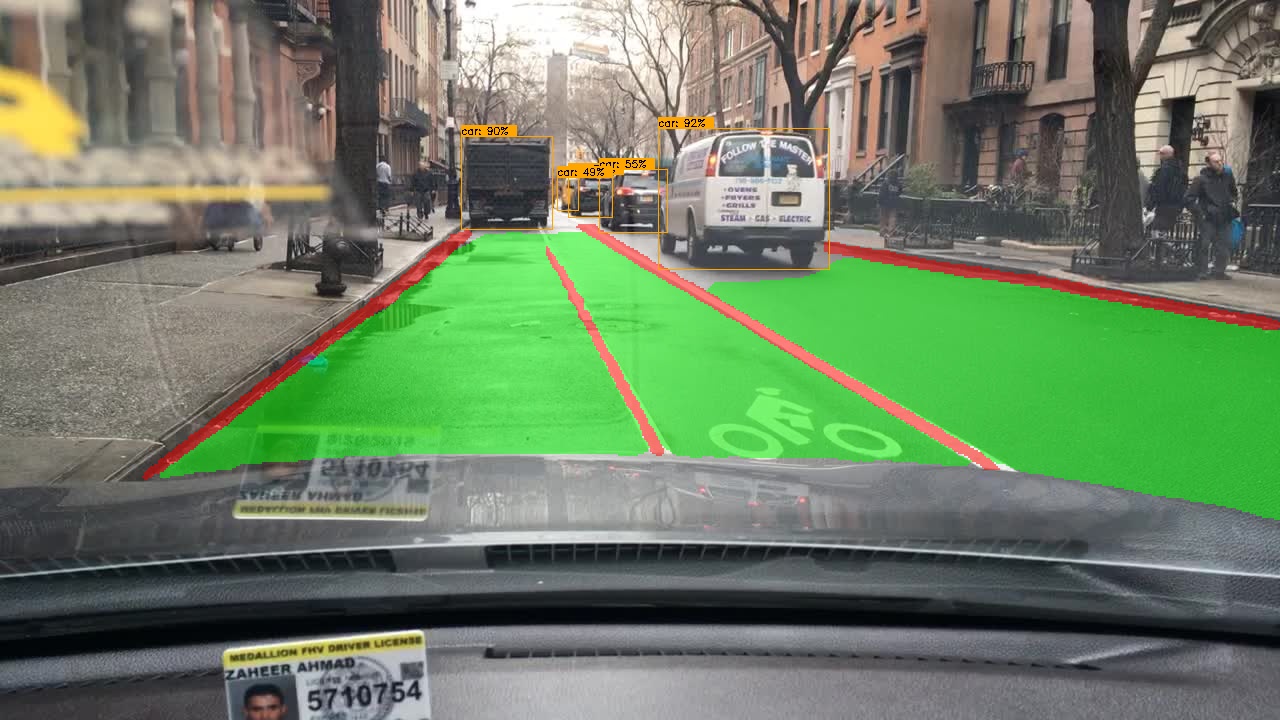
End-to-end perception in computer vision is a very critical task for autonomous driving. And there are very few deep learning models out there which can do so in real-time. Maybe one of the reasons is that it is difficult to pull off. And the new HybridNets model brings a novel method to do so. In the later part of the tutorial, we will discuss the HybridNets model in brief.
For now, let’s check out the points that we will cover in this tutorial.
- We will start with a short discussion of the HybridNets model.
- Then we will move on to the steps to set up our local system for running inference using HybridNets. This includes:
- Creating a new environment.
- Cloning the HybridNets repository.
- Installing the requirements.
- Running inference on a few videos.
- Finally, we will analyze the results that we get from the HybridNets model.
The above points cover all that we will do in this introduction to HybridNets using PyTorch.
A Short Introduction to HybridNets
Before getting into the inference using PyTorch, let’s go through a small introduction to HybridNets. We will not go through the implementation details or discussion of results here, but just a very short introduction only. We will cover the entire network architecture in detail in a separate post.
The HybridNets paper, that is HybridNets: End-to-End Perception Network is published on arXiv by VT Dat et al. And it is a very recent paper as well, March of 2022.
HybirdNets also has its accompanying GitHub repository. The repository contains the code for training and also running inference. We will get into this part a bit later.
What Does HybridNets Do?
HybridNets is a deep learning model which does both, object detection and semantic segmentation. It is an end-to-end visual perception neural network model meanly aimed at solutions for autonomous driving. It has been trained on the Berkeley DeepDrive Dataset (BDD100K) dataset.
Right now, the HybridNets model detects all the vehicles as car (as per the current GitHub code). During training, the authors merged the car, bus, truck, and train classes into the car class. Although in the paper they mention that they are merged into vehicle class. It does not matter much as we can change the class string any time we want.
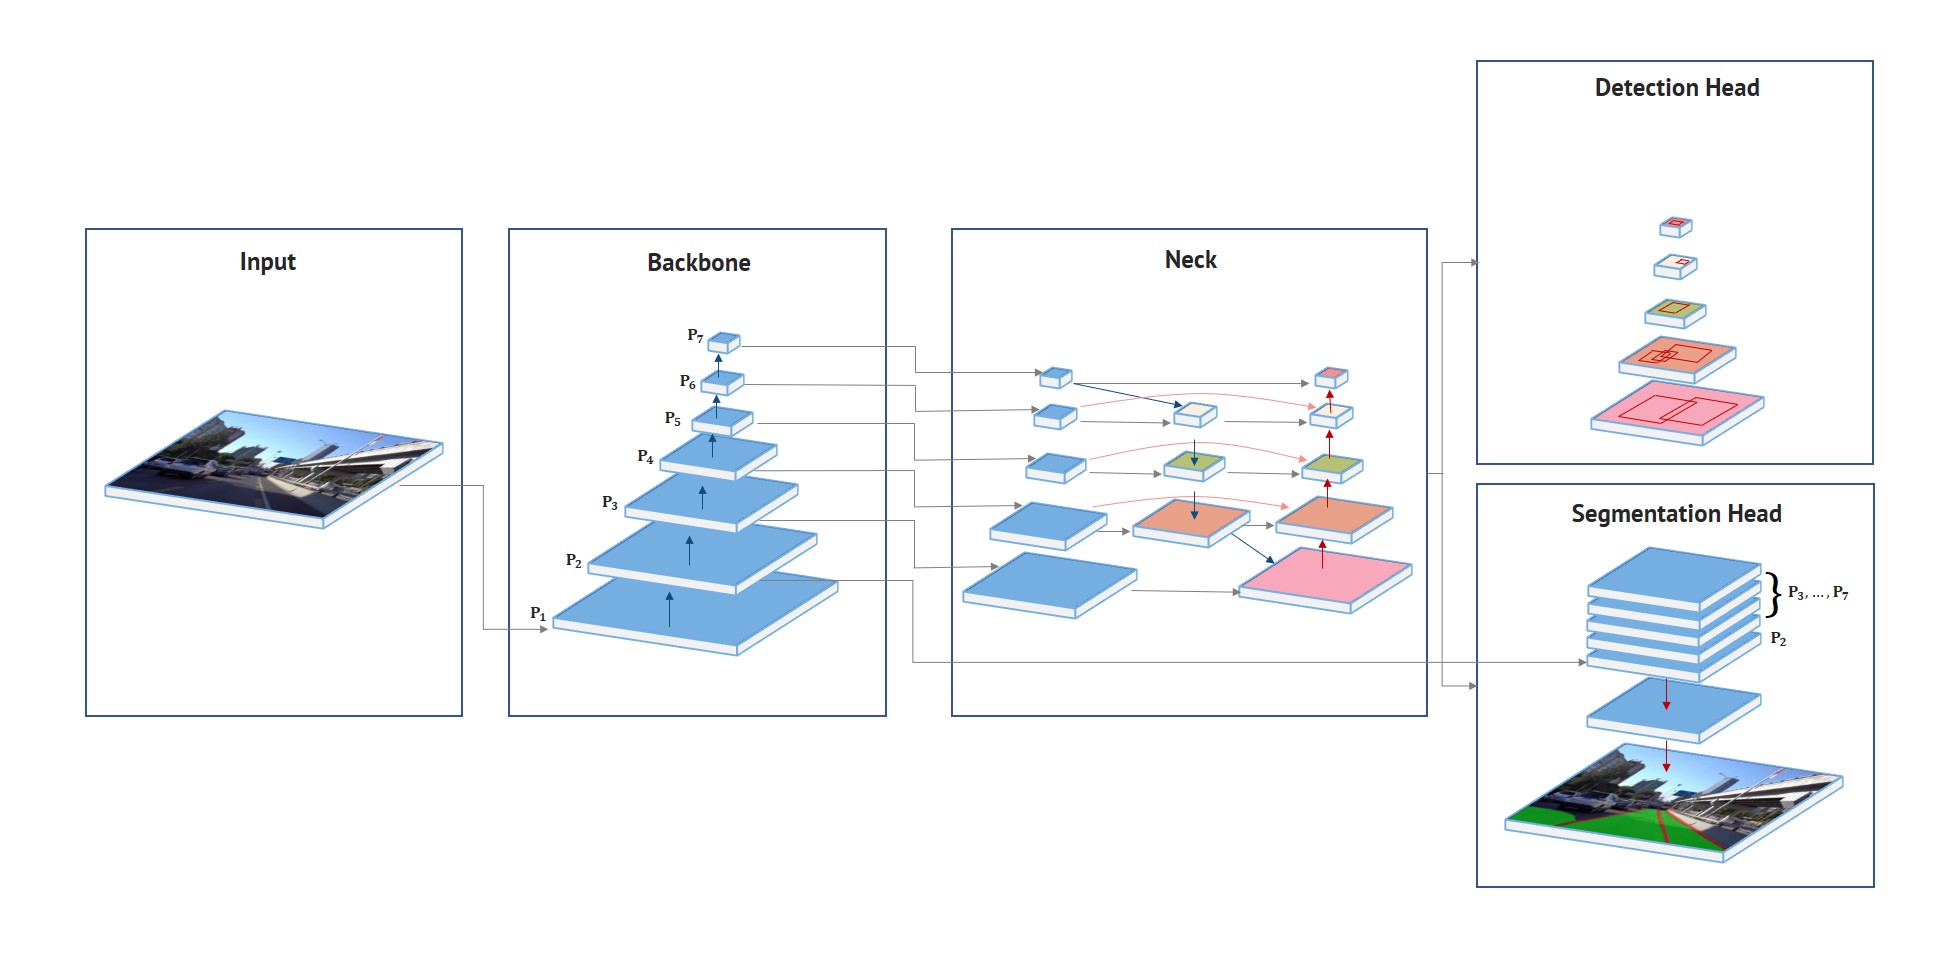
The authors claim that the proposed HybridNets can multitask. That includes traffic object detection, drivable area segmentation, and lane detection. The following short clip gives a proper idea of what the HybridNets neural network model is capable of.
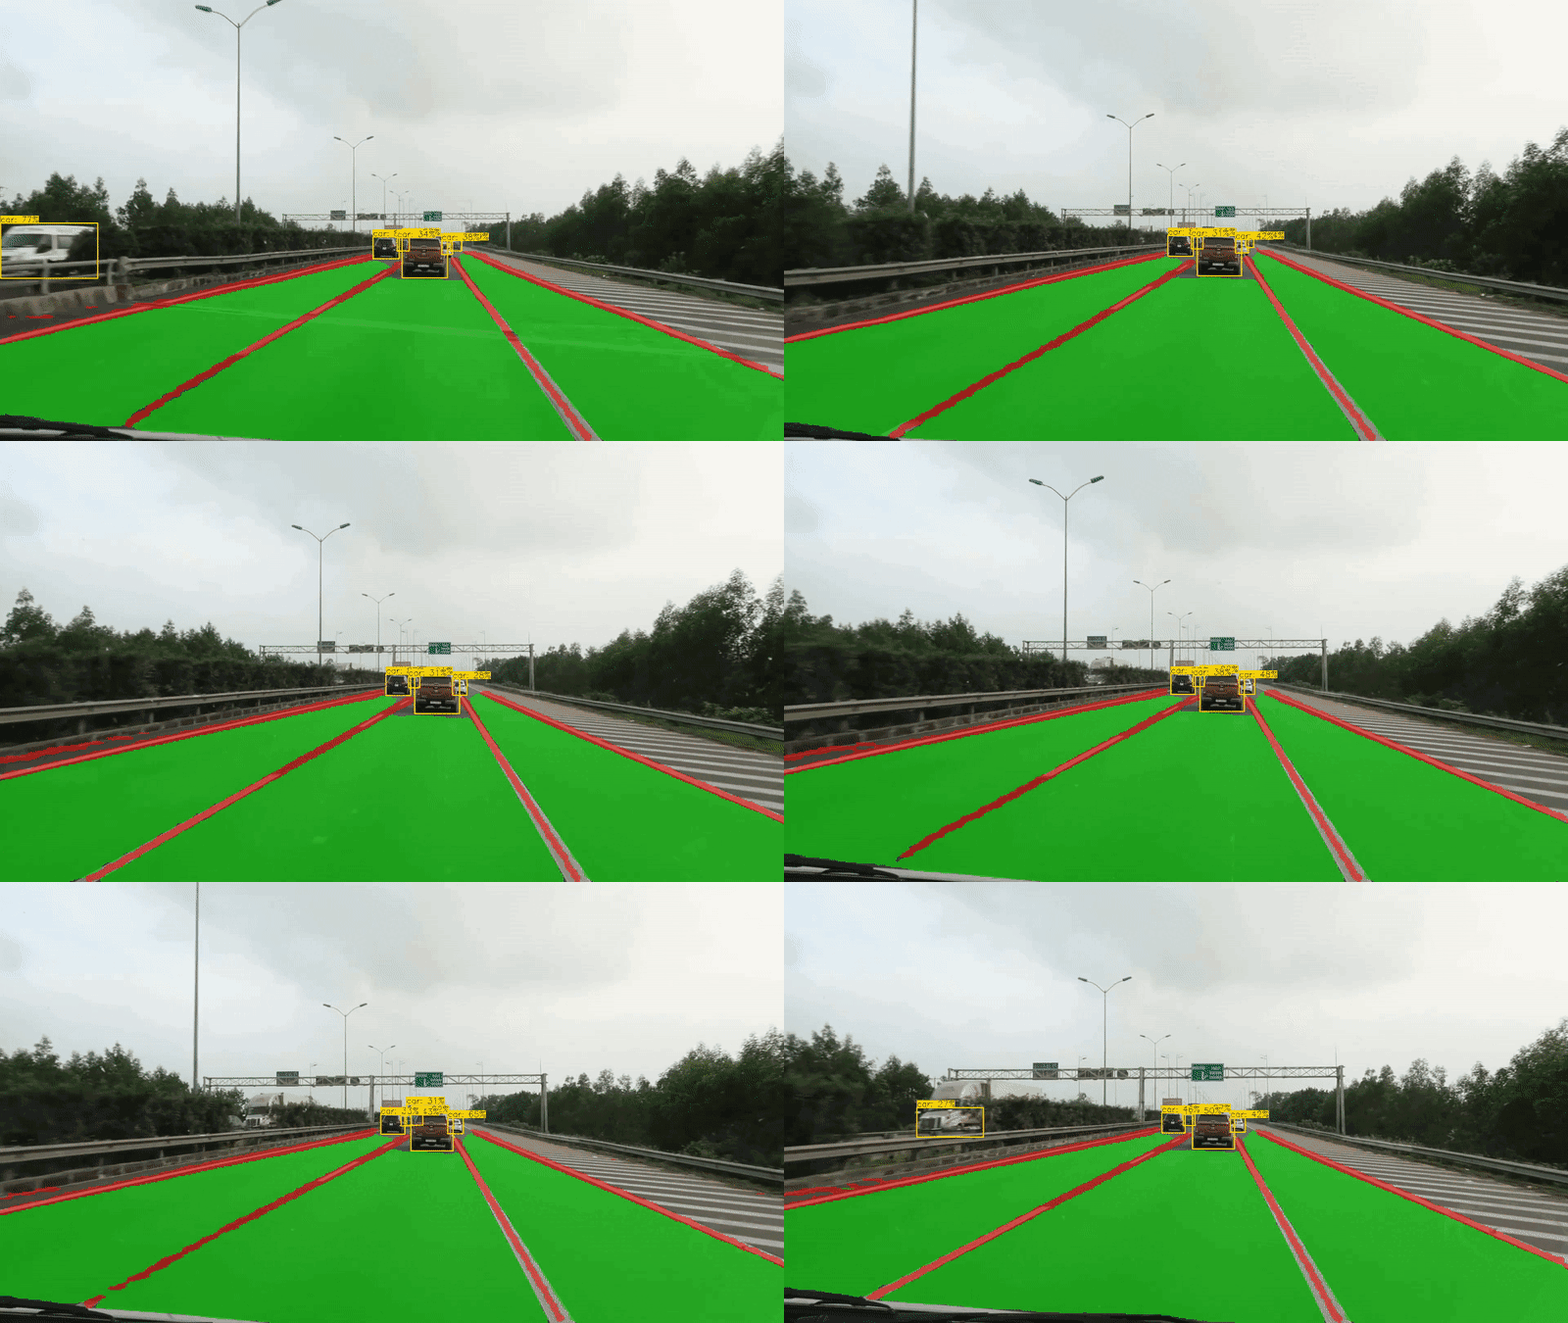
On top of that, the authors also claim that it outperforms other models on the same task by giving 77.3 mAP for object detection and 31.6 mIoU for lane detection. Also, it runs in real-time on the V100 GPU.
The above points only are enough to intrigue some interest in the HybridNets model. In the rest of the article, we will completely focus on running inference on videos using HybridNets.
Directory Structure
Before moving into the technical part, let’s check the directory structure for this project.
├── custom_inference_script
│   └── video_inference.py
├── HybridNets
│   ├── backbone.py
│   ├── demo
│   ├── encoders
│   ├── hubconf.py
│   ├── hybridnets
│   ├── hybridnets_test.py
│   ├── hybridnets_test_videos.py
│   ├── images
│   ├── LICENSE
│   ├── projects
│   ├── requirements.txt
│   ├── train_ddp.py
│   ├── train.py
│   ├── tutorial
│   ├── utils
│   ├── val_ddp.py
│   └── val.py
└── input
    └── videos
- The
custom_inference_scriptdirectory contains a custom script to carry out inference on videos. This heavily borrows from the code already provided by the authors in their GitHub repository. We will copy this script into the cloned GitHub repository later for easier importing of the modules. - The
HybridNetsdirectory is the cloned GitHub repository. - And the
inputdirectory contains two videos on which we will run inference.
When downloading the zip file for this tutorial, you will get the custom inference script and the video files as well. You just need to clone the HybridNets repository if you wish to run inference locally.
HybridNets using PyTorch for End-to-End Detection and Segmentation
Above, we went through a short introduction to HybridNets. Now, let’s jump into the inference part using PyTorch.
There are a few prerequisites that we need to complete before we can run the inference.
Download Code
Creating a New Conda Environment
As we will need to install the requirements of the HybridNets repository, it is much better to create a new environment. You may create a new Python virtual or Conda environment, as per your choice. The following blocks show sample commands for creating and activating a new Conda environment.
conda create -n hybridnets python=3.8
conda activate hybridnets
Clone the Repository and Install the Requirements
We will need to clone the HybridNets repository and install all the requirements. Be sure to clone the repository into the same directory after downloading and extracting the files for this tutorial.
git clone https://github.com/datvuthanh/HybridNets.git
cd HybridNets
Now, install the requirements after ensuring that HybridNets is the current working directory.
pip install -r requirements.txt
As we will be using a custom script for running inference on videos, we will need OpenCV for annotations and visualizations. So, let’s install that as well.
pip install opencv-python
Download the Pretrained Weights
We need the pretrained weights to run the inference. You can use the following command to download them directly.
curl --create-dirs -L -o weights/hybridnets.pth https://github.com/datvuthanh/HybridNets/releases/download/v1.0/hybridnets.pth
Before running any inference, please make sure of the following points:
- We will execute all the inference commands within the cloned
HybridNetsrepository/directory. This will be the working directory. - Our data/videos will be one folder back in the
../input/videosdirectory. - Make sure that you copy the custom inference script (
video_inference.py) from the downloadedcustom_inference_scriptdirectory into the clonedHybridNetsdirectory.
Although the authors provide a script for video inference (hybridnets_test_videos.py), still, we have a custom inference script. So, why is that? This is mainly for a few conveniences and corrections.
- As of writing this, there seem to be some minor issues with the FPS calculation at the end of the script. I raised an issue for that as well which you can find here. This may have gotten corrected by the time you read this.
- The custom script makes a few minor color changes to the visualizations and also to the FPS annotation.
Still, the custom script heavily borrows from the original code that the authors provide, so, the entire credit goes to them.
Run Inference on Videos and Images with HybridNets using PyTorch
Note: We will not go into the details of the inference script in this tutorial. In short, it includes code to load the model, preprocessing of video frames, post-processing, and saving the images/frames to disk. We are going to cover HybridNets and the code for it in much more detail in future posts.
All the inference results shown here were run on a GTX 1060 6GB GPU (laptop), i7 8th generation processor, and 16 GB of RAM.
Running Inference on Images
The authors already provide a script to run inference on a few images present in the demo folder in the cloned repository. Let’s try out that first using the hybridnets_test.py.
python hybridnets_test.py -w weights/hybridnets.pth --source demo/image --output demo_result --imshow True --imwrite True
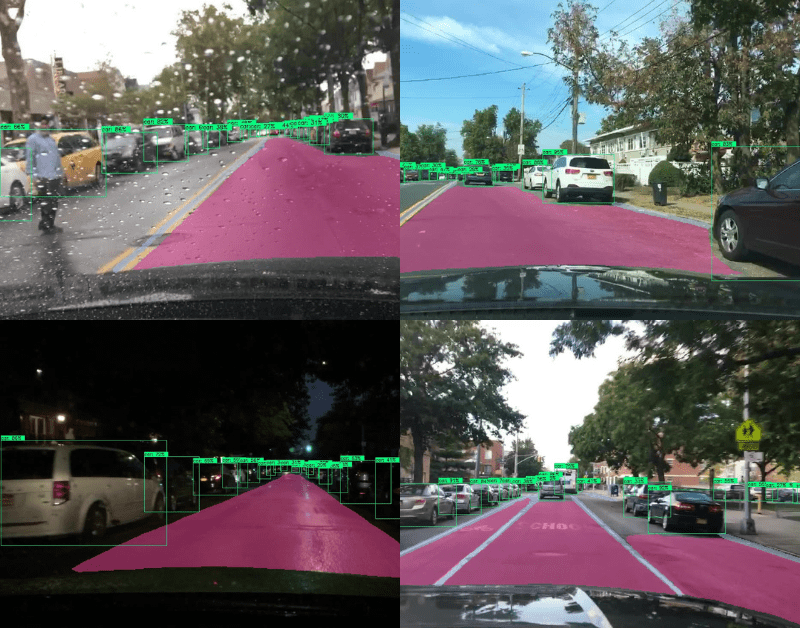
This should show a few images on the screen and also save the results into the demo_results folder. Let’s check out a few of the results.
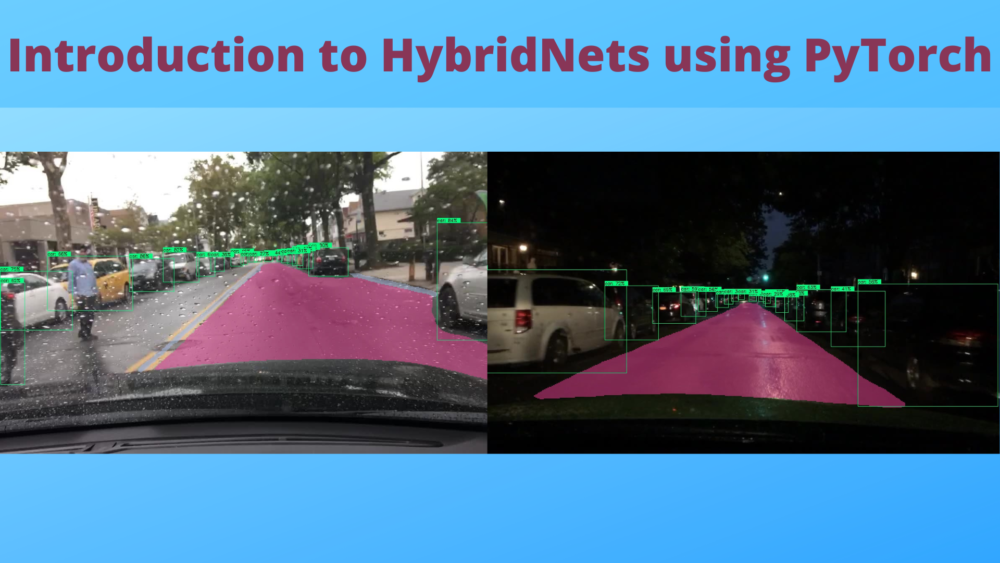
The results actually look pretty good. The model is also performing pretty well in rainy weather with droplets on the windshield. This is quite surprising. Not only that, the night-time results and detection of small vehicles which are far off are also really accurate.
Running Inference on Videos
The authors provide one video in the demo folder of the repository. Let’s use the custom script to run inference on that one first.
python video_inference.py --load_weights weights/hybridnets.pth
By default, the code uses CUDA if available. We get the following output on the terminal after the execution completes.
DETECTED SEGMENTATION MODE FROM WEIGHT AND PROJECT FILE: multiclass
video: demo/video/1.mp4
frame: 297
second: 89.08380365371704
fps: 3.3339393674128055
The FPS shown in the terminal includes the preprocessing and post-processing time as well. So, it is a bit low. The FPS on the video frames is for the forward pass only. Let’s check out the video result.
For the forward pass, the model is running between 11 and 12 FPS which is good considering the fact that we are running it on a laptop GPU, and also the model is performing both detection and segmentation. Apart from that, the results are also impressive. It is able to detect and segment almost everything pretty well.
Now, let’s provide the path to the videos that we have which are a bit more challenging.
python video_inference.py --source ../input/videos/ --load_weights weights/hybridnets.pth
DETECTED SEGMENTATION MODE FROM WEIGHT AND PROJECT FILE: multiclass
video: ../input/videos/video_1.mp4
frame: 328
second: 50.41546940803528
fps: 6.505939622327962
video: ../input/videos/video_2.mp4
frame: 166
second: 28.105358123779297
fps: 5.906347084029902
This time, we get a slightly higher FPS for the entire video run-time as they are not as high resolution as the previous one.
In this video, the forward pass time remains the same. This is an evening time environment. Still, the model is able to segment the drivable area and lane lines quite well. But it is wrongly detecting one of the signboards as a car.
This is even more challenging as it is from an Indian road on which the model has not been trained at all. We can clearly see the limitations on the segmentation task here. The detections remain still quite good apart from the wrong detection of the rear-view mirror as a car.
Summary and Conclusion
In this tutorial, we had a very short introduction to HybridNets and also ran inference using PyTorch. We got to know a few of the novel things the model does and also how it performs in different scenarios. In future posts, we will cover HybridNets in much more detail. I hope this tutorial was helpful to you.
If you have any doubts, thoughts, or suggestions, please leave them in the comment section. I will surely address them.
You can contact me using the Contact section. You can also find me on LinkedIn, and Twitter.



Excellent writeup. Please discuss practical use case of hybridnets. How is it different from other pretrained models? Segmentation tasks is alrealy possible using pixellib? What new hybridnet adds to the system?
Hello Raj. Thank you for your appreciation.
There are two more posts coming. One for discussing the paper and the next one for running inference and experimenting on much more difficult videos to know the real capability of HybridNets.
Will try to address your questions in future posts as well.