

The gpt-oss series of models is one of the best ones right now for text-only local RAG. When grounded with a local semantic search and web search capability, their response quality approaches closed-source frontier models. In this article, we will replicate a simple local RAG pipeline using gpt-oss, terming it gpt-oss-chat. We will use the gpt-oss-20b model to create an extremely lean yet efficient local RAG flow.

Our gpt-oss local RAG tech stack will consist of the following:
- llama.cpp for serving gpt-oss
- Qdrant for an in-memory vector DB and semantic search engine
- A simple yet beautiful terminal rendering UI powered by Rich Console
- Additionally, a separate Gradio UI that we can deploy
We will cover the following in this article:
- Setting up llama.cpp for running gpt-oss
- Setting up Qdrant for local vector DB
- Following through the important parts of the code for gpt-oss local RAG
- Running inference experiments spreading across web search and PDF chat
Motivation Behind gpt-oss-chat
This project started as a simple experiment to understand how far we can push local RAG and web search pipelines when combined with gpt-oss. Models like gpt-oss with llama.cpp runs surprisingly well locally, even with 8GB VRAM with memory offloading.
So, combining a local vector DB and web search APIs became a natural extension of it. This project is also a GitHub repository now that will be actively worked on and maintained for the next few months. Although the name is gpt-oss-chat, we can run any of the chat models from llama.cpp here.
Project Directory Structure
Let’s check the project directory structure before jumping into the code.
├── api_call.py
├── app.py
├── LICENSE
├── README.md
├── requirements.txt
├── semantic_engine.py
└── web_search.py
Currently, the project structure is relatively straightforward. As the project progresses on GitHub, this is bound to change.
- We have a
semantic_engine.pythat manages the creation of the vector DB and retrieval. web_search.pyhandles searching the web to fetch relevant results based on the user query.api_call.pyis the executable CLI script, using which we can chat with the model directly in the terminal.app.pyis a Gradio application around the CLI script for users who are more comfortable in a web UI format.
We will get to know about the files in a bit more detail further in the article.
A stable zip file containing the code is provided with the article, which can be directly used to run the experiments
Download Code
Installing Dependencies
Before installing the libraries from requirements.txt, we need to install llama.cpp with CUDA support.
llama.cpp setup:
Ensure that you have CUDA installed locally before running the following.
sudo apt install libcurl4-openssl-dev
sudo apt-get install libssl-dev

git clone https://github.com/ggml-org/llama.cpp
cd llama.cpp

cmake -B build -DGGML_CUDA=ON
cmake --build build --config Release -j
We do not need the Qdrant Docker image for the codebase, as we will be managing an in-memory vector DB in this case.
Install the rest of the requirements:
pip install -r requirements.txt
Creating a .env file
The codebase has options for Tavily and Perplexity APIs for web search. Tavily provides 1000 free API calls each month, so that is the best option to get started. You can create a Tavily account, get your API key, and add it to the .env file in the project directory. You need to create the .env file if not already present.
TAVILY_API_KEY=YOUR_TAVILY_API_KEY
Optionally, if you are a Perplexity Pro user, you get $5 monthly credits for API usage and can add your Perplexity API key to the .env file.
PERPLEXITY_API_KEY=YOUR_PERPLEXITY_API_KEY
However, the code uses the Tavily web search by default, so adding the Perplexity is not mandatory.
This is all the setup we need for this article. If you wish to get your hands on the updated codebase, please visit the GitHub repository.
gpt-oss-chat with Local RAG and Web Search
Let’s jump into the codebase for gpt-oss-chat with local RAG and web search. We will explore all the necessary code files at a high level.
The Web Search Functions
All the code to perform web search via Tavily and Perplexity APIs is available in the web_search.py file.
As of writing this, it is minimal with fewer than 100 lines of code.
"""
This script contains code to perform web search using Tavily and Perplexity APIs.
"""

import os

from tavily import TavilyClient
from perplexity import Perplexity
from dotenv import load_dotenv

load_dotenv()

def do_web_search(query=None, search_engine='tavily', max_results=5):
    """
    Perform a web search using Tavily or Perplexity to get context.

    :param query: search query string (required)
    :param search_engine: search engine to use, either 'tavily' or 'perplexity' (default: 'tavily')
    :param max_results: maximum number of results to return (default: 5)

    Returns:
        retrieved_docs: a list of retrieved web search results as strings.
            e.g. ['context 1', 'context 2', ...]

    Raises:
        ValueError: if query is None or empty
        KeyError: if required API keys are not found in environment
    """
    if not query or not query.strip():
        raise ValueError("Search query cannot be empty")

    if search_engine == 'tavily':
        TAVILY_API_KEY = os.getenv('TAVILY_API_KEY')
        if not TAVILY_API_KEY:
            raise KeyError('TAVILY_API_KEY not found in environment. Please check your .env file')

        tavily_client = TavilyClient(api_key=TAVILY_API_KEY)
        response = tavily_client.search(query, max_results=max_results)

        results = [res['content'] for res in response['results']]

    elif search_engine == 'perplexity':
        PERPLEXITY_API_KEY = os.getenv('PERPLEXITY_API_KEY')
        if not PERPLEXITY_API_KEY:
            raise KeyError('PERPLEXITY_API_KEY not found in environment. Please check your .env file')

        ppxl_client = Perplexity()
        response = ppxl_client.search.create(
            query=query,
            max_results=max_results,
            max_tokens_per_page=512
        )

        results = [result.snippet for result in response.results]
    else:
        raise ValueError(f"Unsupported search engine: {search_engine}")

    return results

if __name__ == '__main__':
    query = 'What is the capital of France?'
    docs = do_web_search(query, search_engine='tavily')
    print(docs)
We have one function, do_web_search that handles web search for both Tavily and Perplexity, based on the search_engine parameter.
The function accepts a user query and returns the results as a list of strings.
The In-Memory Vector DB
We use Qdrant to manage an in-memory vector DB and retrieval. For now, if users can provide the path to a single PDF file, then in-memory is enough. Nothing gets stored on disk, and retrieval is instantaneous.
The semantic_engine.py contains the code for this. Following the entire code.
"""
This python script reads a PDF, extracts its text content, chunks into
512 character pieces, and encodes each chunk into a vector using the
Qdrant vector database and SentenceTransformer 'all-MiniLM-L6-v2' model.
"""


from qdrant_client import models, QdrantClient
from sentence_transformers import SentenceTransformer

import pymupdf

encoder = SentenceTransformer('all-MiniLM-L6-v2')

qdrant_client = QdrantClient(':memory:')

def read_pdf(file_path):
    """
    Reads a PDF file and extracts all text content.

    :param file_path: path to the PDF file
    :return: concatenated text from all pages
    """
    doc = pymupdf.open(file_path)

    full_text = ''
    for i, page in enumerate(doc):
        text = page.get_text()
        full_text += text + '\n'

    return full_text

def chunk_text(text, chunk_size=512, overlap=50):
    """
    Chunks text into smaller piecces and returns a list of documents.

    :param text: full text to be chunked
    :param chunk_size: number of characters in each chunk
    :param overlap: number of overlapping characters between chunks

    Returns: a list of dictionary containing chunked text in the format
        documents = [
            {
                'text': 'chunked text here'
            },
            ...
        ]
    """
    documents = []
    start = 0
    text_length = len(text)

    while start < text_length:
        end = min(start + chunk_size, text_length)
        chunk = text[start:end]
        documents.append({'text': chunk})
        start += chunk_size - overlap

    return documents

def create_and_upload_in_mem_collection(
        collection_name='my_collection', documents=None
    ):
    """
    Creates an in-memory Qdrant collection and overwrites the previous
    one if it exists. The uploads the data to the in-memory collection.

    :param collection_name: name of the collection (optional)
    :param documents: list of documents to add to the collectoin.
    """
    qdrant_client.recreate_collection(
        collection_name=collection_name,
        vectors_config=models.VectorParams(
            size=encoder.get_sentence_embedding_dimension(),
            distance=models.Distance.COSINE,
        )
    )

    qdrant_client.upload_points(
        collection_name=collection_name,
        points=[
            models.PointStruct(
                id=idx, vector=encoder.encode(doc['text']).tolist(), payload=doc
            )
            for idx, doc in enumerate(documents)
        ],
    )

def search_query(query, collection_name='my_collection', top_k=3):
    """
    Searches the in-memory Qdrant collection for the most similar documents
    to the query.

    :param query: search query string
    :param collection_name: name of the collection (optional)
    :param top_k: number of top similar documents to return (optional)

    Returns: tuple of (hits, search_results)
        hits: list of PointStruct objects with similarity scores
        search_results: list of text content from matched documents
    """
    hits = qdrant_client.query_points(
        collection_name=collection_name,
        query=encoder.encode(query).tolist(),
        limit=top_k,
    ).points

    search_results = [hit.payload['text'] for hit in hits]

    return hits, search_results

if __name__ == '__main__':
    full_text = read_pdf('input/yolov1/1506.02640v5.pdf')

    print('Reading and creating chunks...')
    documents = chunk_text(full_text, chunk_size=512, overlap=50)
    print(f"Total chunks created: {len(documents)}")

    print('Creating Qdrant collection...')

    create_and_upload_in_mem_collection(documents=documents)

    # Dummy search.
    hits, retrieved_list = search_query('YOLOv1 is a ')
    print('#' * 50)

    print('HITS:')
    print(hits)
    print('#' * 50)
    for hit in hits:
        print(hit.payload, 'score:', hit.score)
    print('#' * 50)
    print('RETRIEVED LIST:')
    print(retrieved_list)
Let’s cover the important aspects of the vector DB and the semantic search engine.
- We use the
all-MiniLM-L6-v2embedding model for creating and searching vector embeddings. It is one of the most used ones, although not that good at understanding questions. Going further, this might be replaced with newer models. - We create an in-memory vector DB using
QdrantClient. This serves the purpose for now, and based on the size of the PDF file, it may consume somewhere between 1-3GB of system RAM. - We have four helper functions.
read_pdfreads the PDF and returns the entire content as a single string.chunk_textcreates smaller chunks of the PDF based on the number of characters we want in each chunk, along with an overlap of certain characters. It returns the document as a list of dictionaries containing the chunks in the'text'field.create_and_upload_in_mem_collectioncreates an in-memory vector DB, converts the chunks to vector embeddings, and upserts the vector embeddings along with the text as payload to the vector DB.- The
search_queryfunction accepts a user query, searches the vector DB, and returns the top-3 results as a list of strings.
You can test the script by executing it directly and modifying the path to the PDF file in the main block.
python semantic_engine.py
CLI API Call Script
The code for command line user interface chat is present in api_call.py file. It is the primary executable file for gpt-oss-chat.
It combines the components that we discussed above and starts the chat loop. These include:
- Indexing a document in Qdrant in-memory vector DB
- Initializing the web search API
- Setting the system prompt and chat history for gpt-oss
- Starting the chat loop
The following code block handles the imports and initializes the relevant objects.
from openai import OpenAI, APIError
from web_search import do_web_search
from semantic_engine import (
    read_pdf,
    chunk_text,
    create_and_upload_in_mem_collection,
    search_query
)
from rich.console import Console
from rich.markdown import Markdown
from rich.live import Live
from pathlib import Path
import argparse
import sys

parser = argparse.ArgumentParser(
    description='RAG-powered chatbot with optional web search and local PDF support'
)
parser.add_argument(
    '--web-search',
    dest='web_search',
    action='store_true',
    help='Enable web search for answering queries'
)
parser.add_argument(
    '--search-engine',
    type=str,
    default='tavily',
    choices=['tavily', 'perplexity'],
    help='web search engine to use (default: tavily)'
)
parser.add_argument(
    '--local-rag',
    dest='local_rag',
    help='provide path of a local PDF file for RAG',
    default=None
)
parser.add_argument(
    '--model',
    type=str,
    default='model.gguf',
    help='model name to use (default: model.gguf)'
)
parser.add_argument(
    '--api-url',
    type=str,
    default='http://localhost:8080/v1',
    help='OpenAI API base URL (default: http://localhost:8080/v1)'
)
args = parser.parse_args()

system_message = """
You are a helpful assistant. You never say you are an OpenAI model or chatGPT.
You are here to help the user with their requests.
When the user asks who are you, you say that you are a helpful AI assistant.
"""

# Initialize Rich console
console = Console()

# Initialize OpenAI client
try:
    client = OpenAI(base_url=args.api_url, api_key='')
except Exception as e:
    console.print(f"[red]Error: Failed to initialize OpenAI client: {e}[/red]")
    sys.exit(1)

chat_history = []
def append_to_chat_history(role, content, chat_history):
    chat_history.append({'role': role, 'content': content})

    return chat_history

chat_history = append_to_chat_history('system', system_message, chat_history)

messages = chat_history

### Embed document for vector search ###
if args.local_rag is not None:
    if not Path(args.local_rag).exists():
        console.print(f"[red]Error: PDF file not found: {args.local_rag}[/red]")
        sys.exit(1)

    try:
        console.print("[cyan]Ingesting local document for RAG...[/cyan]")
        console.print("[cyan]Reading and creating chunks...[/cyan]")
        full_text = read_pdf(args.local_rag)
        documents = chunk_text(full_text, chunk_size=512, overlap=50)
        console.print(f"[green]✓ Total chunks created: {len(documents)}[/green]")

        console.print("[cyan]Creating Qdrant collection...[/cyan]")
        create_and_upload_in_mem_collection(documents=documents)
        console.print("[green]✓ RAG collection ready[/green]")
    except Exception as e:
        console.print(f"[red]Error processing PDF: {e}[/red]")
        sys.exit(1)
###########################################

# Display available features
console.print("[bold cyan]RAG-Powered Chatbot Started[/bold cyan]")
if args.web_search:
    console.print(f"[cyan]  • Web search enabled ({args.search_engine})[/cyan]")
if args.local_rag:
    console.print(f"[cyan]  • Local RAG enabled[/cyan]")
console.print("[cyan]Type 'exit' or 'quit' to end the conversation[/cyan]\n")
- The user can pass whether to use local PDF RAG and web search as command line arguments.
- We use the Rich library for rendering the output in markdown format directly in the terminal.
Next, we have the function that runs the chat loop.
def run_chat_loop(client, args, messages, console):
    """
    Reusable chat loop function that can be imported by other modules.

    Args:
        client: OpenAI client instance
        args: Parsed arguments containing web_search, search_engine, local_rag, and model
        messages: Chat history list
        console: Rich console instance for output

    Returns:
        messages: Updated chat history
    """
    while True:
        try:
            user_input = console.input("[bold]You: [/bold]").strip()
            print()
            if not user_input:
                continue
            if user_input.lower() in ['exit', 'quit']:
                console.print("[yellow]Goodbye![/yellow]")
                break

            context_sources = []
            search_results = []
            ### Web search and context addition starts here ###
            if args.web_search:
                try:
                    console.print(f"[dim]Searching with {args.search_engine}...[/dim]")
                    web_search_results = do_web_search(
                        query=user_input, search_engine=args.search_engine
                    )
                    # context = "\n".join(web_search_results)
                    # user_input = f"Use the following web search results as context to answer the question.\n\nContext:\n{context}\n\nQuestion: {user_input}"
                    search_results.extend(web_search_results)
                    context_sources.append("web search")
                except Exception as e:
                    console.print(f"[yellow]Warning: Web search failed: {e}[/yellow]")
            ### Web search and context addition ends here ###

            ### Document retrieval begins here ###
            if args.local_rag is not None:
                try:
                    console.print("[dim]Searching local documents...[/dim]")
                    hits, local_search_results = search_query(user_input, top_k=3)
                    # context = "\n".join(local_search_results)
                    # user_input = f"Use the following document search results as context to answer the question.\n\nContext:\n{context}\n\nQuestion: {user_input}"
                    search_results.extend(local_search_results)
                    context_sources.append("local RAG")
                except Exception as e:
                    console.print(f"[yellow]Warning: Document search failed: {e}[/yellow]")
            ### Document retrieval ends here ###

            # Update user input if search results are found.
            if len(search_results) > 0:
                context = "\n".join(search_results)
                user_input = f"Use the following search results as context to answer the question.\n\nContext:\n{context}\n\nQuestion: {user_input}"

            messages = append_to_chat_history('user', user_input, messages)

            try:
                stream = client.chat.completions.create(
                    model=args.model,
                    messages=messages,
                    stream=True
                )
            except APIError as e:
                console.print(f"[red]Error: API request failed: {e}[/red]")
                messages.pop()  # Remove the user message that failed
                continue

            current_response = ''
            buffer = ''
            console.print("[bold green]Assistant:[/bold green] ")
            with Live(
                Markdown(''),
                console=console,
                refresh_per_second=1,
                vertical_overflow='visible'
            ) as live:
                for event in stream:
                    stream_content = event.choices[0].delta.content
                    if stream_content is not None:
                        buffer += stream_content
                        live.update(Markdown(buffer))
                        current_response += stream_content

            messages = append_to_chat_history('assistant', current_response, messages)
            console.print()
            if context_sources:
                console.print(f"[dim](Sources: {', '.join(context_sources)})[/dim]")

        except KeyboardInterrupt:
            console.print("\n[yellow]Interrupted. Goodbye![/yellow]")
            break
        except Exception as e:
            console.print(f"[red]Error: {e}[/red]")
            continue

    return messages


def main():
    """Main entry point when running api_call.py directly."""
    run_chat_loop(client, args, messages, console)


if __name__ == '__main__':
    main()
The run_chat_loop function handles chat history by default. Furthermore, it calls the relevant RAG or web search functions if the command line arguments are provided.
As we are using the Rich console to render the output, we cannot exactly stream the output to the terminal in real time. Instead, the output is buffered and shown in chunks with a minimum delay of one second.
Gradio UI Script
The app.py file contains the code for the Gradio UI. We will not be going through the code here, as the core logic remains the same as above. However, there are some important pointers for the same.
- It uses a custom UI based on the terminal theme
- Although the core chat logic remains the same as in
api_call.py, for now, we have thechatfunction handles its own chat history and calls the RAG and web search functions.
Going further, we will make the entire repository more modular, such that either the terminal chat or Gradio chat will call the same functions while keeping the core logic separate from the UIs.
This is all the code that we have in this project for now. Please go through the codebase once to understand it better.
gpt-oss-chat UI and Inference Experiments
Before running either the terminal or the Gradio application, ensure that you are running the gpt-oss-20b model from the llama.cpp folder.
./build/bin/llama-server -hf ggml-org/gpt-oss-20b-GGUF
This enables the server and we can send the messages to the chat endpoint.
We can execute the following command to run the application in terminal mode with web search and local RAG.
python api_call.py --web-search --local-rag input/yolov1/1506.02640v5.pdf
If we pass the --local-rag flag, we need to provide a local PDF file path as well.
The following command is for running the Gradio application.
python app.py
The following are some screenshots from both the terminal and Gradio UI.
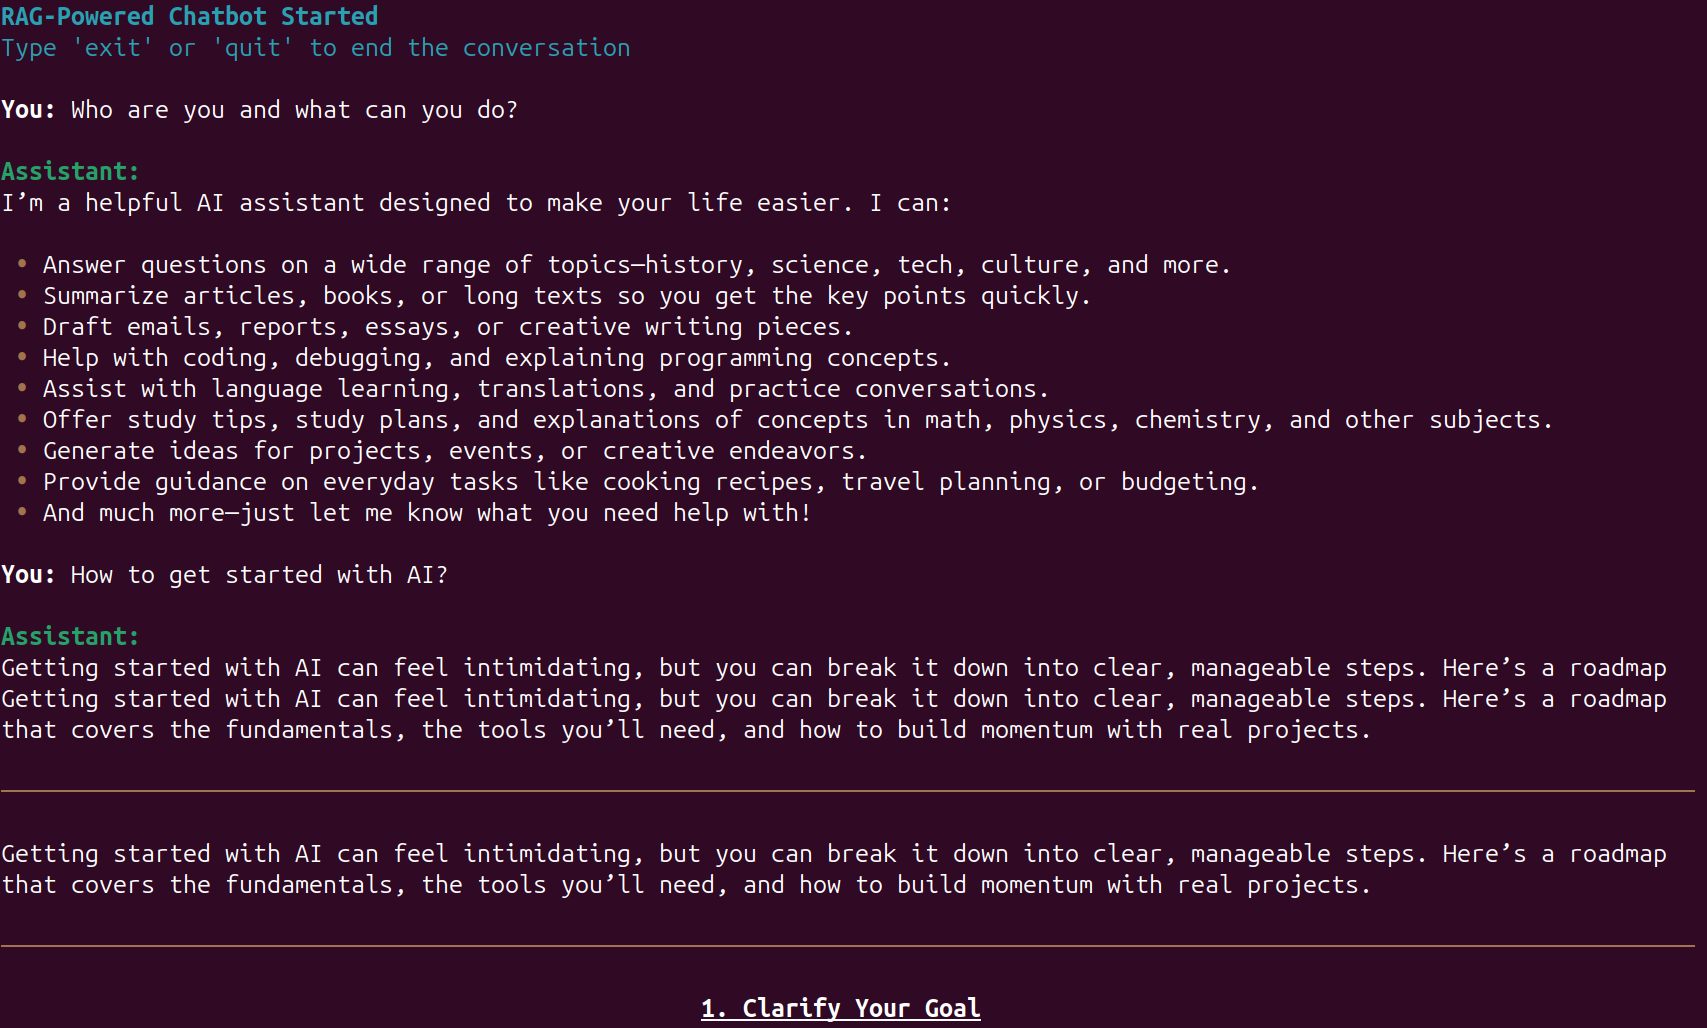
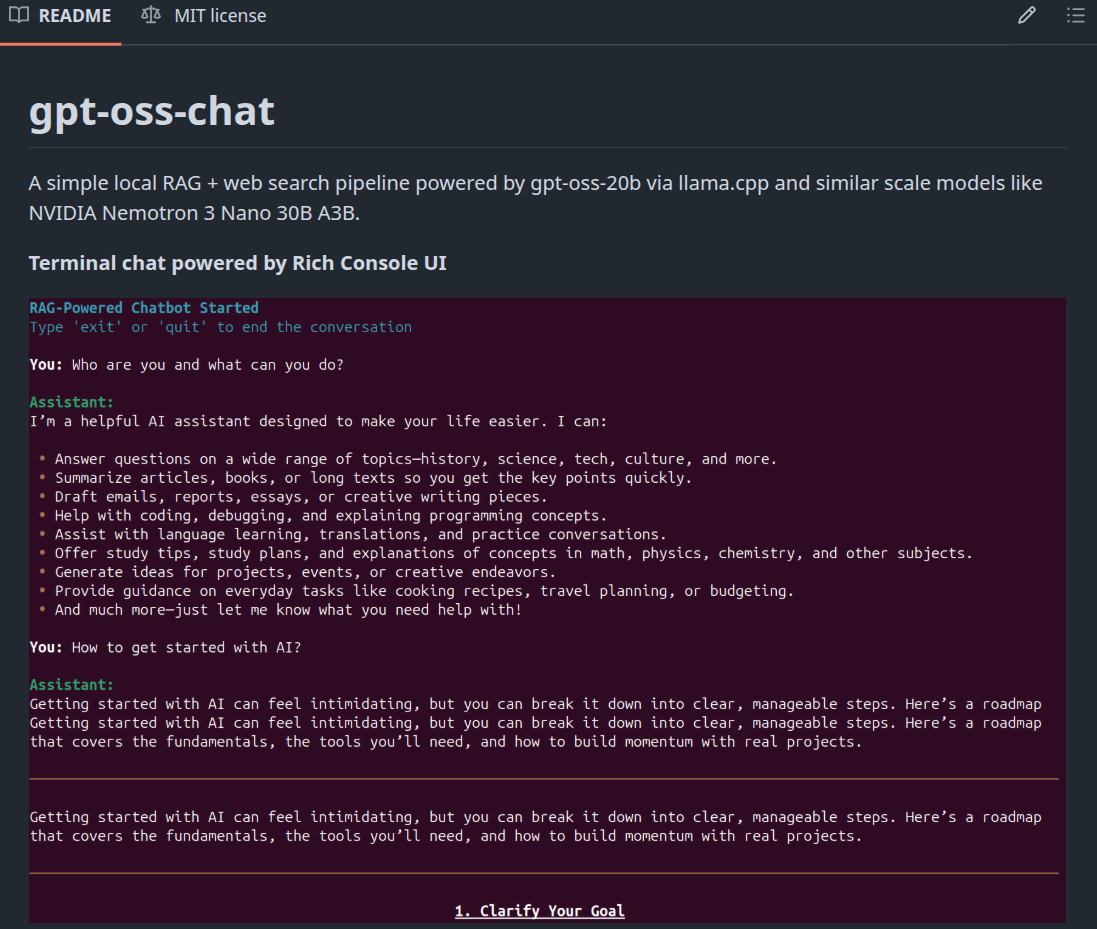
The above figure shows the interface for gpt-oss-chat in terminal mode. As we can see, using Rich console makes the UI more pleasant and readable.
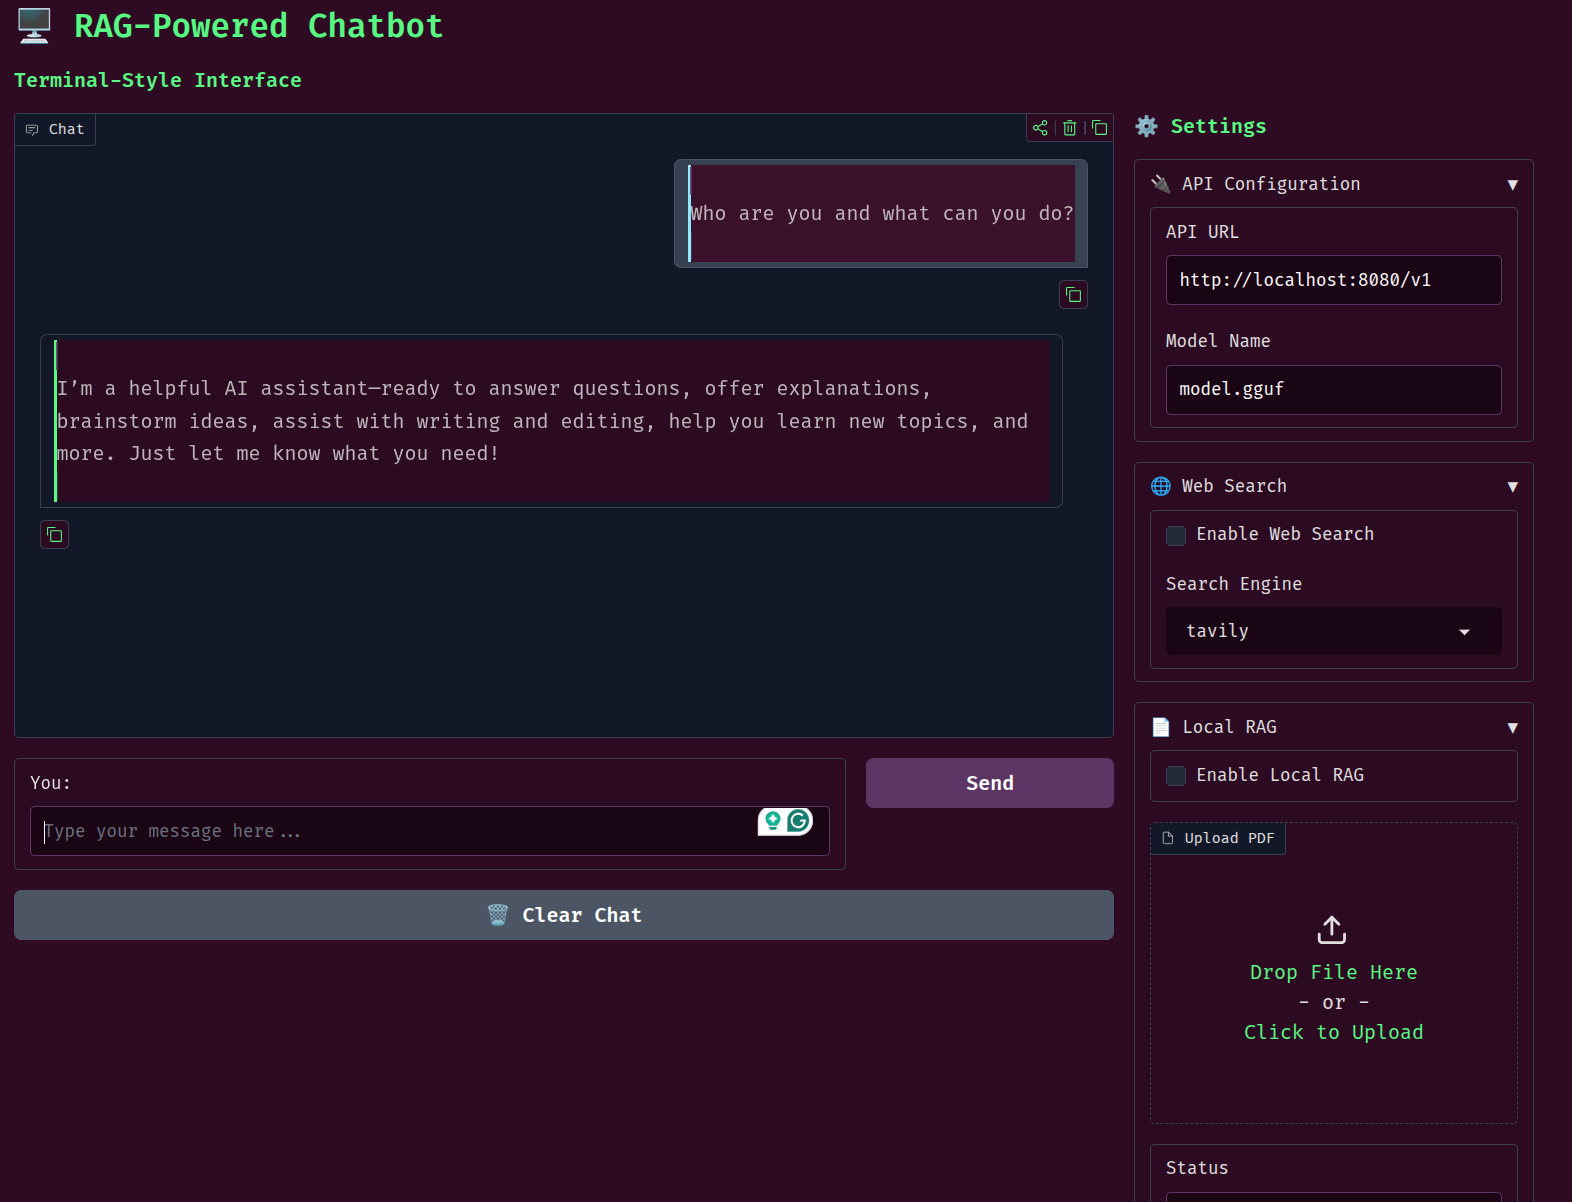
The Gradio UI also uses a terminal theme along with custom output and code blocks for rendering.
As this is an introductory article to gpt-oss-chat, we will not be evaluating the application’s output quality here. However, the following video shows the chat flow in terminal mode.
The above example uses a PDF for local RAG. After the indexing is complete, we show the information along with the number of chunks created, and the user can start chatting with the model.
The next video shows the workflow in Gradio UI mode.
This is slightly more user friendly. We can enable web search and local RAG on the fly, which makes the workflow smoother compared to the terminal UI.
Summary and Conclusion
In this article, we covered a small new project, gpt-oss-chat, a minimal chat application powered by gpt-oss, local RAG, and web search. Theoretically, we can serve any model via llama.cpp and use the application. So, you can play around with different models. We will cover more articles in the future with major updates to the project.
If you have any questions, thoughts, or suggestions, please leave them in the comment section. I will surely address them.
You can contact me using the Contact section. You can also find me on LinkedIn, and X.
