
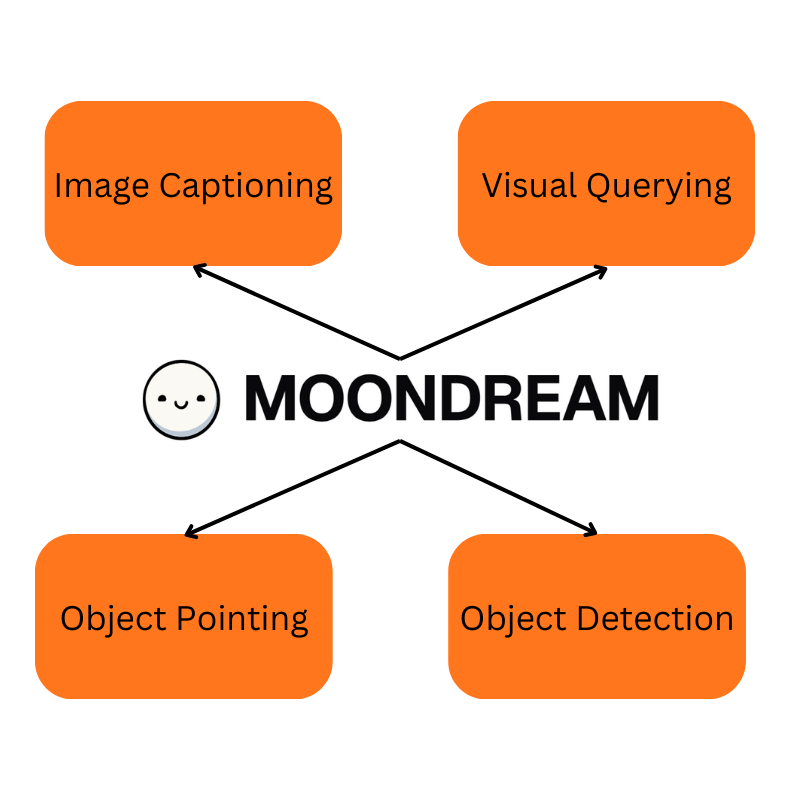
Vision Language Models (VLMs) are undoubtedly one of the most innovative components of Generative AI. With AI organizations pouring millions into building them, large proprietary architectures are all the hype. All this comes with a bigger caveat: VLMs (even the largest) models cannot do all the tasks that a standard vision model can do. These include pointing and detection. With all this said, Moondream (Moondream2), a sub 2B parameter model, can do four tasks – image captioning, visual querying, pointing to objects, and object detection.
This might seem like a small feat. However, given that the model is exactly 1.93B parameters with a Phi 1.5 decoder and SigLIP vision encoder, this is impressive. Moreover, even the free version of ChatGPT cannot detect objects at the time of writing this article.
What will we cover using Moondream?
- What is Moondream, who created it, and what can we do using it?
- Covering all the Moondream tasks:
- Image captioning and visual querying.
- Pointing to objects in images and videos using Moondream.
- Detecting objects in images and videos using Moondream.
What is Moondream?
Moondream is a Small Vision Language Model (SVLM). Created by the user Vik Korrapati on Hugging Face, it is primarily meant for edge devices.
Moondream has two versions, version 1 and version 2. We will use the Moondream2 model in this article which is referred to as Moondream from here on for simplicity.
It is extremely accurate and uses just around 5.2GB of VRAM to load in FP16. We can easily load it using Hugging Face Transformers using the following syntax:
from transformers import AutoModelForCausalLM, AutoTokenizer

model = AutoModelForCausalLM.from_pretrained(
    "vikhyatk/moondream2",
    revision="2025-01-09",
    trust_remote_code=True,
    device_map={"": "cuda"}
)
It is a great rival to the Molmo VLM whose smallest model is 7B parameters and cannot perform object detection yet.
What Tasks Can We Perform Using MoonDream?
We can carry out image captioning, visual querying, pointing to objects, and object detection using Moondream.
Following is an example syntax showing each of the tasks in code:
# Captioning
print("Short caption:")
print(model.caption(image, length="short")["caption"])

print("\nNormal caption:")
for t in model.caption(image, length="normal", stream=True)["caption"]:
    # Streaming generation example, supported for caption() and detect()
    print(t, end="", flush=True)
print(model.caption(image, length="normal"))

# Visual Querying
print("\nVisual query: 'How many people are in the image?'")
print(model.query(image, "How many people are in the image?")["answer"])

# Object Detection
print("\nObject detection: 'face'")
objects = model.detect(image, "face")["objects"]
print(f"Found {len(objects)} face(s)")

# Pointing
print("\nPointing: 'person'")
points = model.point(image, "person")["points"]
print(f"Found {len(points)} person(s)")
For each task we either use the caption, query, point, or detect methods respectively. Further in the article, we will cover these tasks in more detail with complete examples.
Directory Structure
Let’s take a look at the directory structure.
├── input
│   ├── giraffes.jpg
│   ├── people.jpg
│   └── video_1.mp4
├── moondream_caption.py
├── moondream_object_detection.py
├── moondream_object_detection_video.py
├── moondream_pointing.py
├── moondream_pointing_video.py
├── moondream_visual_query.py
├── outputs
├── README.md
├── requirements.txt
└── tree.txt
- The
inputdirectory contains the images and videos that we will run inference on. - The
outputsdirectory contains the inference results. - We have six Python scripts for running inference using various tasks on images and videos.
You can download all the code and requirements files from the download section.
Download Code
Installing Requirements
Along with the Hugging Face transformers library, we also need specific versions of pyvips and pyvips-binary for image processing. We can install these using the requirements file.
pip install -r requirements.txt
With this, we are done with the initial discussion and the setup. Let’s jump into the coding part now.
Moondream for Image Captioning, Visual Querying, Object Pointing, and Object Detection
Starting from this section, we will tackle each task Moondream can perform.
Along the way, we will also discover, how easy it is to carry out each task that makes using the Moondream model a breeze.
While covering the image-specific inference runs, we will use the following image throughout.
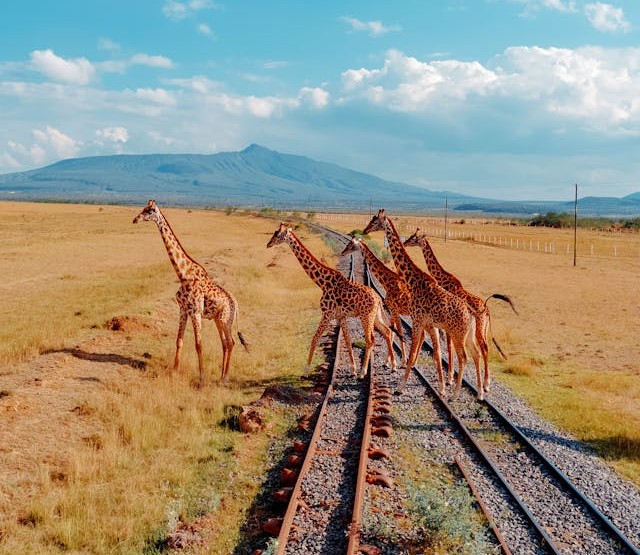
Image Captioning using Moondream
We will start with image captioning.
The code for image captioning is present in the moondream_caption.py file.
Let’s start with importing the modules and loading the model.
from transformers import AutoModelForCausalLM
from PIL import Image

model = AutoModelForCausalLM.from_pretrained(
    'vikhyatk/moondream2',
    revision='2025-01-09',
    trust_remote_code=True,
    device_map={'': 'cuda'}
)
We will use the revision of the model as provided in the official Hugging Face repository.
To generate captions for images, we simply need to read the image using PIL and pass it through the caption method of the model.
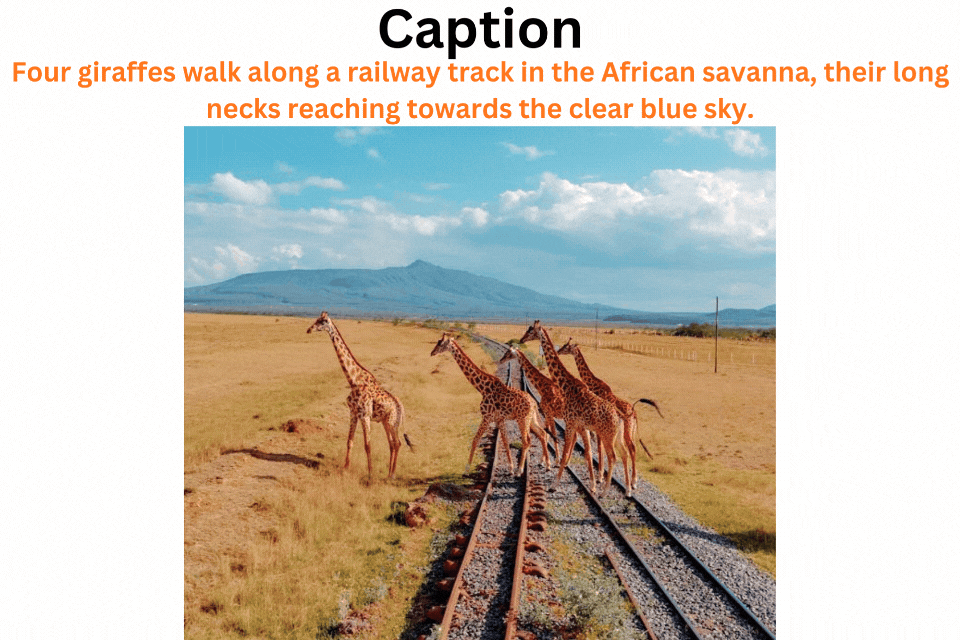
image = Image.open('input/giraffes.jpg')

# Normal caption.
print('NORMAL CAPTION:\n')
for t in model.caption(image, length='normal', stream=True)['caption']:
    print(t, end='', flush=True)
print('\n')

# Short Captioning
print('SHORT CAPTION:\n')
for t in model.caption(image, length='short', stream=True)['caption']:
    print(t, end='', flush=True)
print('\n')
Moondream supports generating two types of captions: short and normal. The former generates concise captions, almost like an alternate tag for an image. The latter generates a more detailed caption, just like we may need for any website’s figure captions. The results are stored in the 'caption' key of the output dictionary.
Additionally, for image captioning, the model supports text streaming, which we are using above.
python moondream_caption.py
Following are the results that we get for the image.
NORMAL CAPTION:

 In a dry savanna landscape, a group of at least five giraffes with distinctive brown and white coats are walking along a railway track. The giraffes are moving towards the right side of the image, their long necks reaching towards the clear blue sky dotted with fluffy white clouds. The railway track, composed of rusty metal rails, cuts through the landscape, disappearing into the distance. The savanna is a light tan or beige color, with sparse vegetation. In the distance, a mountain range stretches across the horizon, its peaks partially obscured by the clouds. A small section of a fence or barrier is also visible along the right edge of the railway track.

SHORT CAPTION:

 Four giraffes walk along a railway track in the African savanna, their long necks reaching towards the clear blue sky.
The descriptions seem good, however, there are a few nuances that catch our eye. In both captions, the count of the giraffes differs. The normal caption mentions five giraffes which is correct while the short caption mentions four giraffes. Furthermore, the model describes that the giraffes are moving toward the right while they are moving toward the left from the perspective of the viewer.
These subtle details will probably be addressed in future versions of the Moondream.
Visual Querying Using Moondream
Visual Querying refers to asking nuanced questions about an image. Moondream supports the query method for this task.
The code for visual querying is present in the moondream_visual_query.py script.
from transformers import AutoModelForCausalLM
from PIL import Image

model = AutoModelForCausalLM.from_pretrained(
    'vikhyatk/moondream2',
    revision='2025-01-09',
    trust_remote_code=True,
    device_map={'': 'cuda'}
)

image = Image.open('input/giraffes.jpg')

query = 'How many giraffes are there in the image?'

print(query)
print(model.query(image, query)['answer'])
We invoke the query method of the model asking about the number of giraffes in the image. The final answer is present in the 'answer' key of the output dictionary.
python moondream_visual_query.py
We get the following answer as output.
There are five giraffes in the image.
The model answers the question correctly. Of course, exploring more images will provide us with more information regarding its strengths and limitations, however, here we will cover all the tasks that it can perform.
Object Pointing using Moondream
In object pointing, the Moondream model points to an object with a single (x, y) coordinate pair. If there are multiple objects of similar kind, it will point to all the objects it can perceive.
Object Pointing in Images
Let’s start with pointing in images. The code for this is present in the moondream_pointing.py file.
Starting with the imports, argument parser to pass input images, create an output directory, and load the model.
from transformers import AutoModelForCausalLM
from PIL import Image

import cv2
import numpy as np
import argparse
import os

parser = argparse.ArgumentParser()
parser.add_argument(
    '--input',
    help='path to the input image'
)
args = parser.parse_args()

out_dir = 'outputs'
os.makedirs(out_dir, exist_ok=True)

model = AutoModelForCausalLM.from_pretrained(
    'vikhyatk/moondream2',
    revision='2025-01-09',
    trust_remote_code=True,
    device_map={'': 'cuda'}
)
Next, we read the input image using PIL and pass it through the model.
image = Image.open(args.input)

pointing = 'giraffes'
print(f"Pointing to: {pointing}")
points = model.point(image, pointing)['points']
print(points)

image_array = cv2.cvtColor(np.array(image), cv2.COLOR_RGB2BGR)
We call the point method of the model with a string name indicating the objects that we want to point to. We are trying to get the coordinates of giraffes in the images.
The output from the 'point' key of the dictionary is in the following format.
[{'x': 0.30078125, 'y': 0.5}, {'x': 0.4951171875, 'y': 0.50390625},
{'x': 0.595703125, 'y': 0.5}, {'x': 0.654296875, 'y': 0.505859375},
{'x': 0.689453125, 'y': 0.4970703125}]
We have five pairs of (x, y) coordinates for the five giraffes normalized according to the image size. We need to denormalize them and annotate on the original image for better visualization/
image_array = cv2.cvtColor(np.array(image), cv2.COLOR_RGB2BGR)

for point in points:
    h, w = image_array.shape[:2]
    x = point['x']*w
    y = point['y']*h

    # Create a small blue circle.
    cv2.circle(
        image_array,
        center=(int(x), int(y)),
        radius=2,
        color=(255, 0, 0),
        thickness=-1,
        lineType=cv2.LINE_AA
    )
    # Create a larger white circle.
    cv2.circle(
        image_array,
        center=(int(x), int(y)),
        radius=4,
        color=(255, 255, 255),
        thickness=2,
        lineType=cv2.LINE_AA
    )
    # Create a larger red circle.
    cv2.circle(
        image_array,
        center=(int(x), int(y)),
        radius=6,
        color=(0, 0, 255),
        thickness=2,
        lineType=cv2.LINE_AA
    )

file_name = args.input.split(os.path.sep)[-1]
cv2.imwrite(os.path.join(out_dir, 'pointing_'+file_name), image_array)

cv2.imshow('Image', image_array)
cv2.waitKey(0)
For each coordinate pair, we annotate with three circles (completely cosmetic reasons) for better visualization. We then save the results to disk and visualize on screen.
We can execute the script with the following command.
python moondream_pointing.py --input input/giraffes.jpg
We get the following output.

The model is able to point to the giraffes successfully.
Object Pointing in Videos
We can also point to objects in videos. The process is very similar to that of images. Instead of a single image, we loop through all the frames of the video.
The following code is present in the moondream_pointing_video.py file.
from transformers import AutoModelForCausalLM
from PIL import Image

import cv2
import time
import argparse
import os

parser = argparse.ArgumentParser()
parser.add_argument(
    '--input',
    help='path to the input video'
)
args = parser.parse_args()

out_dir = 'outputs'
os.makedirs(out_dir, exist_ok=True)

model = AutoModelForCausalLM.from_pretrained(
    'vikhyatk/moondream2',
    revision='2025-01-09',
    trust_remote_code=True,
    device_map={'': 'cuda'}
)

cap = cv2.VideoCapture(args.input)

frame_width = int(cap.get(3))
frame_height = int(cap.get(4))

save_name = args.input.split(os.path.sep)[-1]
# Define codec and create VideoWriter object.
out = cv2.VideoWriter(f"{out_dir}/pointing_{save_name}",
                    cv2.VideoWriter_fourcc(*'mp4v'), 30,
                    (frame_width, frame_height))

pointing = 'giraffes'

frame_count = 0 # To count total frames.
total_fps = 0 # To get the final frames per second.

while cap.isOpened():
    ret, frame = cap.read()

    if ret:
        frame_pil = Image.fromarray(frame).convert('RGB')

        print(f"Pointing to: {pointing}")
        start_time = time.time()

        points = model.point(frame_pil, pointing)['points']

        end_time = time.time()

        fps = 1 / (end_time - start_time)
        total_fps += fps
        frame_count += 1

        for point in points:
            h, w = frame.shape[:2]
            x = point['x']*w
            y = point['y']*h

            # Create a small blue circle.
            cv2.circle(
                frame,
                center=(int(x), int(y)),
                radius=2,
                color=(255, 0, 0),
                thickness=-1,
                lineType=cv2.LINE_AA
            )
            # Create a larger white circle.
            cv2.circle(
                frame,
                center=(int(x), int(y)),
                radius=4,
                color=(255, 255, 255),
                thickness=2,
                lineType=cv2.LINE_AA
            )
            # Create a larger red circle.
            cv2.circle(
                frame,
                center=(int(x), int(y)),
                radius=6,
                color=(0, 0, 255),
                thickness=2,
                lineType=cv2.LINE_AA
            )

        out.write(frame)

        cv2.imshow('Image [Press Q to exit]', frame)
        # Press `q` to exit
        if cv2.waitKey(1) & 0xFF == ord('q'):
            break
    else:
        break

# Release VideoCapture().
cap.release()
# Close all frames and video windows.
cv2.destroyAllWindows()

# Calculate and print the average FPS.
avg_fps = total_fps / frame_count
print(f"Average FPS: {avg_fps:.3f}")
We pass a video path through the argument parser and extract the width and height for saving it to disk later. One thing to note is that we need to pass the object string that we want to point to for each frame (lines 48 to 53).
Let’s execute the script.
python moondream_pointing_video.py --input input/video_1.mp4
We have the following video output.
It runs with an average of 4.8 FPS on an RTX 3080 GPU. Of course, this is not real-time. However, we can expect such models to get better and faster from here on.
The model is able to point to the giraffes in almost all the frames. The giraffe at the back loses its point when it gets occluded later on. Can we use point tracking to solve this and make the pointing process more stable?
Object Detection in Moondream
The process of object detection in Moondream is very similar to that of pointing. We call the detect method of the model here.
Object Detection in Images
Starting with image object detection whose code is present in moondream_object_detection.py file.
from transformers import AutoModelForCausalLM
from PIL import Image

import cv2
import numpy as np
import argparse
import os

parser = argparse.ArgumentParser()
parser.add_argument(
    '--input',
    help='path to the input image'
)
args = parser.parse_args()

out_dir = 'outputs'
os.makedirs(out_dir, exist_ok=True)

model = AutoModelForCausalLM.from_pretrained(
    'vikhyatk/moondream2',
    revision='2025-01-09',
    trust_remote_code=True,
    device_map={'': 'cuda'}
)

image = Image.open('input/giraffes.jpg')

detecting = 'giraffes'
print(f"Object detection: {detecting}")
objects = model.detect(image, detecting)['objects']
print(objects)

image_array = cv2.cvtColor(np.array(image), cv2.COLOR_RGB2BGR)

for object in objects:
    h, w = image_array.shape[:2]
    xmin = object['x_min']*w
    ymin = object['y_min']*h
    xmax = object['x_max']*w
    ymax = object['y_max']*h

    cv2.rectangle(
        image_array,
        pt1=(int(xmin), int(ymin)),
        pt2=(int(xmax), int(ymax)),
        color=(0, 0, 255),
        thickness=4,
        lineType=cv2.LINE_AA
    )
    cv2.rectangle(
        image_array,
        pt1=(int(xmin), int(ymin)),
        pt2=(int(xmax), int(ymax)),
        color=(255, 255, 255),
        thickness=1,
        lineType=cv2.LINE_AA
    )

file_name = args.input.split(os.path.sep)[-1]
cv2.imwrite(os.path.join(out_dir, 'detection_'+file_name), image_array)

cv2.imshow('Image', image_array)
cv2.waitKey(0)
The only parts that change are the method calling and how we visualize the results. Insread of (x, y) coordinate pairs, here, the model returns (xmin, ymin, xmax, ymax) for each object in image dimension normalized format.
[{'x_min': 0.2080078125, 'y_min': 0.349609375, 'x_max': 0.3720703125, 'y_max': 0.6875},
 {'x_min': 0.57421875, 'y_min': 0.3955078125, 'x_max': 0.728515625, 'y_max': 0.6787109375},
 {'x_min': 0.546875, 'y_min': 0.4013671875, 'x_max': 0.701171875, 'y_max': 0.6689453125},
 {'x_min': 0.4306640625, 'y_min': 0.40625, 'x_max': 0.5927734375, 'y_max': 0.673828125},
{'x_min': 0.666015625, 'y_min': 0.43408203125, 'x_max': 0.78125, 'y_max': 0.69677734375}]
Let’s execute the script and visualize the results.
python moondream_object_detection.py --input input/giraffes.jpg
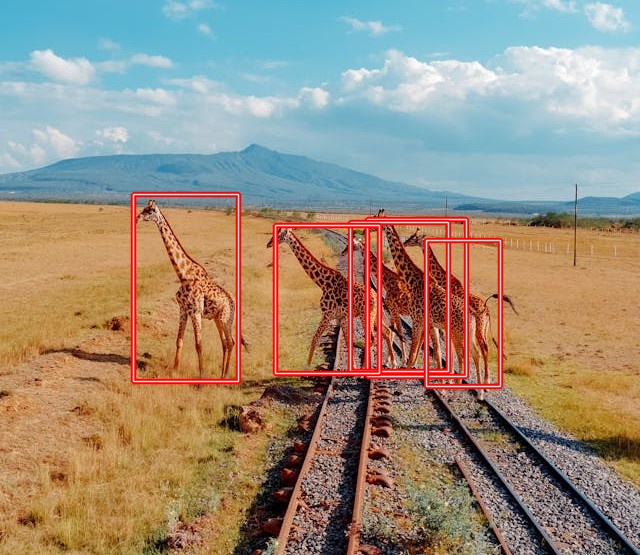
The model is successful in detecting all the giraffes in this case.
Object Detection in Videos
Similarly, we can detect objects in videos. The following code is present in moondream_object_detection_video.py file.
from transformers import AutoModelForCausalLM
from PIL import Image

import cv2
import os
import time
import argparse
import os

parser = argparse.ArgumentParser()
parser.add_argument(
    '--input',
    help='path to the input video'
)
args = parser.parse_args()

out_dir = 'outputs'
os.makedirs(out_dir, exist_ok=True)

model = AutoModelForCausalLM.from_pretrained(
    'vikhyatk/moondream2',
    revision='2025-01-09',
    trust_remote_code=True,
    device_map={'': 'cuda'},
)

cap = cv2.VideoCapture('input/video_1.mp4')

frame_width = int(cap.get(3))
frame_height = int(cap.get(4))

save_name = args.input.split(os.path.sep)[-1]
# Define codec and create VideoWriter object.
out = cv2.VideoWriter(f"{out_dir}/detection_{save_name}",
                    cv2.VideoWriter_fourcc(*'mp4v'), 30,
                    (frame_width, frame_height))

detecting = 'giraffe'

frame_count = 0 # To count total frames.
total_fps = 0 # To get the final frames per second.

while cap.isOpened():
    ret, frame = cap.read()

    if ret:
        frame_pil = Image.fromarray(frame).convert('RGB')

        print(f"Object detection: {detecting}")
        start_time = time.time()

        objects = model.detect(frame_pil, detecting)['objects']

        end_time = time.time()

        fps = 1 / (end_time - start_time)
        total_fps += fps
        frame_count += 1

        for object in objects:
            h, w = frame.shape[:2]
            xmin = object['x_min']*w
            ymin = object['y_min']*h
            xmax = object['x_max']*w
            ymax = object['y_max']*h

            cv2.rectangle(
                frame,
                pt1=(int(xmin), int(ymin)),
                pt2=(int(xmax), int(ymax)),
                color=(0, 0, 255),
                thickness=4,
                lineType=cv2.LINE_AA
            )
            cv2.rectangle(
                frame,
                pt1=(int(xmin), int(ymin)),
                pt2=(int(xmax), int(ymax)),
                color=(255, 255, 255),
                thickness=1,
                lineType=cv2.LINE_AA
            )

        out.write(frame)

        cv2.imshow('Image [Press Q to exit]', frame)
        # Press `q` to exit
        if cv2.waitKey(1) & 0xFF == ord('q'):
            break
    else:
        break

# Release VideoCapture().
cap.release()
# Close all frames and video windows.
cv2.destroyAllWindows()

# Calculate and print the average FPS.
avg_fps = total_fps / frame_count
print(f"Average FPS: {avg_fps:.3f}")
Let’s execute the script.
python moondream_object_detection_video.py --input input/video_1.mp4
As we can see, the model can detect the giraffes, still, we have the same occlusion issue that we had in the case of pointing. The average FPS for video inference using Moondream detection was 4.1 FPS.
Summary and Conclusion
In this article, we covered inference and several tasks using Moondream. We started with a short discussion about the model, then covered all the tasks including caption, visual query, pointing, and detection. In future articles, we will dive deeper into these while trying to address some of the issues that we discussed. I hope this article was worth your time.
If you have anu questions, thoughts, or suggestions, please leave them in the comment section. I will surely address them.
You can contact me using the Contact section. You can also find me on LinkedIn, and X.

1 thought on “Moondream – One Model for Captioning, Pointing, and Detection”